
The art of cinemagraphs is currently being rediscovered as a popular medium for advertisers. The animated pictures create a stunning WOW effect for little money. They bring photos to life by incorporating moving elements. In this article you will learn how to get photos in motion and which advertising channels are ideal to share cinemagraphs.
Is the classic GIF dead? One thing is for sure: Some trends cycle back into fashion again and again. This is why we have devoted this article to a very special kind of moving picture. Cinemagraphs have been making a name for themselves for some time and seem to be coming back as a trend. They combine still photos with looping moving elements to create a dynamic effect. Cinemagraphs are a hybrid of photo and video that WOW viewers, making them ideal for advertising purposes.
Content:
- For your marketing: professional advertising with moving pictures
- Create your own moving pictures: Tool check
Cinemagraph vs. GIF
In cinemagraphs, only specific elements of a photo are moving, the rest remains still. They are perceived more as “living pictures” and less as videos. Compared to GIFs, cinemagraphs have a lot more colours and create a more vivid impression.
The moving pictures contain a surprise element. Take the photo of a woman soaking up the sun in the pool below. The scene appears still, but suddenly you notice an isolated subtle movement.
Produced to advertise well-known brands already in 2011, moving pictures such as cinemagraphs are not a new trend. The cinemagraphs made by creative artists Jamie Beck and Kevin Burg for the New York Fashion Week back in 2009 are one such example. They have a lot of potential to create more inspiring websites or internet ads without producing expensive videos.
Professional uses of moving pictures
The tool presentation below explains how to make moving pictures and details the technical background. But one thing is certain, cinemagraphs are cheaper and easier to produce than videos and the subtly animated photos have a hypnotic effect on the observer. Moreover, cinemagraphs have a much smaller file size than videos which results in faster autoplay performance on many websites or blogs. And this is important since the mesmerising effect of cinemagraphs works best when auto-played without delay in a seamless loop.
Note: Although we are talking about moving pictures, cinemagraphs are actually video files in most cases. In order to play the animated photo in an endless loop, it might seem a good idea to save the video format as a GIF file since this format automatically repeats the sequence over and over again.
But be cautious: An MP4 file is capable of reproducing innumerable colours, whereas a GIF is limited to 256 colours and this quality loss is often quite obvious. For this reason, you should avoid converting the file to GIF when embedding the cinemagraph in your website or blog and incorporate the loop function using the embed code instead.

Websites and blogs
Moving pictures are a great way to immediately grab a website visitor’s attention without creating sensory overload. Cinemagraphs also make more attractive product presentations that can be tailored to the industry and the product. This advantage can also be harnessed to visually upgrade blogs. But bear in mind that less is more when creating cinemagraphs. To achieve that WOW effect you are aiming for, it is important not to overdo it.
Examples of product presentations:
Source : flixel.com/cinemagraphs/advertising – CinePix
Source : flixel.com/cinemagraphs/advertising – CinePix
Technical embedding: The moving picture can be embedded using the HTML video element. The properties for “Autoplay” and “Loop” should be included in the code and you should test the compatibility with different browsers. Embedding the cinemagraph in WordPress is also possible without difficulty. The best idea is to upload the moving picture to YouTube or other platforms such as flixel.com (a website that has specialised in the production and distribution of cinemagraphs) and then embed it on your website. The latter platform offers ready-made embed codes you can copy and paste to autoplay and loop the video.
Sample code to embed a moving picture as an HTML element:
<video width="320" height="240" autoplay loop>
<source src="movie.mp4" type="video/mp4">
<source src="movie.ogg" type="video/ogg">
Your browser does not support the video tag.
</video>
Sample code to embed a moving picture from the Media Gallery (of WordPress):
[ video width="1200" height="800"
mp4="https://www.onlineprinters.co.uk/magazine/wp-content/uploads/2018/09/Test_Wasser
-1200px-25fps-2.mp4" loop="on" autoplay="on" ] [ /video ]
(Note: Please delete the blanks before and after the parentheses before using this code.)
Sample code to embed a moving picture on YouTube:
<iframe class="embed-responsive-item"id="ytplayer" type="text/html" width="640" height="360" src="https://www.youtube.com/embed/DWamwL9e3EY?&autoplay=1&loop=1&rel=0&showinfo=0&color=white&iv_load_policy=3&playlist=DWamwL9e3EY" frameborder="0" allowfullscreen></iframe>
Sample code to embed a moving picture on Flixel:
<div class="flx-embed"><div style="position:relative; height:0; padding-bottom:56.25%; width:100%"><iframe style="position:absolute; top:0; left:0; width:100%; height:100%;" src="https://media.flixel.com/cinemagraph/tpaqkloxud1mvjq08bfh?hd=false" frameborder="0" allowfullscreen allow='autoplay'></iframe></div></div>
Social media content, display or canvas advertising
Moving content is interesting. This is true for content posted on all social media channels. Moving pictures are great both for display and canvas advertising on Facebook or Instagram and to highlight interesting strategic content. These pictures have an advantage over videos: They create a more subtle effect and because there is less movement to catch the eye, cinemagraphs capture a moment in time which captivates the viewer. Moreover, they should feel authentic and tell better stories that entertain millions of users on social media sites.
View this post on Instagram
Technical embedding: The autoplay function of Facebook, Instagram and similar sites launches videos or animated pictures without having to click on the photo. Even profile pictures or ads can now include cinemagraphs on Facebook. Cinemagraphs can also be played on newer mobile devices. But make sure that your moving picture is looped to highlight the moving effect of the subject. If the animated picture appears for a few seconds only, the effect on the viewer will be lost.
Newsletters
Moving pictures also create more inspiring newsletters. The streaming service Netflix, for instance, incorporated a cinemagraph in their newsletter for the start of the third season of “House of Cards”. This makes it more likely that readers of the newsletter will remember the start of the new season and click the trailer.
Source : blog.flixel.com
Technical embedding: If you want to embed the picture in a newsletter, it can make sense to convert it to GIF format out of practicality to keep the file size small. You can integrate the GIF in the usual way using the embed code of pictures and the small file size would prevent slow loading of newsletter content. But make sure that the quality doesn’t suffer too much and that the animated picture still creates a high-quality impact.
Sample code to embed a moving picture in a newsletter (saved as GIF):
<img src=“XXXXX.gif“ width=“600“ height=“340“ alt=“xx“ border=“0“ hspace=“0“ vspace=“0“>
If you embed the cinemagraph as a video with much more colours and a larger file size, it is imperative to test first whether the animated photo affects the performance of the content when opening the newsletter – both of the desktop and mobile version.
Create your own moving pictures: Tool check
To bring a picture to life, you need a good eye and a constant internet connection depending on the tool. Some tools even allow users to edit the cinemagraphs online. Depending on which tool you use, you need a photo or video to start from.
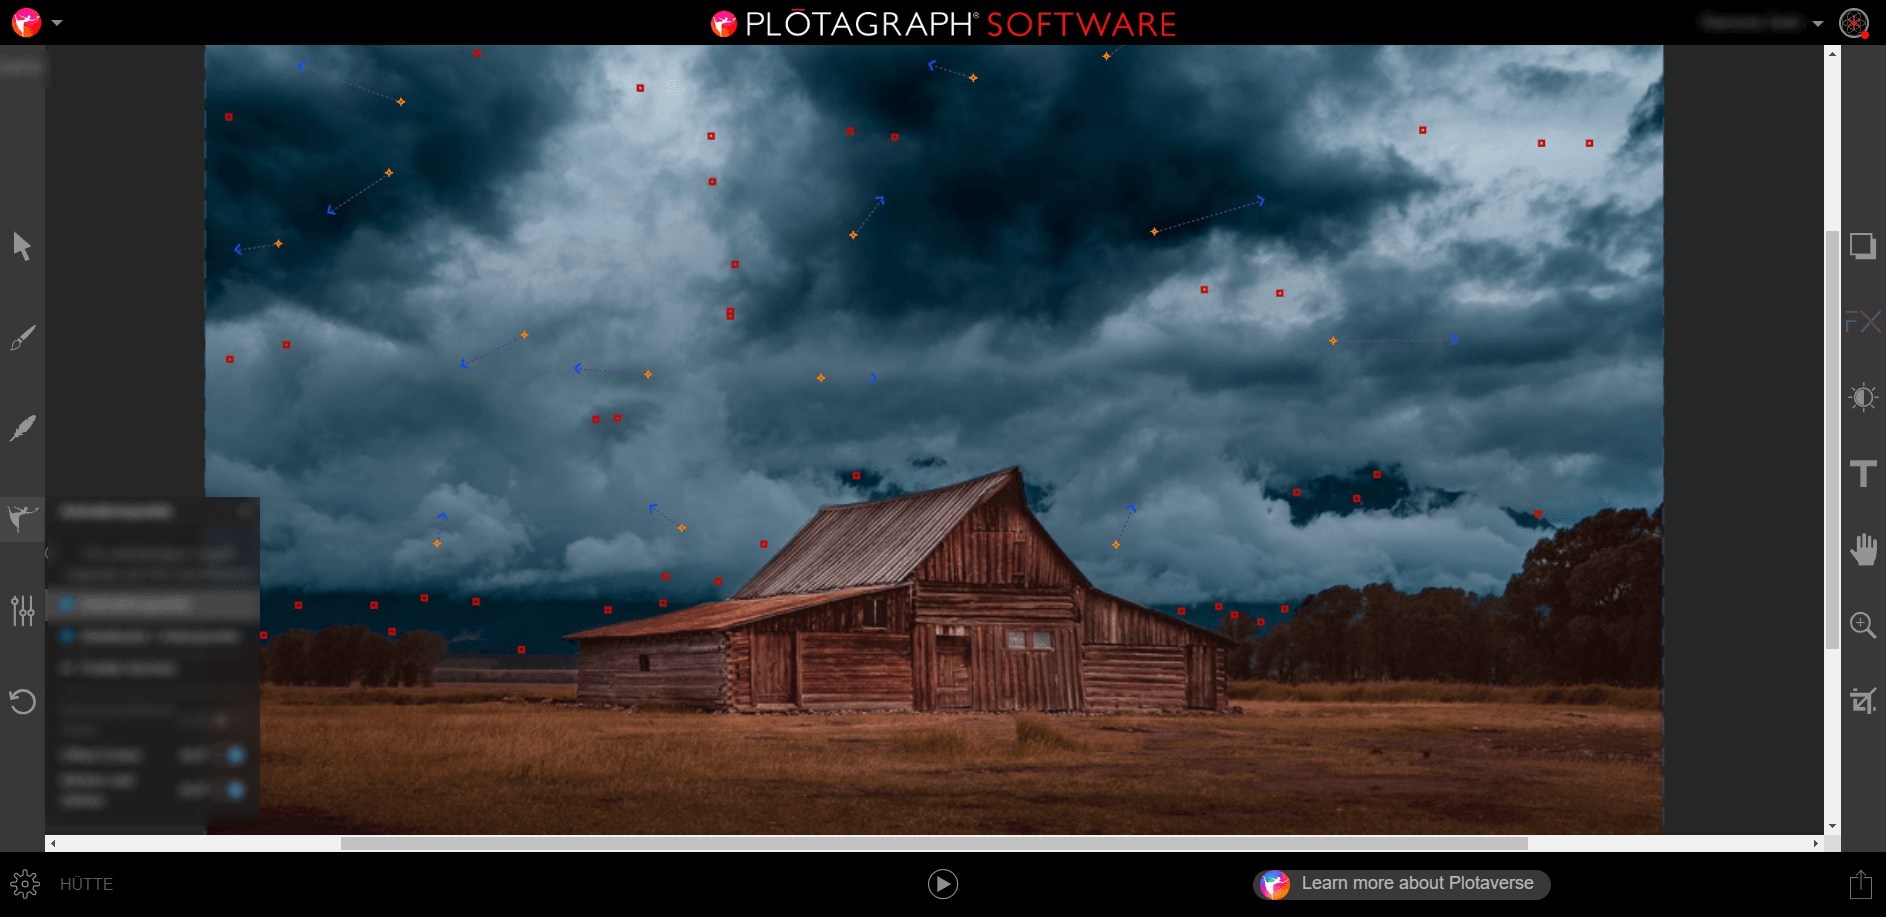
Plotagraph
Unlike other services, this provider enables you to create a moving picture based on an image file. You can also edit pictures online here. To use Plotagraph, or more exactly Plotaverse, you can register for free and create a first impression of the tool. Animating an image is done very quickly here and does not require a lot to be produced in advance. All you have to do is take a suitable photo and upload it. The brush function in the editor enables you to define which areas will stay still.

Drag animation points (orange and blue arrows) to specify in which direction you want the picture to move. Use the stabilising anchor points to outline anything you don’t want to move. In the example, anchor points were added to the cloudy sky to create differentiated movement of the clouds.
The tool automatically calculates the movement of the pixels. Additionally, you can adjust the time of the automatically calculated movement. The shorter the duration of the animated picture, the faster the defined image points will move. Lastly, export the project. If you do not use the paid Pro version, you will get an MP4 file which contains a watermark. The paid version provides the formats MOV, JPEG seg, PNG seq, animated PNG and GIF.
Hit the play button at the bottom of the screen at any time to instantly see what your animation looks like. This allows you to experiment a bit to fine-tune the animation until it is just right.
Conclusion: The online application offers high performance also on the smartphone. If you decide to purchase the Pro version, it can make sense to download the desktop version. But the tool sometimes fails to create naturally moving pictures, because it is not possible to adjust the exact movement of the individual image points.
For example, it is difficult to animate elements such as sunrays in the foreground with the background, e.g., a mountain range, staying still. Plotagraph is a good choice for images where the movement in the foreground and background are clearly separated (such as the sea and sky). All you need is a photo to transform it into a gorgeous animation. Flowing elements like clouds, the sea or graphics are ideal for this tool.
Flixel
The program Cinemapraph Pro by Flixel has specialised in the making of cinemagraphs. It also offers a free trial option. Unlike Plotagraph, Flixel works with video material. This means that the animations in the picture appear much more natural, because they are real movements. But first you have to film the video according to certain criteria.
To create a cinemagraph, you have to shoot the video using a digital camera on a tripod. This creates stable video footage where only the desired elements are moving. There are no limits to your creativity when it comes to deciding which content will be animated in the final result. Before shooting the video, you should already have an idea of what to implement in the cinemagraph. You have to instruct the models accordingly or position the camera in a suitable environment for this purpose.
The Flixel tutorial for beginners uses the scene of two people drinking tea to demonstrate the procedure with the man on the left drinking from his cup and the woman on the right pouring tea.
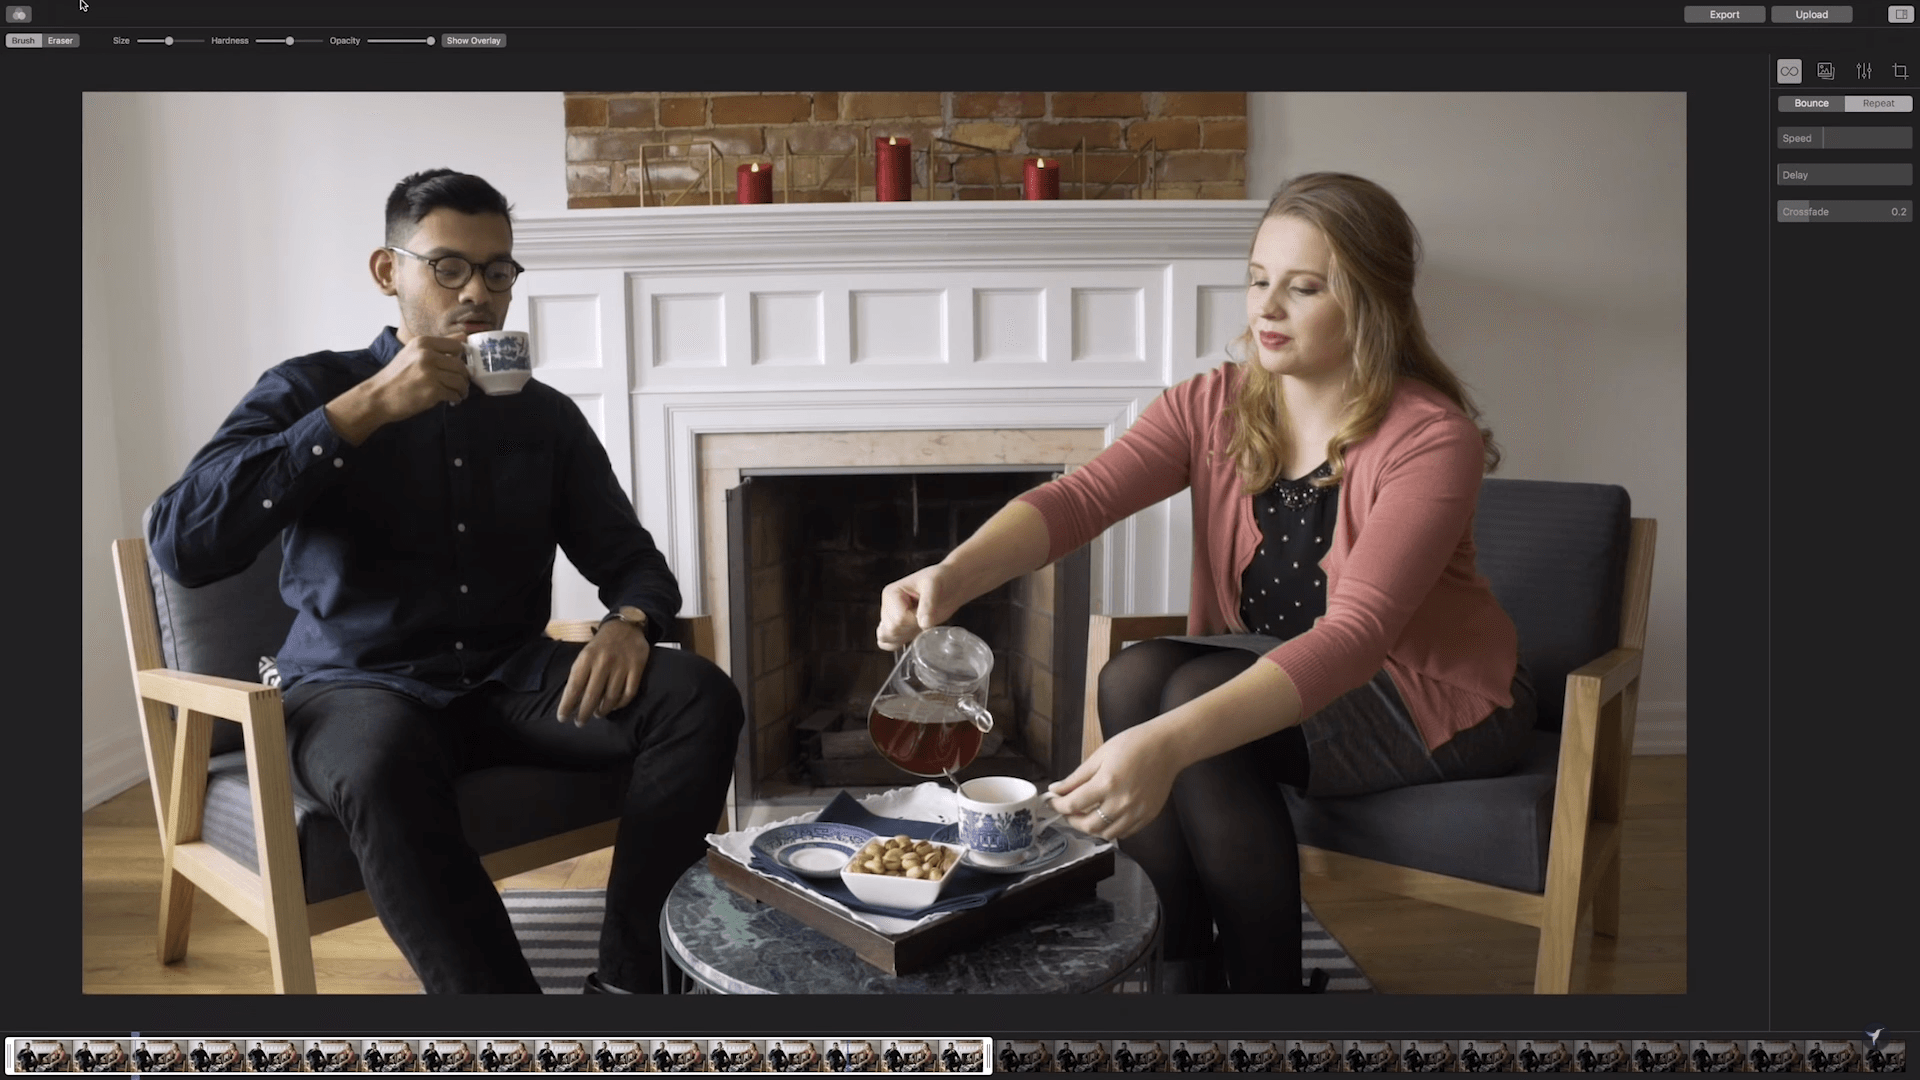
Now if you upload the video in Cinemagraph Pro, you have to specify a short sequence in the video first and then select a still image in this sequence. This still image is the starting material of the cinemagraph.
It will be masked in the next step. To reveal motion from your video, use the brush tool to paint over selected areas you want to animate.
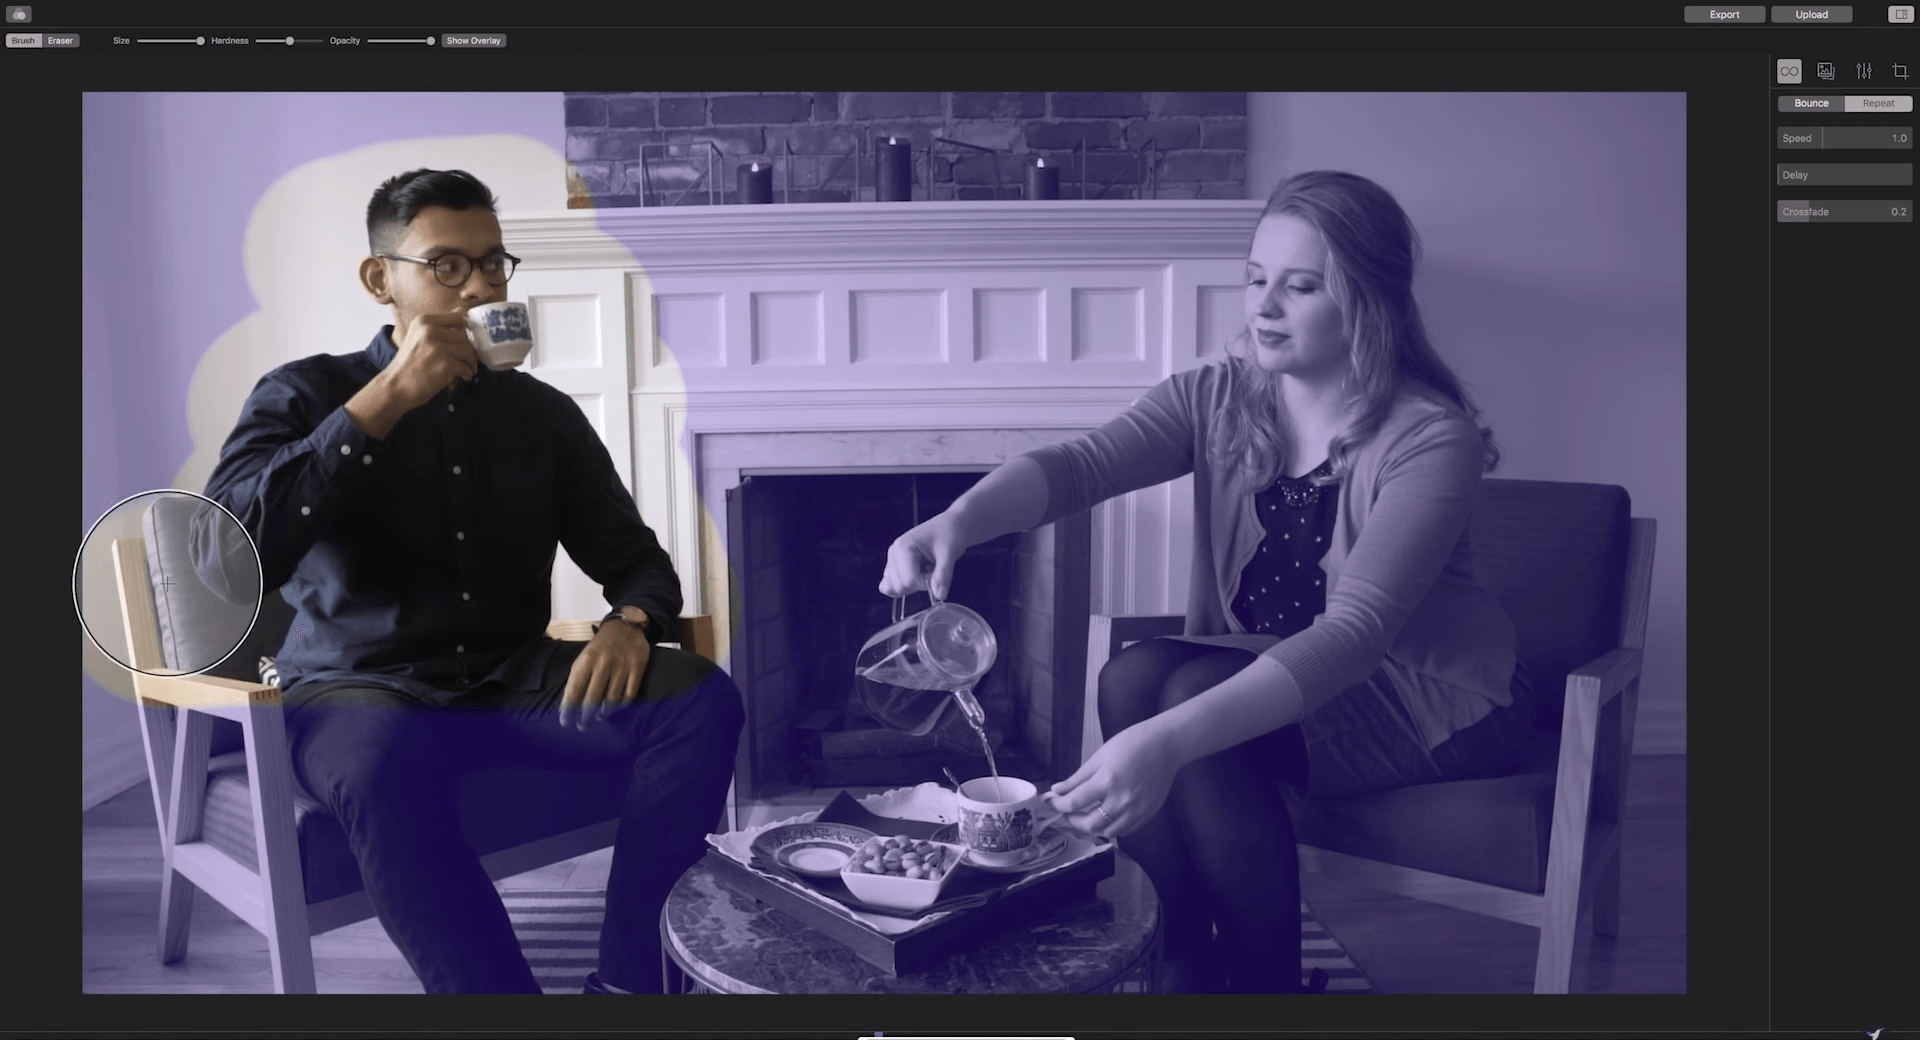
The mask now reveals all areas in the still photo which you selected with the brush tool. The rest of the picture shows the selected still image.
To create flowing movement, you have to select the video sequence carefully. The “Bounce” and “Repeat” functions bounce the video either forward or back or repeat the motion from beginning to end. The duration of the repeat loop can also be defined.
Conclusion: In this step, it is all about the perfect alignment of the video material, the selected video sequence and the associated still photo. The program has a clearly structured user interface and provides all the necessary editing tools. The export option enables optimising the cinemagraph for use on social media or as Facebook ads. Cinemagraph Pro creates realistically looking moving images and features a manageable scope of functions. If you use moving pictures professionally, the tool is really worth the investment.
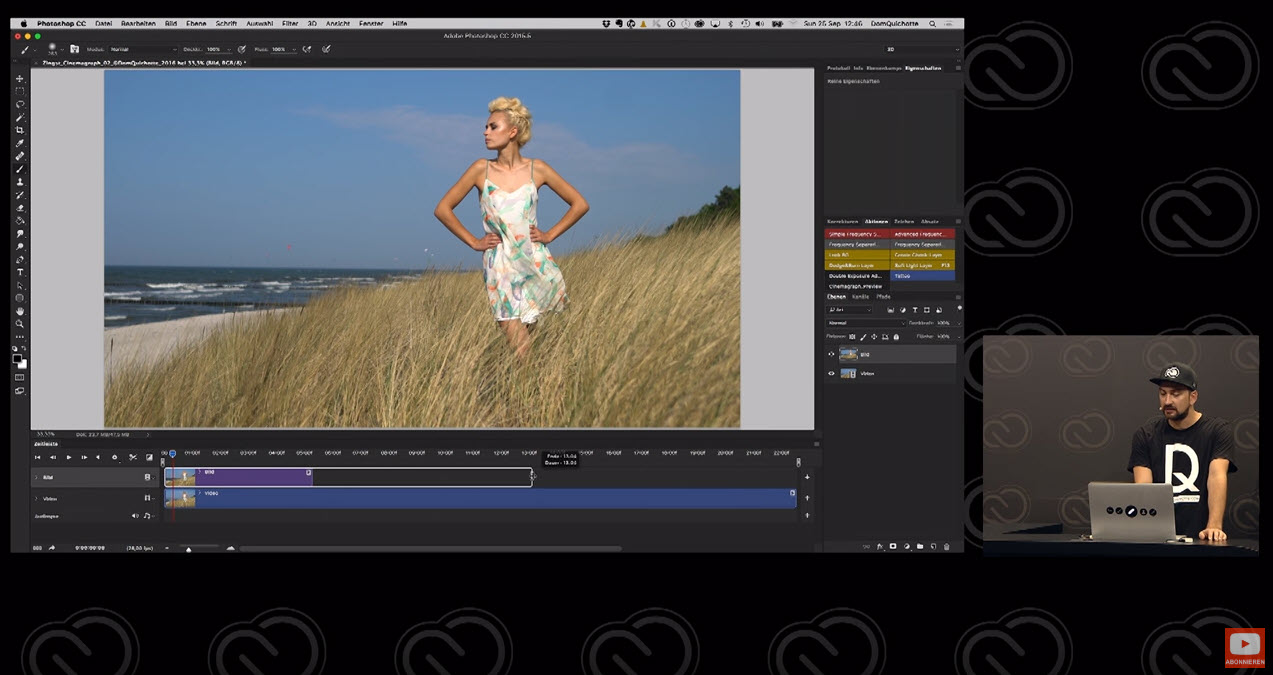
Adobe Photoshop
If you already have the Creative Suite, you don’t necessarily have to purchase an extra tool. Cinemagraphs can also be created using Photoshop C6 or later versions. Although it was not originally designed to edit videos, Photoshop C6 and later versions enable you to create stunning cinemagraphs using the Timeline panel at the bottom of the screen.
DomQuichotte, the media designer that has become famous for his tutorials on fx-ray.com, demonstrates how to use Photoshop to quickly create a cinemagraph in his Tutorial for Adobe. Put briefly, the tutorial explains (similar to Cinemagraph Pro by Flixel) how to film a video and define a suitable segment. Once you have selected this segment, you can copy the still photo from it. Now it’s all about “layer masks”. Layer masks enable you to define in which areas of the still photo the underlying video will be visible. This is because layer overlay with video files in Photoshop works similar to image layer overlay. As a result, you always see the picture first and the video underneath only in selected areas.
The advantage of editing in Photoshop: When converting the still image to a smart object, you can continue to use all image editing functions. Whether RAW filter or other functions – you can edit your moving picture in the same way as you would do with other photos.
In addition to videos, you can also turn a normal photo into an animated picture using the timeline. This method, however, is not as flexible, because you try to simulate movement through masking and transformation (such as magnifying). As in Plotagraph, flowing subjects such as clouds or water are better suited for this purpose.
Conclusion: If you are an experienced Photoshop user and know how to work with the timeline, you will find it easy to make cinemagraphs. And in addition to creating the animated picture, you can apply all the necessary retouch and filter functions to the image. You don’t have to buy a new tool and stay flexible.


