
A project requires you to reshape your photos from portrait to landscape orientation – ideally without distorting or cutting off the subject. The “content-aware scale” function in Photoshop allows you to accomplish this without losing visual content. We show you how to reshape your photos in a few steps.
Scaling problems are not new. Photoshop provides various options to resize photos with varying success. Some Photoshop users try to scale their images using Transform > Scale to stretch the complete photo in one layer. But this frequently distorts the subject (B1). Another approach is to adjust the photo width via proportional scaling. Unfortunately, this often causes the subject to be cut off and changes the image composition (B2). The result is often not satisfactory even if only a part of the photo is scaled or the missing width is filled with identical colour values or patterns (B3).
Content-aware scaling: the elegant fix.
There is another way. With version CS4, Photoshop introduced the content-aware scale command to remedy this problem. This powerful feature may be new to some users. Unlike normal scaling in Photoshop, this tool accounts for important visual content and tries to preserve it.
The final result is strongly dependent on the subject and is not always ideal. The function works best on photos with a clear separation between the subject and the background. But being quick and easy to use, the content-aware scale function is definitely worth a try for all kinds of photos.
Below, we will illustrate how the function works and which trick you can use to expand it.
How to scale simple subjects in Photoshop
Step 1: Resolve the background layer
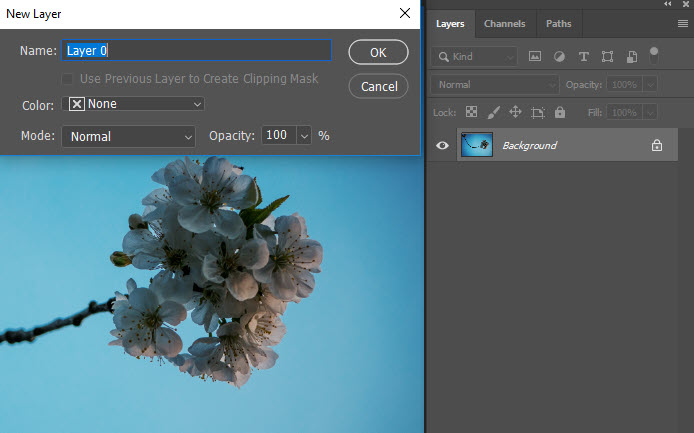
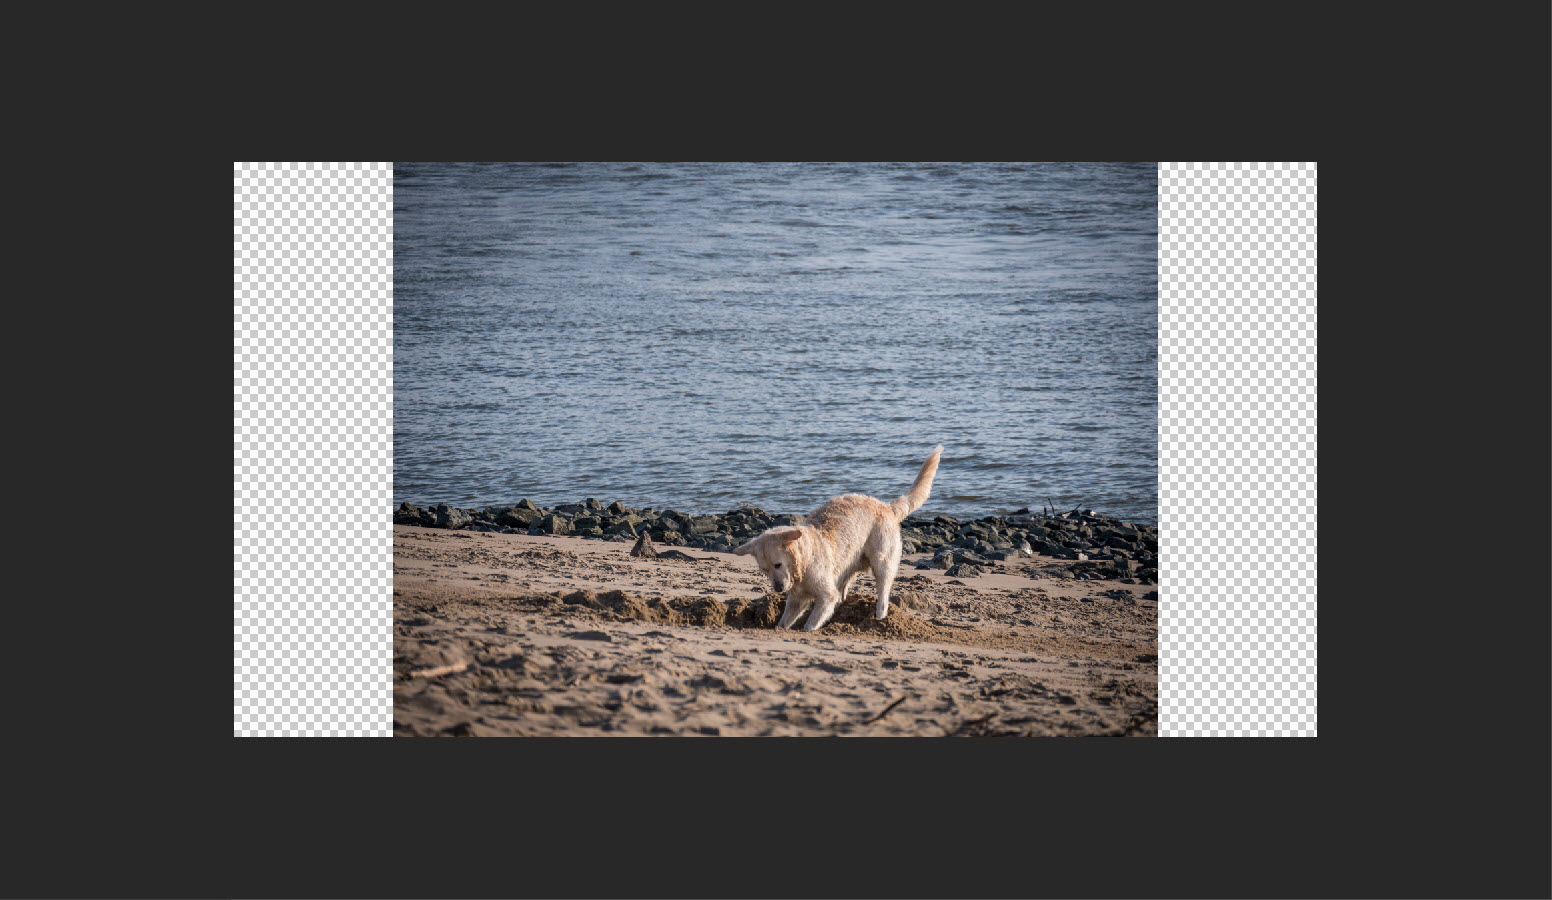
After you have opened the subject in Photoshop, you should first remove the background layer. The fastest way to achieve this is by double-clicking the background layer.
Step 2: Adjust the workspace
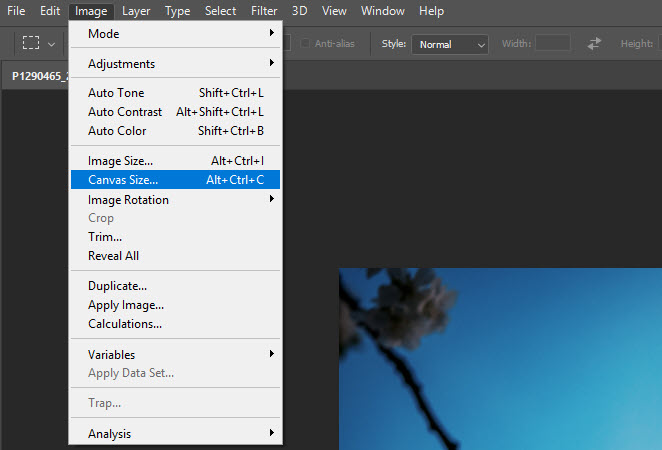
In the next step, you have to set the specified size of the photo by adjusting the canvas size of the photo. Choose Image Canvas Size to specify your desired size.
Step 3: Content-aware scaling
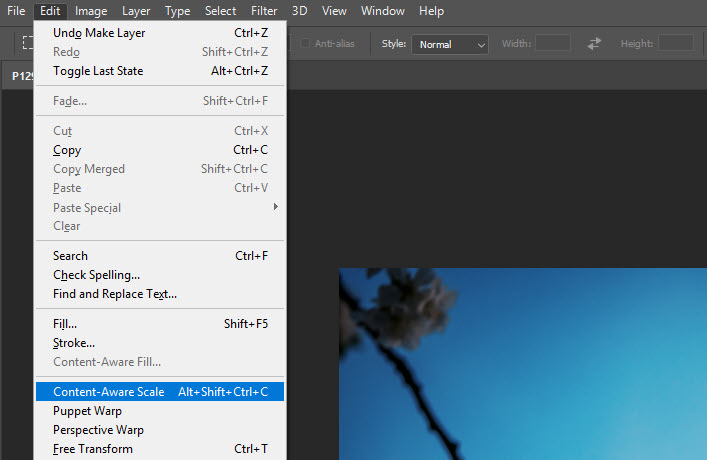
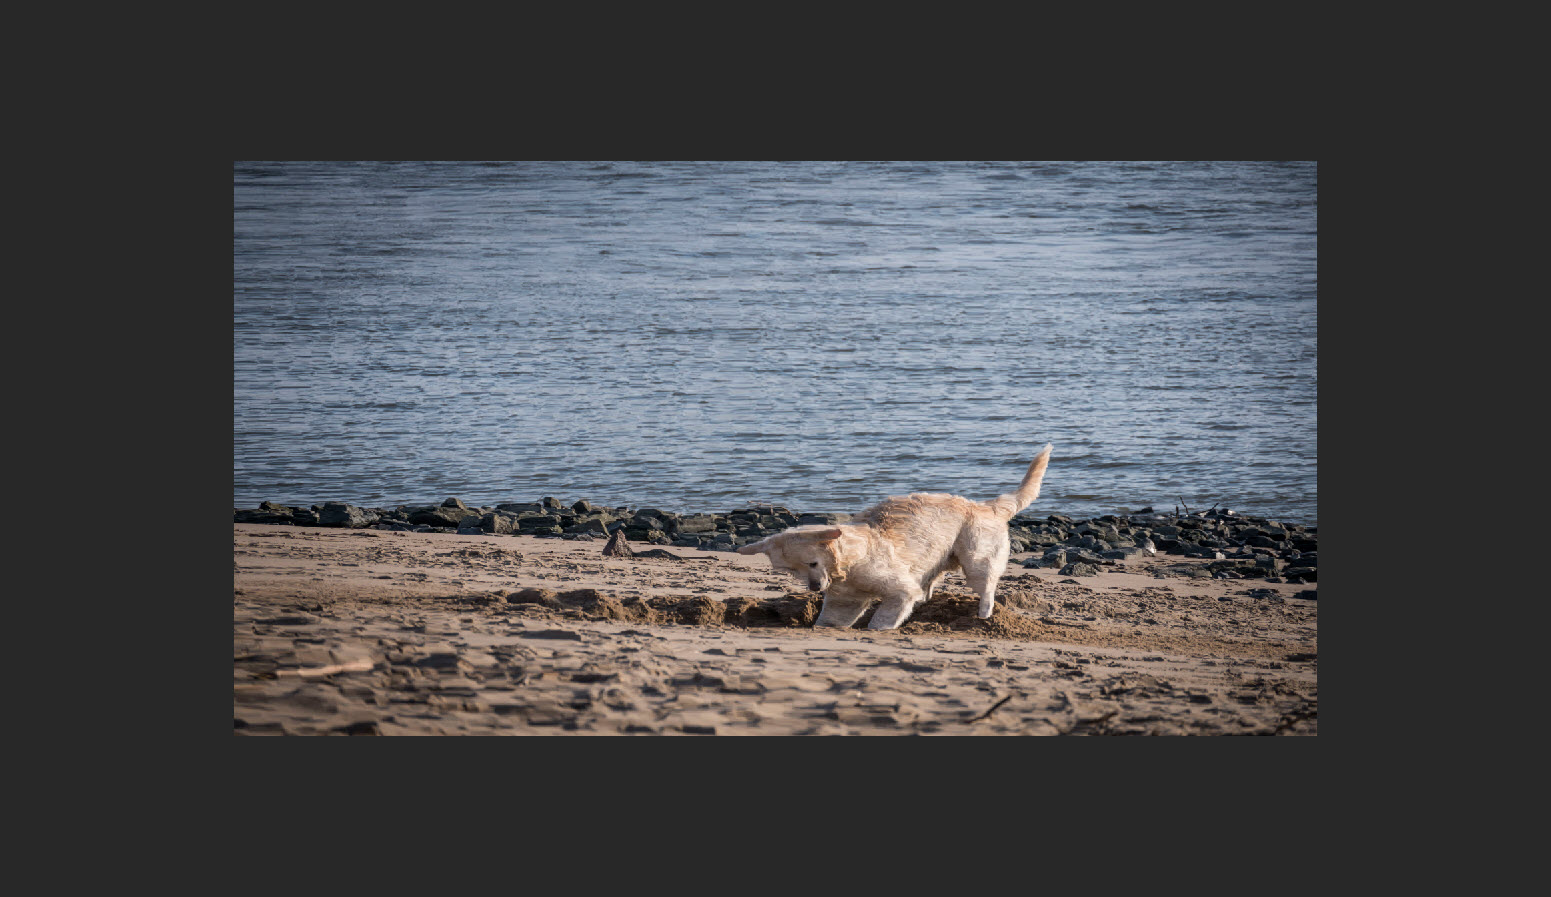
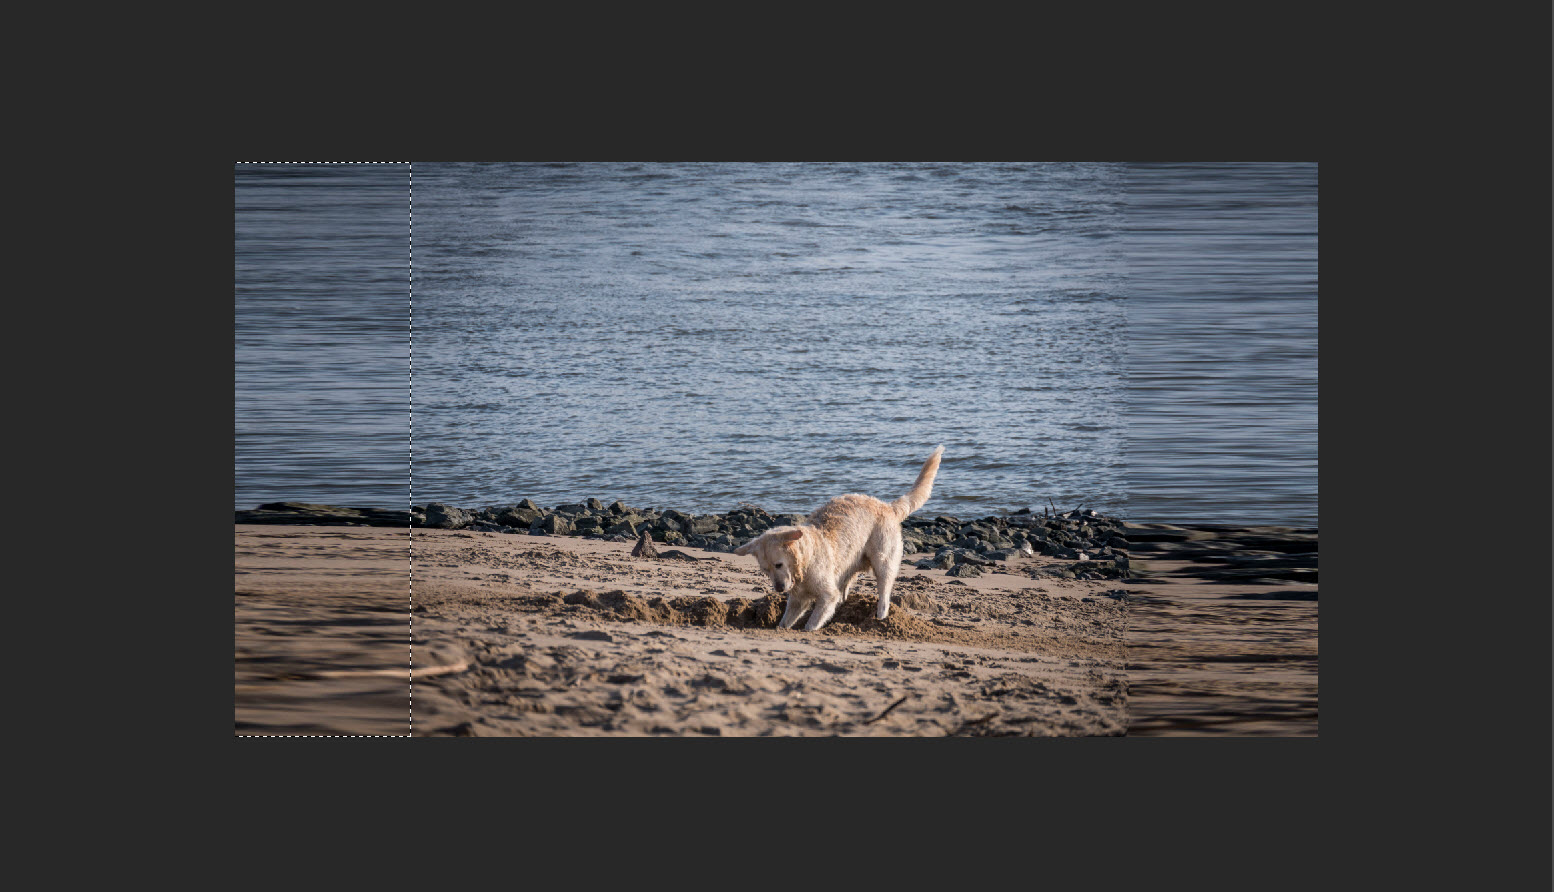
The content-aware scale command is located in the Edit menu. When you click the function, Photoshop will show a bounding border around the photo. Drag a handle on the bounding border to scale the image. This function is easy to implement with simple subjects and a clear or uni-coloured background.
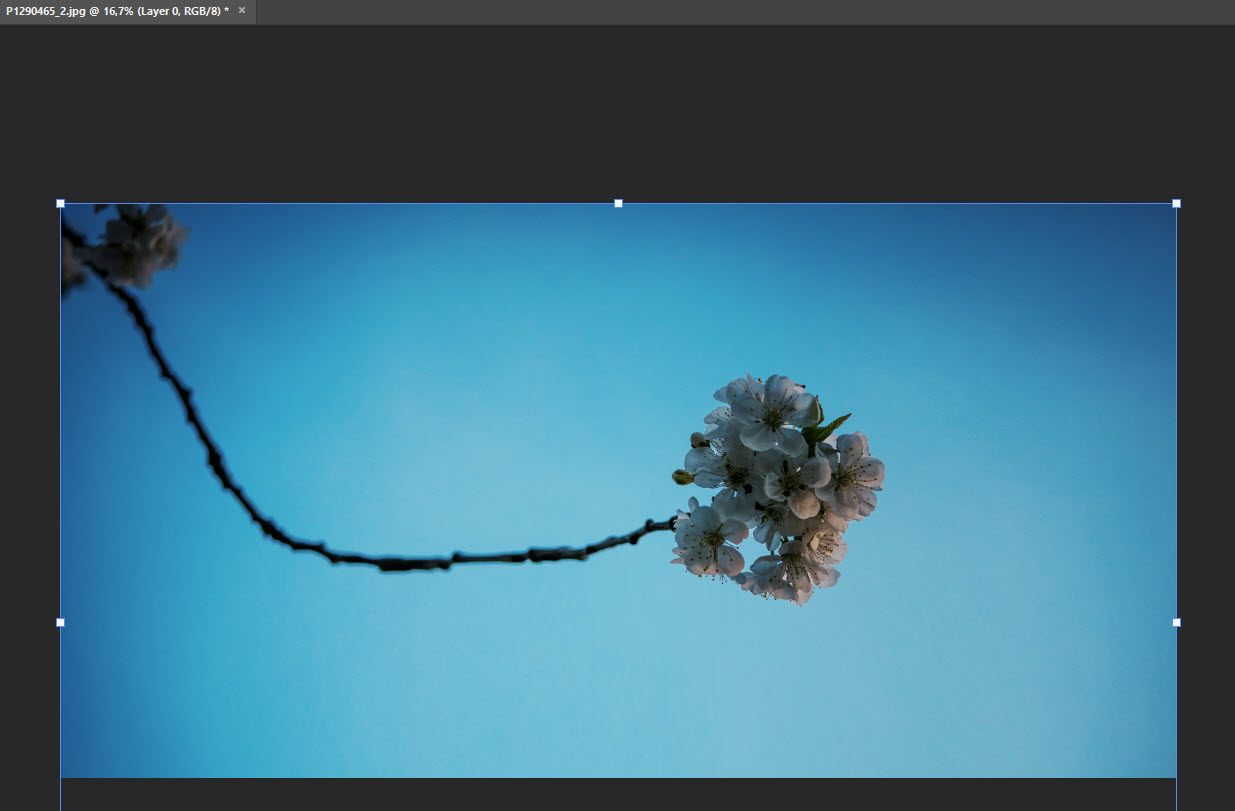
In our example, the main subject is clearly separated from the homogeneous background. Photoshop is capable of detecting the cherry blossoms. The content-aware scale function does not change all pixels in the same manner but only those pixels that do not carry important content. Therefore, only the sky in the background is stretched but not the blossoms.
Note: When scaling in Photoshop, the result depends on the photos you are using. For the content-aware scale function to deliver good results, the subject should be clearly separated from the background.
Content-aware scaling of complex subjects
There are many photos where content-aware scaling does not immediately produce a satisfactory result. This can happen when the background is busy or when the background and the subject have similar colour values. In both cases, Photoshop has difficulties detecting the main subject. If this is the case, you have to define the main subject manually and exclude it from the scaling.
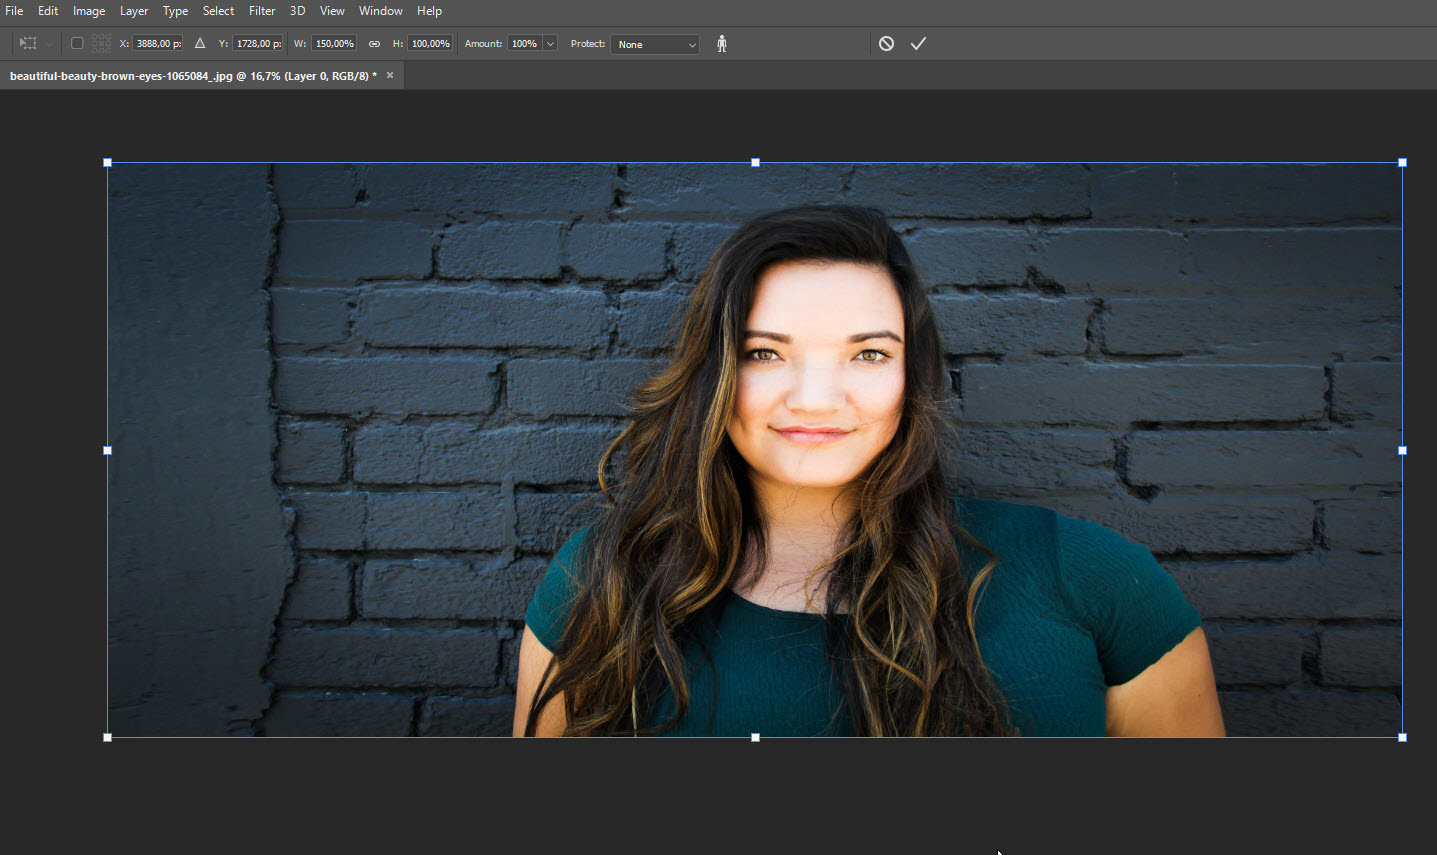
The model and the background in this example contain similar colour values and hardly stand out against each other. Photoshop has problems isolating the woman. Now if you apply the content-based scale command, not only the background will be stretched but the woman, too. The effect is especially noticeable in the woman’s face.
Step 4: Manually define the main subject and protect it
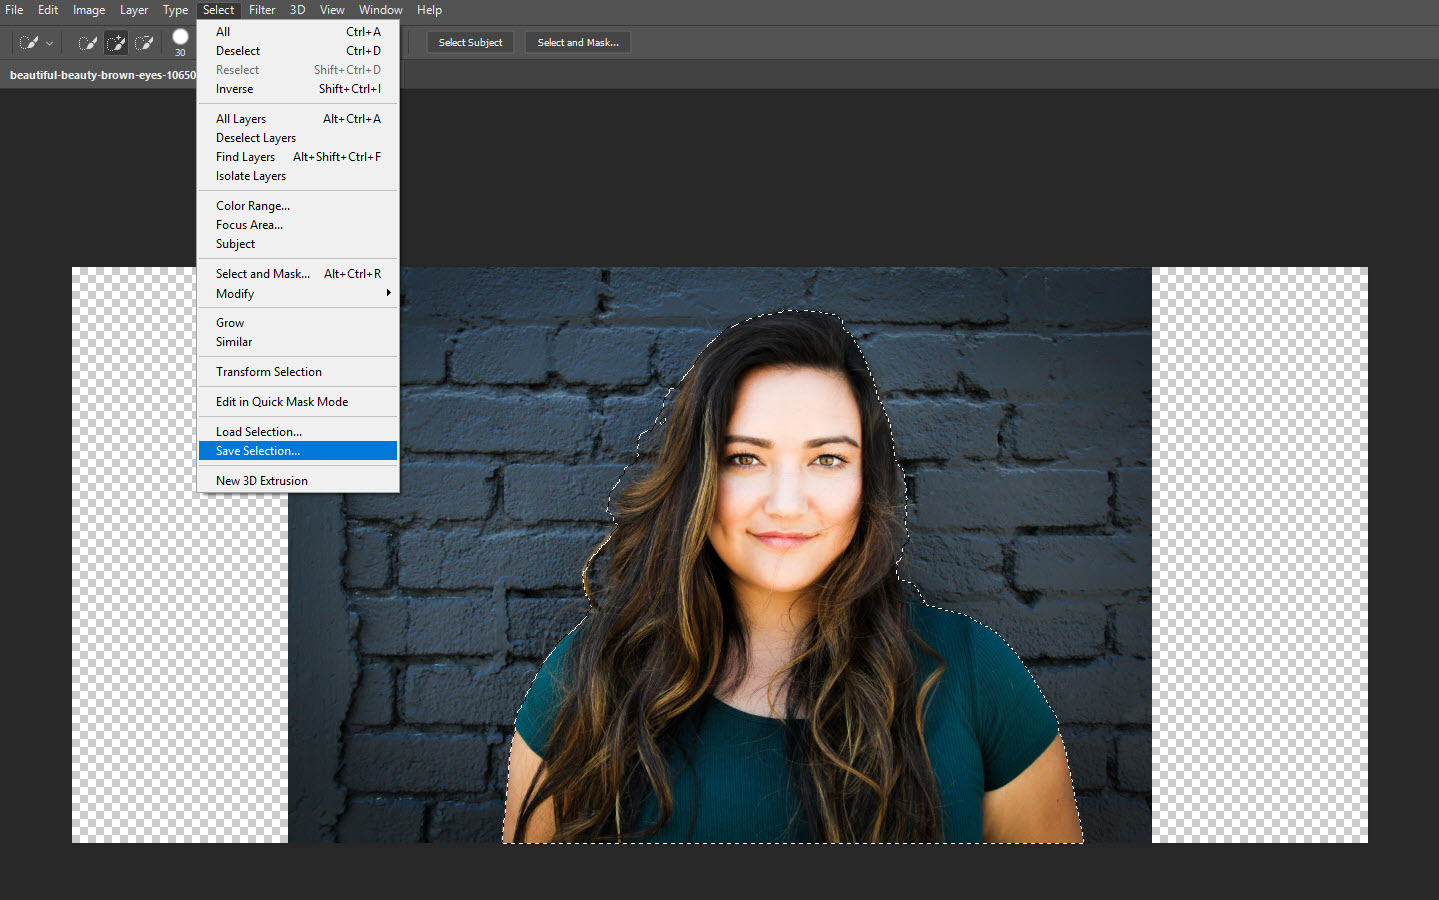
To be able to apply content-aware scaling to the photo, you have to select the subject before executing the command. This is quickly done using the Quick Selection Tool or the Lasso Tool from the toolbox. To enable Photoshop to detect the selection, in this case the woman, choose Select > Save Selection to save and name the selection.
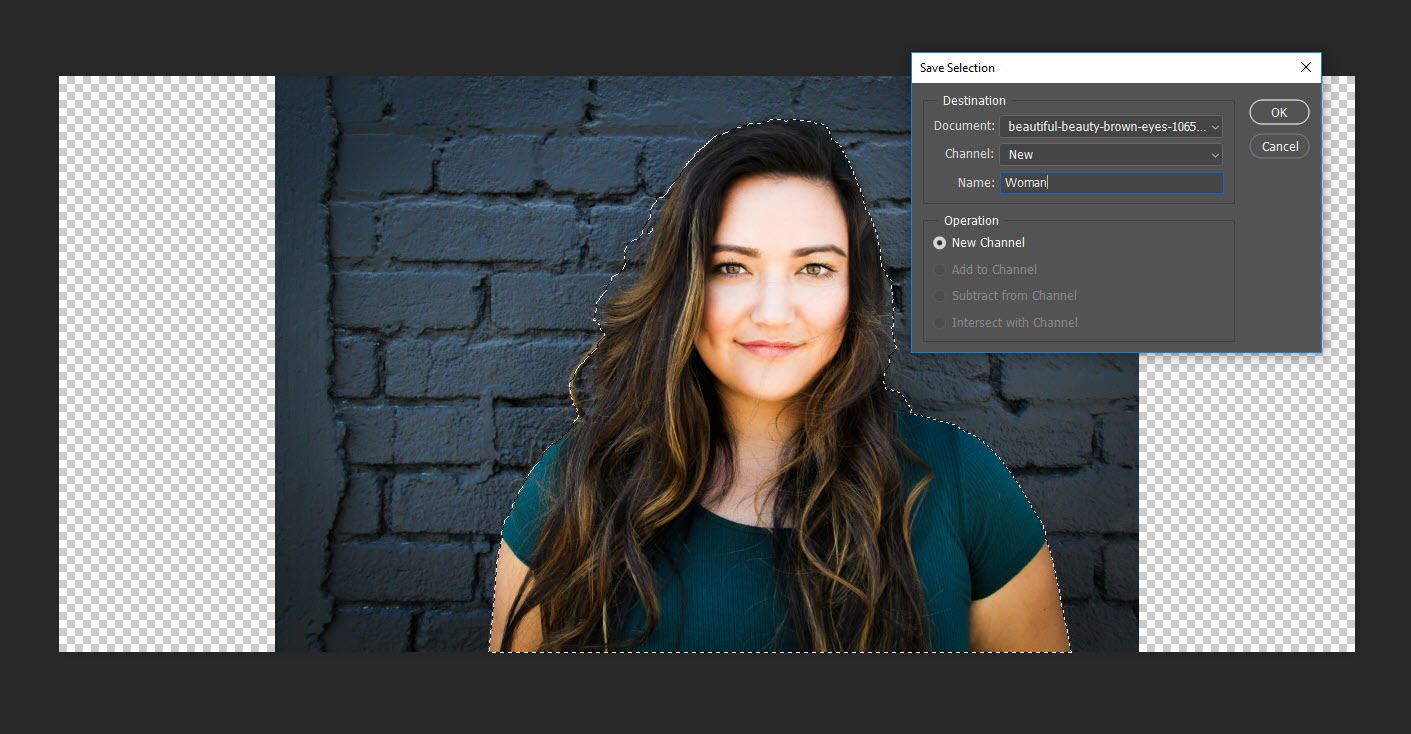
This will exclude the woman from content-aware scaling. In our example, we saved the selection as “Woman”. Note: Afterwards, you have to undo the selection by using the shortcut STRG + D or for Mac Apple + D or else the scaling will only be applied to the selection.
Fine-tuning: You can optimise the selection of your main subject by choosing Select > Modify > Expand and then smooth the edges or expand the selection by a few pixels.
Step 5: Protect the selection and start content-aware scaling

Now apply the Content-aware Scale command to the expanded canvas. The upper options bar gives access to the saved selection. Choose “Woman” in the Protect drop-down list box to exclude the main subject from scaling.
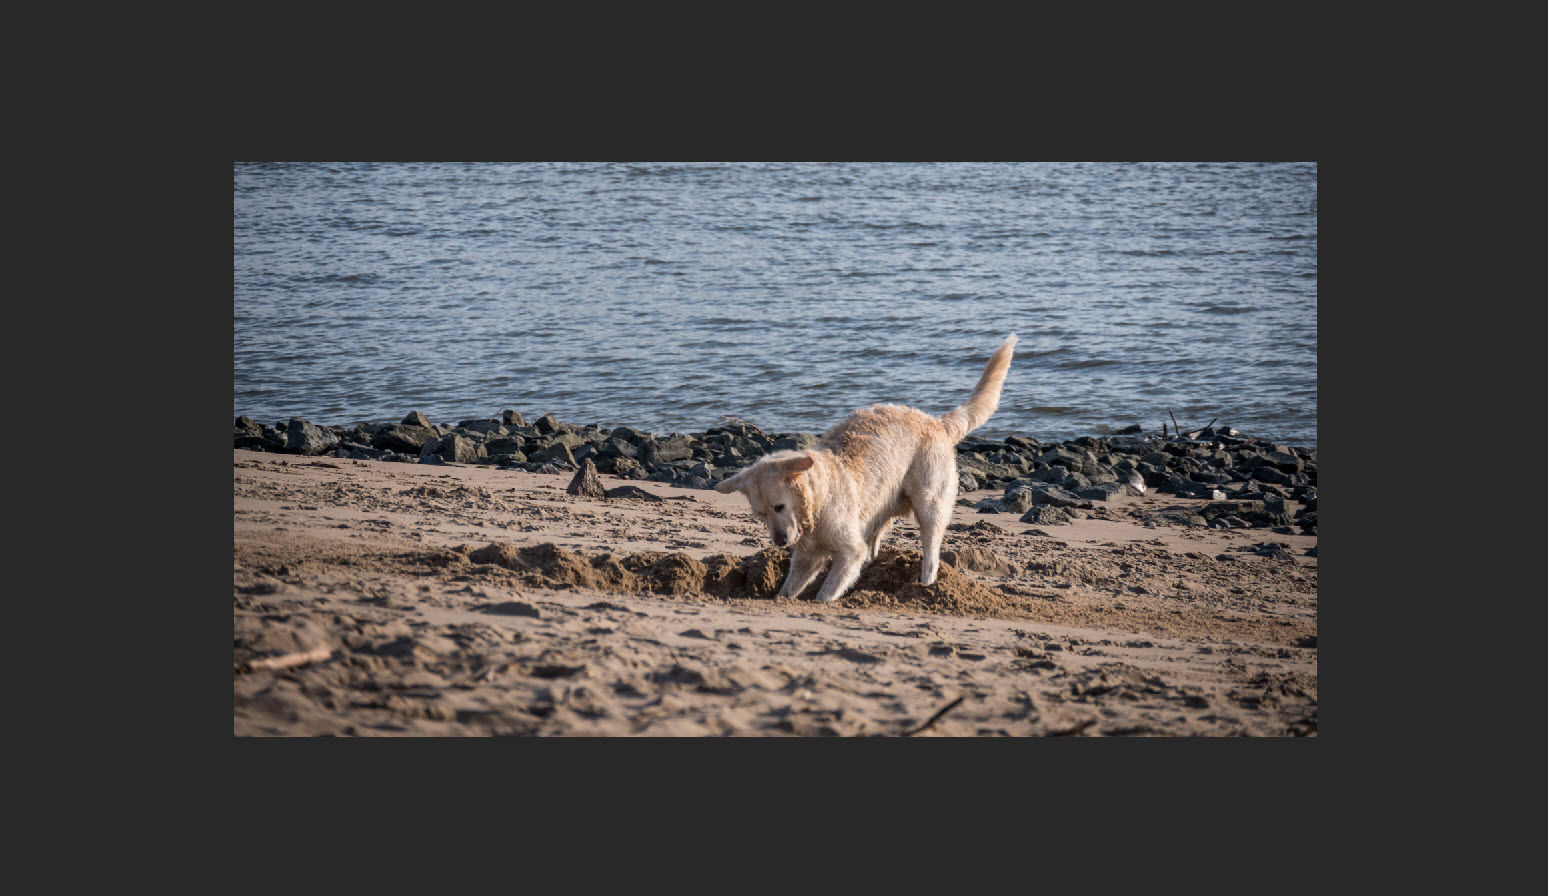
Step 6: Scale successfully and marvel at the result
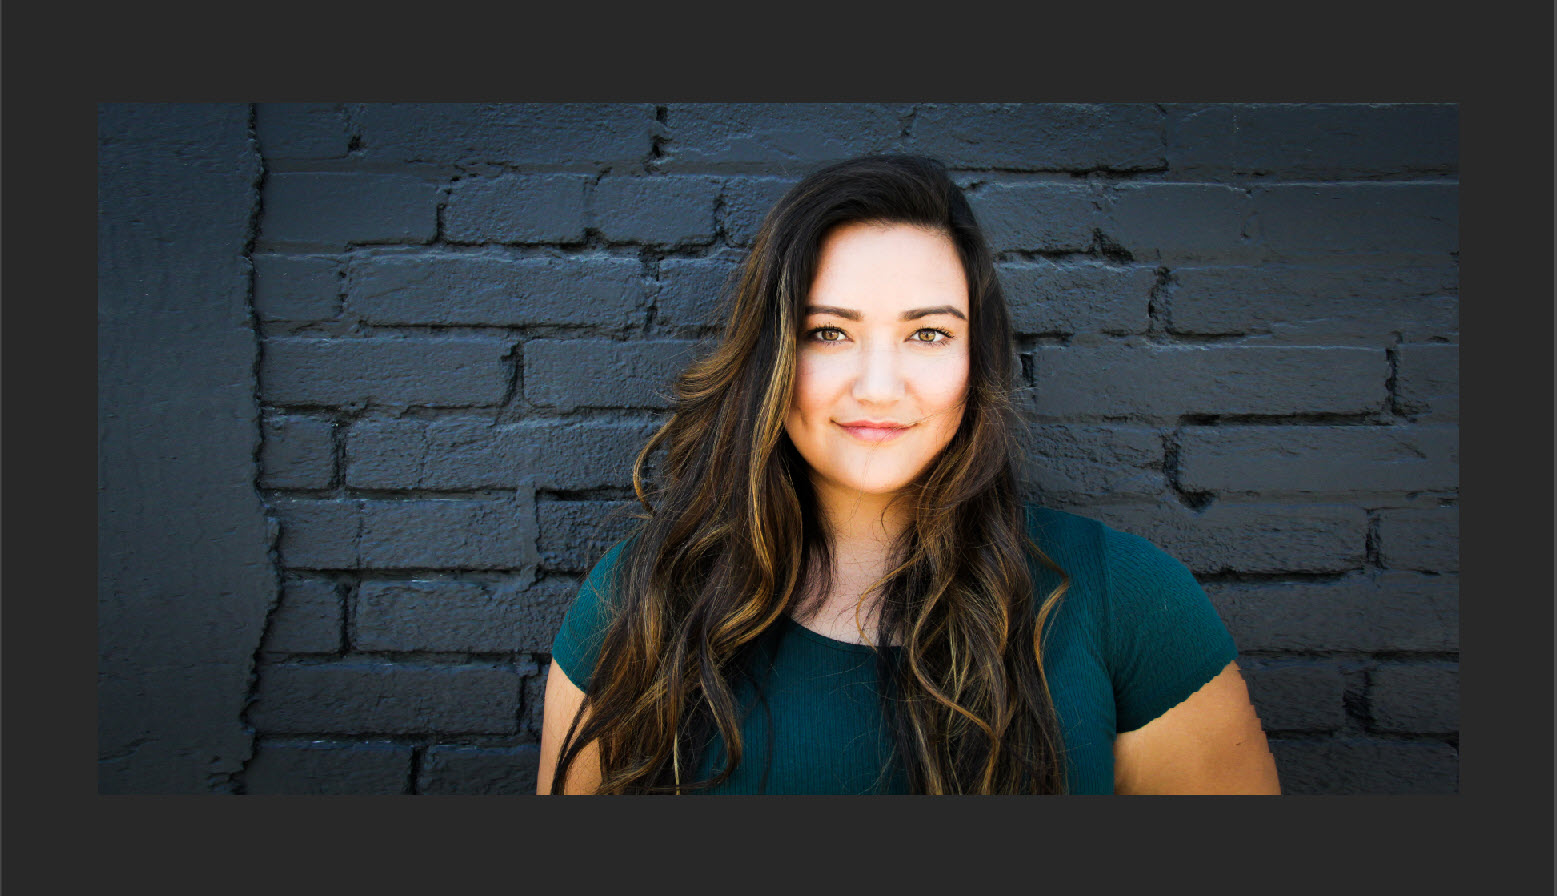
Next, adjust the bounding border to the canvas by dragging the left and right handles. Only the background is stretched because we excluded the subject from the pixel calculations in Photoshop. The result is stunning. It is amazing how precisely Photoshop does these calculations.
Tip: Play around with the different setting options. If you are unsure whether you can achieve the desired result with the Content-Aware Scale function, just try it out. The results are usually satisfactory, so it is worth investing some time and effort into it.

