You have successfully cut out an image but what to do next? How can you make a background transparent in Photoshop? In our tutorial, you will learn how to save subjects with a transparent background and edit them in Photoshop.
Cutting out a subject in an image editor, such as Photoshop or Affinity, can be quite time-consuming. To make the effort worthwhile, it is important to know how the subject you have cut out can be further edited with transparency without loss of information. To ensure that you have your image in the correct format for the intended purpose, there are a few things to keep in mind when saving the image.
Contents
- Transparent background in Photoshop: unlocking layers
- Cutting out subjects – one of many possibilities
- Photoshop: transparent background for your images in the RGB colour space
- Transparent background in the CMYK colour space for print projects
Transparent background in Photoshop: unlocking layers
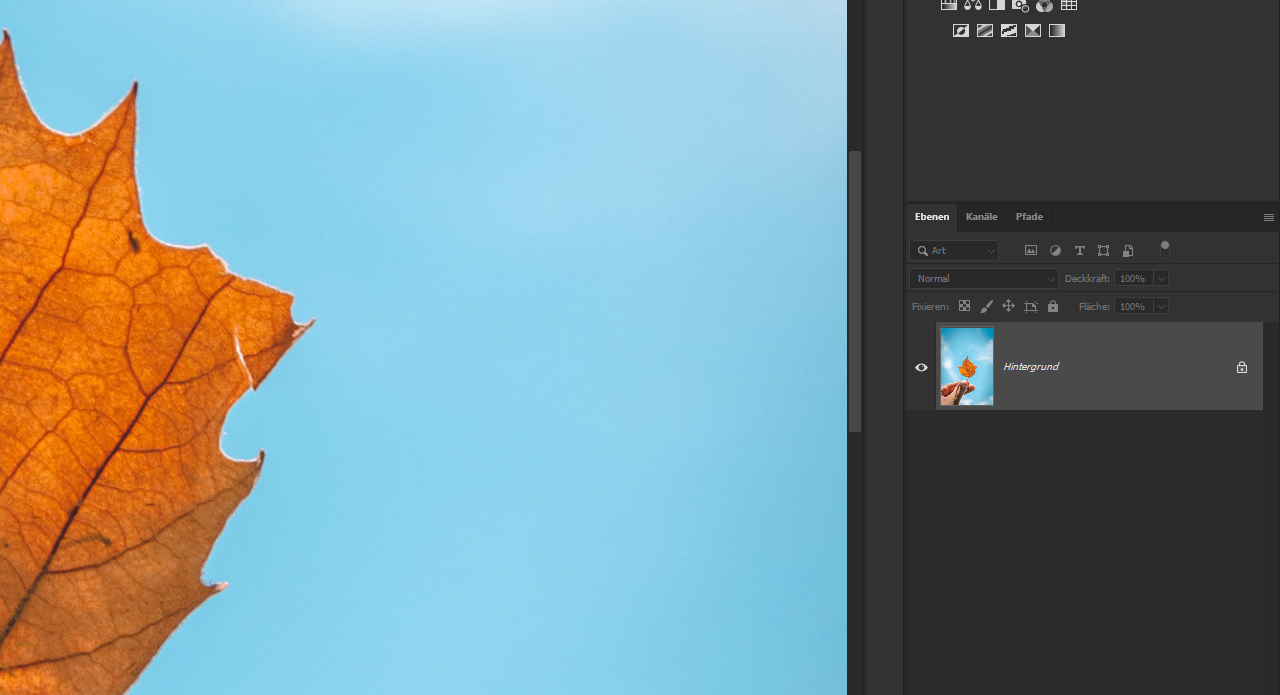
In our example, we want to cut out the hand holding the leaf from the background (blue sky). The first step is to import or open the image in Photoshop. The subject will be created automatically as background in the size of our image. For some applications, it can make sense to work with this locked background layer. But in most cases, you will need an editable image. To do so, you have to unlock the background layer or convert the image to a normal layer.
There are two ways to do this: Double-click the background layer and confirm the workspace that opens. Or drag and drop the small lock icon onto the dustbin icon in the lower right part of the layers window. This will remove the background lock and you can now drag and drop the image to any position in the project window.
Appearance of transparencies in Photoshop: When moving the image, your subject will be displayed against a grey-and-white checkerboard background. This is how Photoshop displays transparencies and it tells you that there is no other content in this position of the project window but an empty and transparent space.
Cutting out subjects – one of many possibilities
In the next step, we want to separate the subject from the background. Since there is good contrast between the hand holding the leaf and the blue sky, this image is ideal to cut out – especially using the new Object Selection tool of Photoshop 2020.
Using the Object Selection tool for cutting out
Here’s how to: Select the Object Selection tool in the toolbar and draw roughly around the area you want to cut out. Photoshop should automatically detect the edges and make a pre-selection. Next click Select and Mask in the upper menu. In this workspace, you can refine the selection to get a nearly perfect result in a short time. In our example, the Object Selection tool in Photoshop has already yielded a very good result.
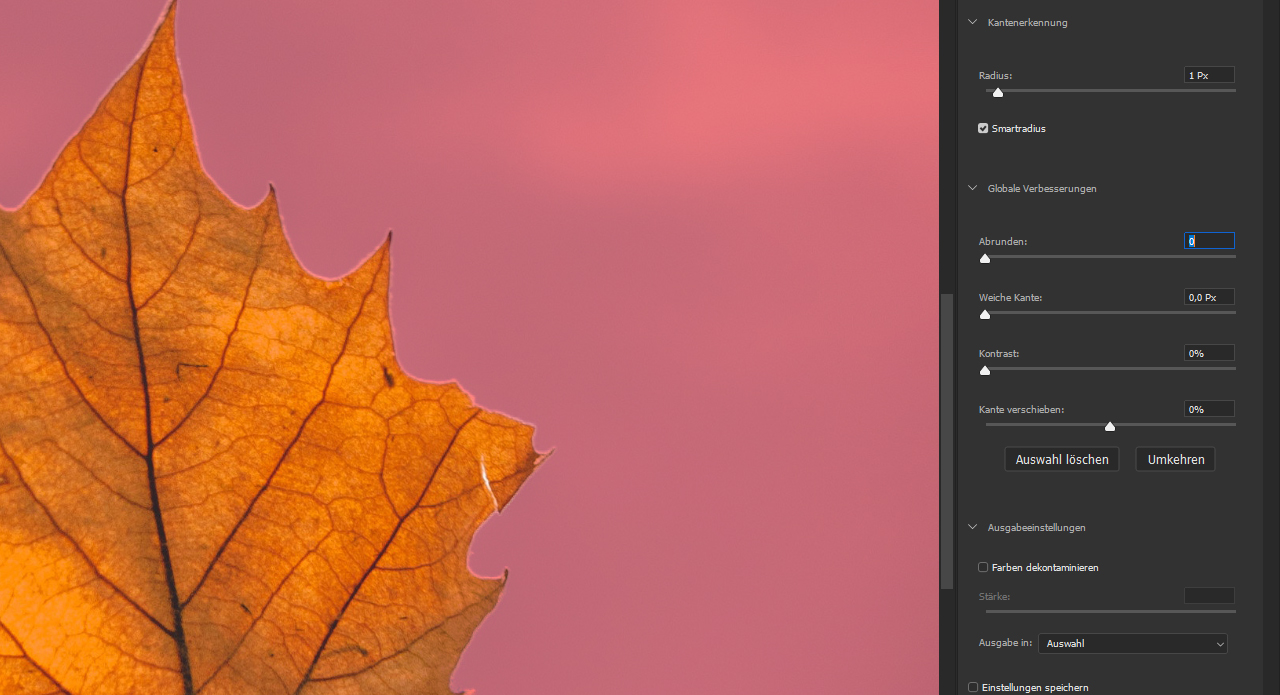
Refining edges for a perfect result
To refine this selection, click again Select and Mask in the upper menu and use the Refine Edge Brush tool in the left toolbar to draw along the contours of the leaf and the fingertips. If you are not yet satisfied with the revised selection of the subject, you can additionally define a smart radius of 1 px in the right-hand settings window.
Then go to Output Settings and click the Decontaminate Colors checkbox. Your original file will be retained and the cut out area will be created as a separate layer. Finally confirm the workspace by clicking OK and your cut out subject will be displayed: The hand with the leaf is displayed in Photoshop against a transparent background, i.e. a grey-and-white checkerboard pattern.
RGB colour space – making a background transparent in Photoshop
The subject we cut out is an image in the RGB colour space. RGB is exactly the right colour space if you want to publish your image digitally, for example, on screens or the internet. Photoshop enables you to save the image with transparency directly for web publishing. To keep the transparency, you only have to choose the correct format when saving the image.
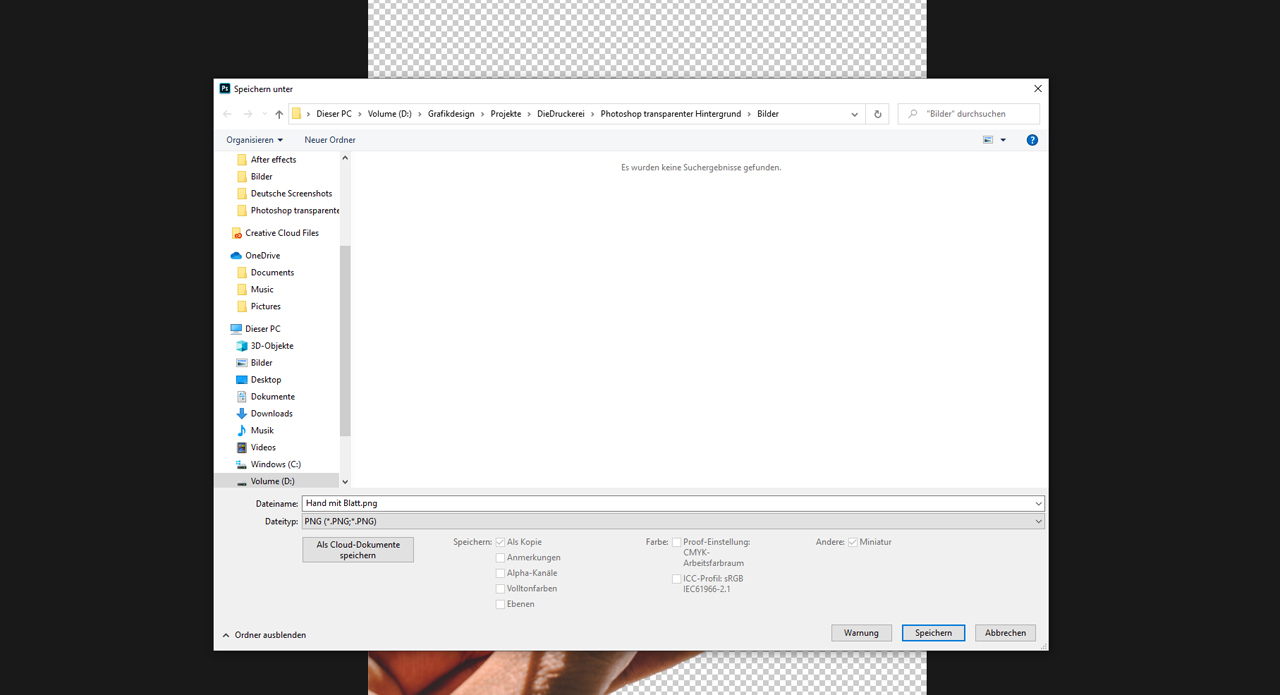
PNG provides transparency for digital images.
Click the file and then Save as. A new window opens. Choose PNG under file type here. PNG (Portable Network Graphics) is a graphics file format that supports lossless data compression and is the most widely used lossless graphics format in the World Wide Web. PNG is also capable of displaying transparencies in the RGB colour space, making it ideal to save your cut out subject.
Finally, save your file as a unique name and click Save. In the next window, you can adjust the level of file compression. Click OK to confirm your settings and save the image as PNG with transparency. You can now drag and drop the saved image file directly into a new Photoshop document. Once the image has been inserted, you will only see the cut out subject.

Important: It is not possible to restore the deleted background subsequently because the PNG ignores this image information when saving the file.
For print projects: save a transparent background in the CMYK colour space
If you want to print out the image, you have to save it as a different file format in your layout program since the CMYK colour space does not support the PNG format.
Converting an image – from RGB to CMYK
First convert the RGB image to the CMYK colour space. Click Image in the menu and choose the CMYK colour mode under Mode. When converting in Photoshop, you can choose whether to flatten the layers or not. Click Do not merge here. A message appears, informing you that the document will be assigned a new colour profile in the CMYK colour space. Confirm this window with OK.
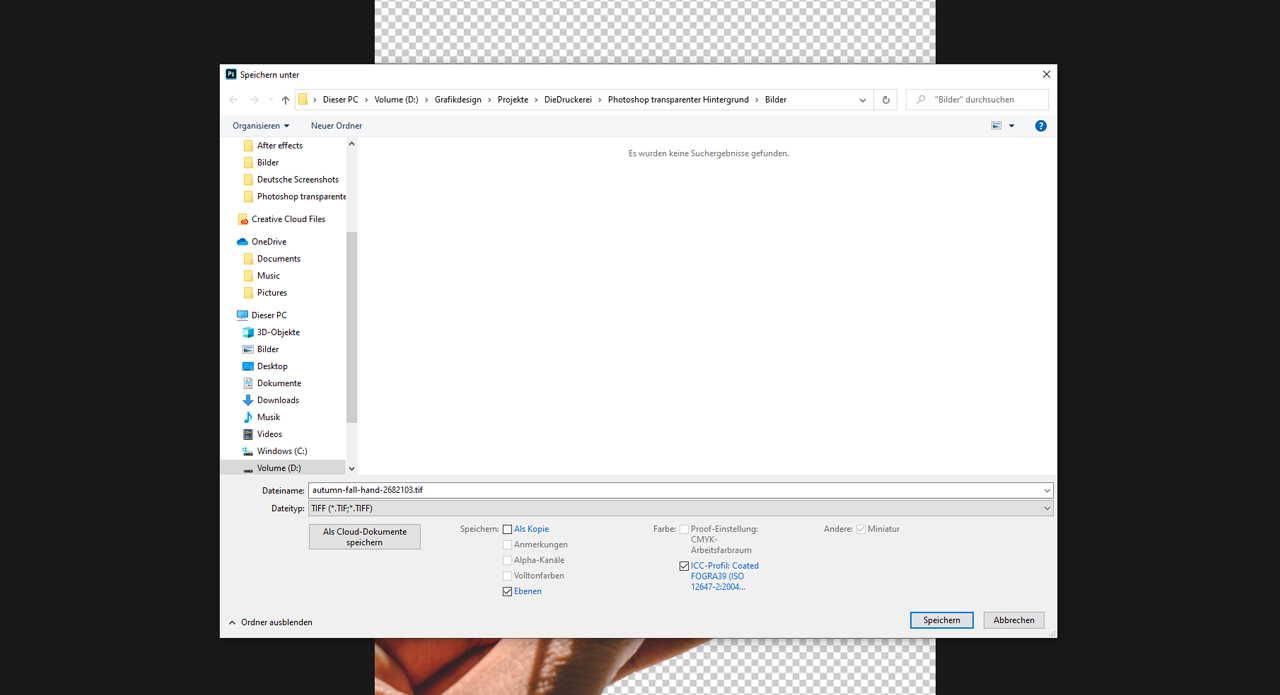
TIFF format makes the background transparent
You have now converted the image from RGB to CMYK and can save it for printing by clicking File and Save as in the menu. Choose the file type TIFF in the next window and click Save. The last window provides various setting options that mostly concern the file size.
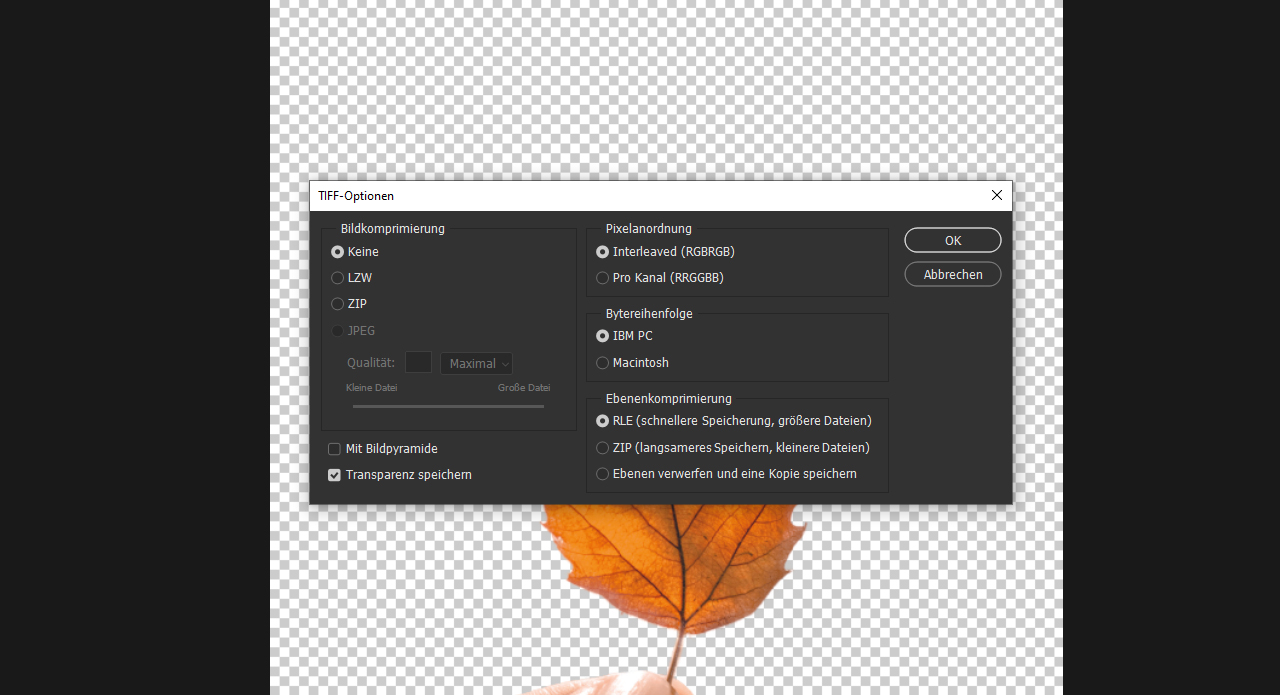
To save your image with a transparency in TIFF format, enable the Save transparency checkbox. Once you have confirmed the window, your image will be saved in CMYK colour space in TIFF format with transparency. You can now insert this file into open Photoshop or InDesign projects. Only the cut out area should be displayed.
Transparencies increase the data volume: TIFFs require a lot of memory
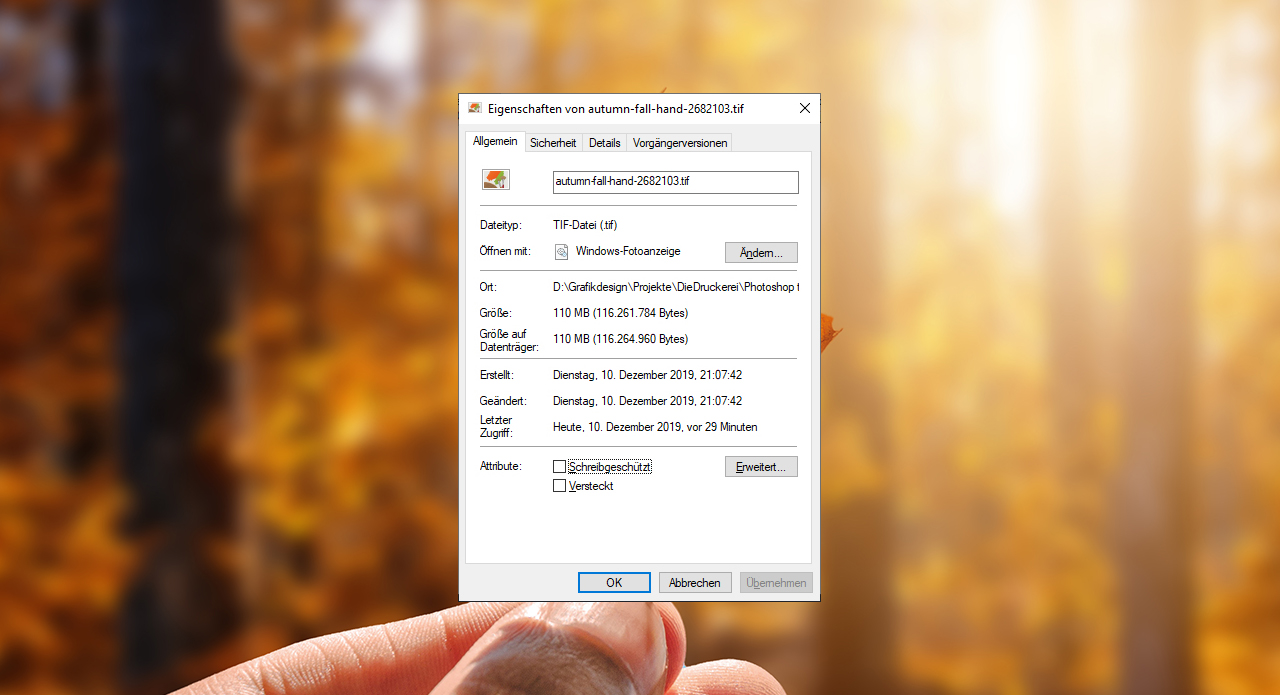
You should have sufficient memory available when storing one but especially multiple images in TIFF format with transparency. This is because an image file saved in TIFF format with transparency usually has a very large file size. Among others, this is due to the four colour channels, the embedded colour profiles, the transparency and the general amount of image information.
Credits: Speaker and designer: media designer Christoph Ullrich.


