
Adobe InDesign is one of the most commonly used tools for creating and editing layouts. If you add page numbers for catalogues or magazines in InDesign, these can be positioned and formatted across all pages with just a few clicks. In our InDesign Basics Tutorial, we will show you how to use these functions and what else to pay attention to when creating artwork files.
Step 1: Create a project
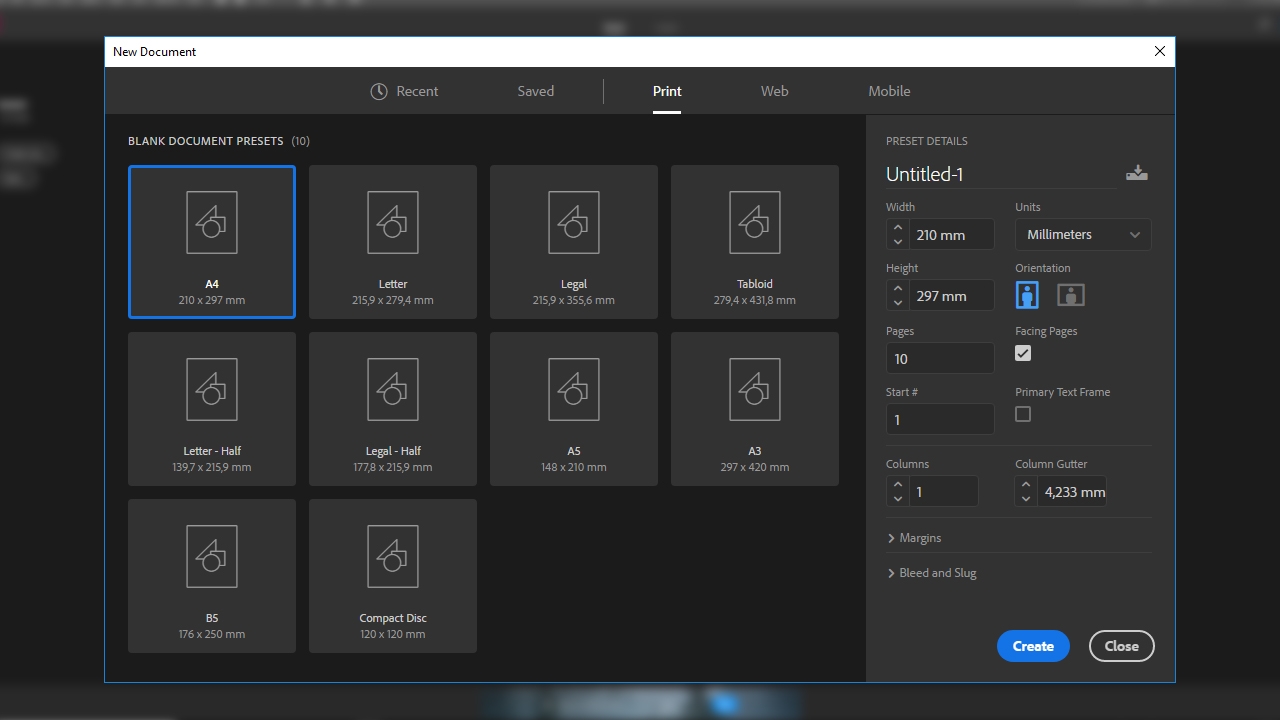
In this tutorial, we will create an artwork file for a magazine with ten pages. To do so, click File > New > Document. Go to the Print tab to choose among predefined document sizes. Alternatively, you can enter a custom document size. In our example, we chose A4 and set the number of pages to ten.
Optionally, you can enable the Facing Pages checkbox. When enabled, two single pages will be inserted as facing pages when creating the project in InDesign. Select this option to make left and right pages in your project file face each other in the same way they will appear later in the printed layout.
To print your project later on, it is not relevant whether you create your project with the single pages or facing pages view. When the facing pages option is enabled, you can still export each page individually later on.
Now click the Create button to set up the project.
Step 2: Open the Pages window
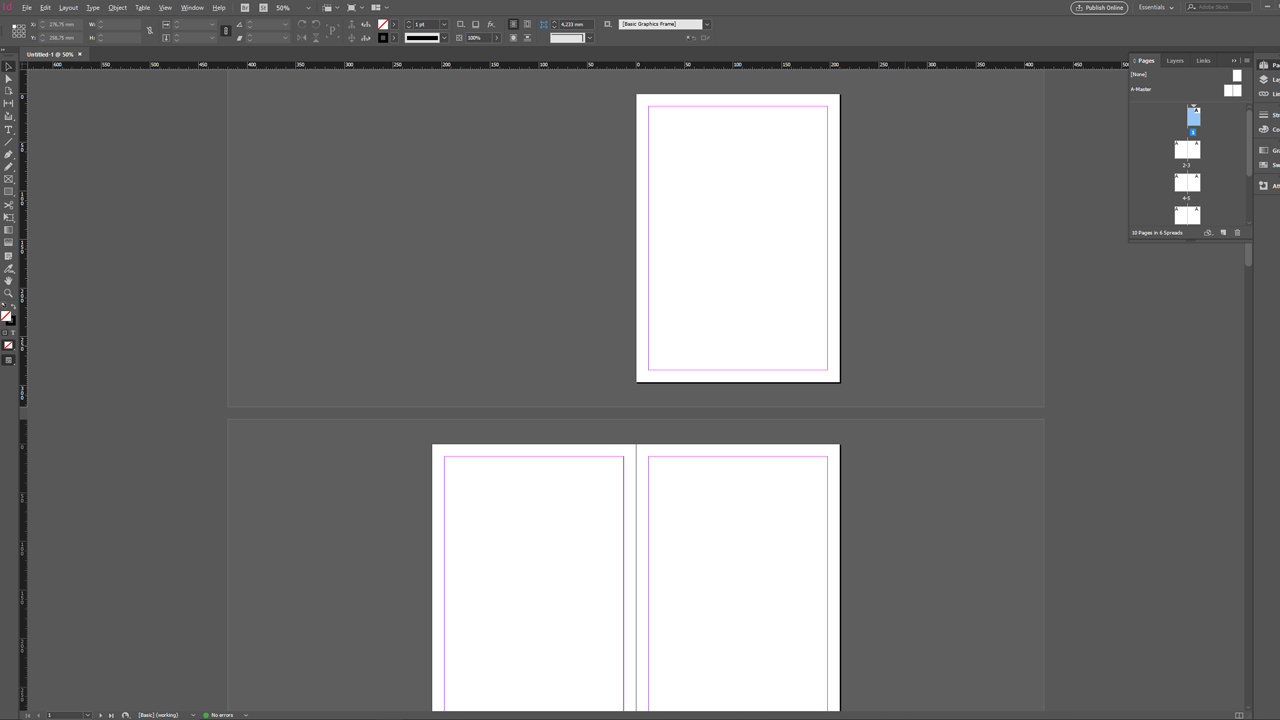
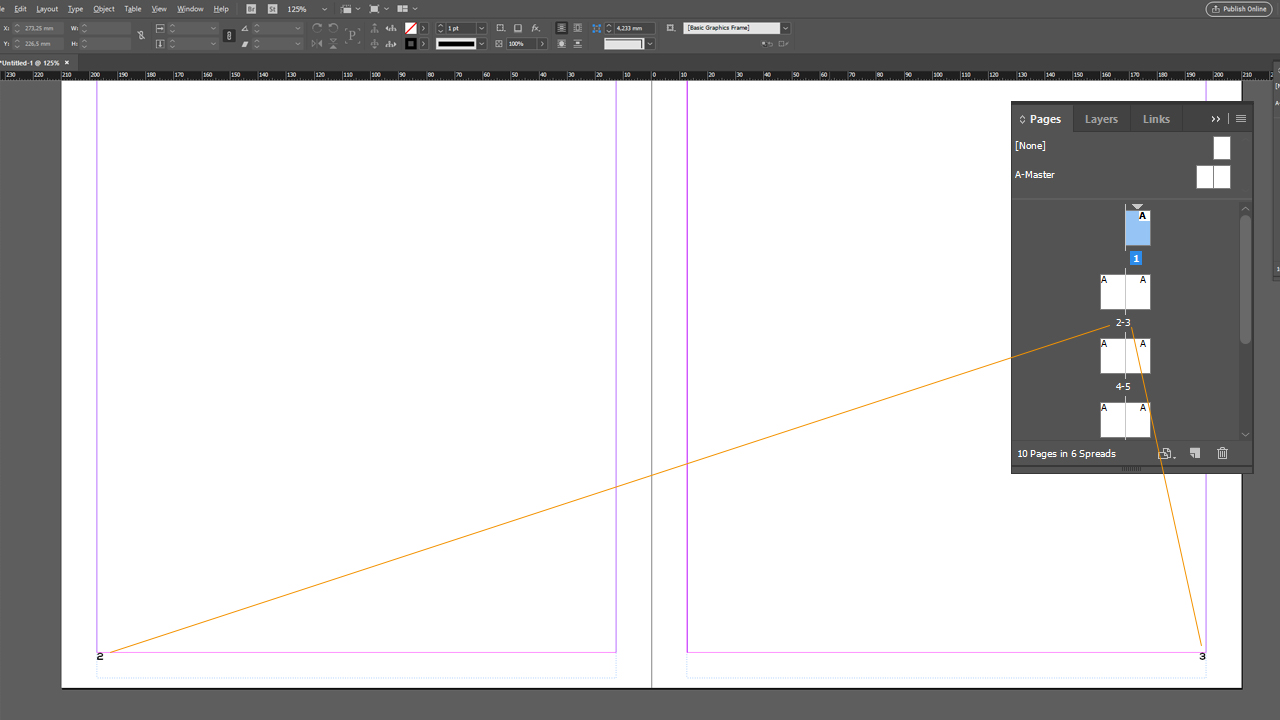
Next open the Pages window. Usually, it is located in the upper right corner below the Pages button. You now see ten pages both in the Pages window and in the actual project. The first and the last page is a single page. This is because printed material such as a magazine or book start on a right single page and end on a left single page. For a better understanding, imagine leafing through a magazine and looking at the front and back page in your mind.
Step 3: Select a master page and add page numbers on the left pages
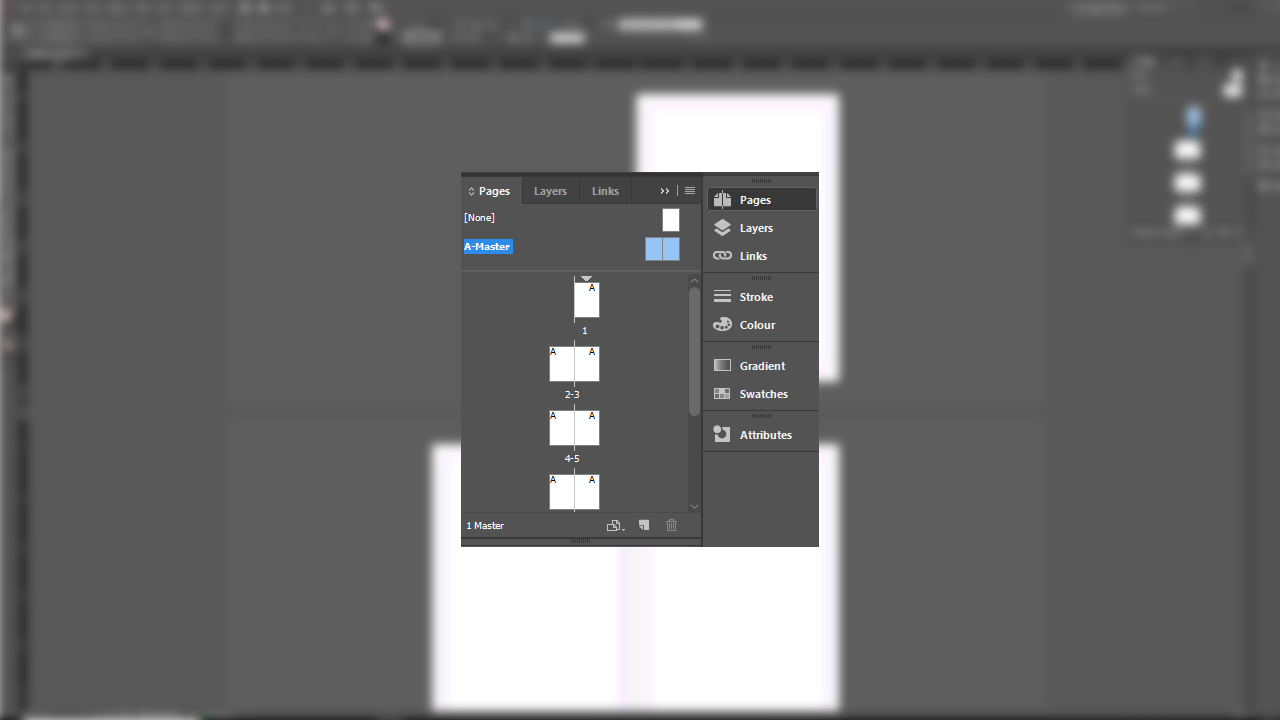
To add page numbering in InDesign, you have to edit the master page. The master page is also located in the Pages window above the individual document pages. The master page is representative of all document pages of the project. To edit the master page, double-click the A-Master icon.
A two-page master opens where the left page represents all left pages and the right page represents all right pages in the project. To add the page numbers, first zoom in on the lower edge of the document on the left page and select the Type tool.
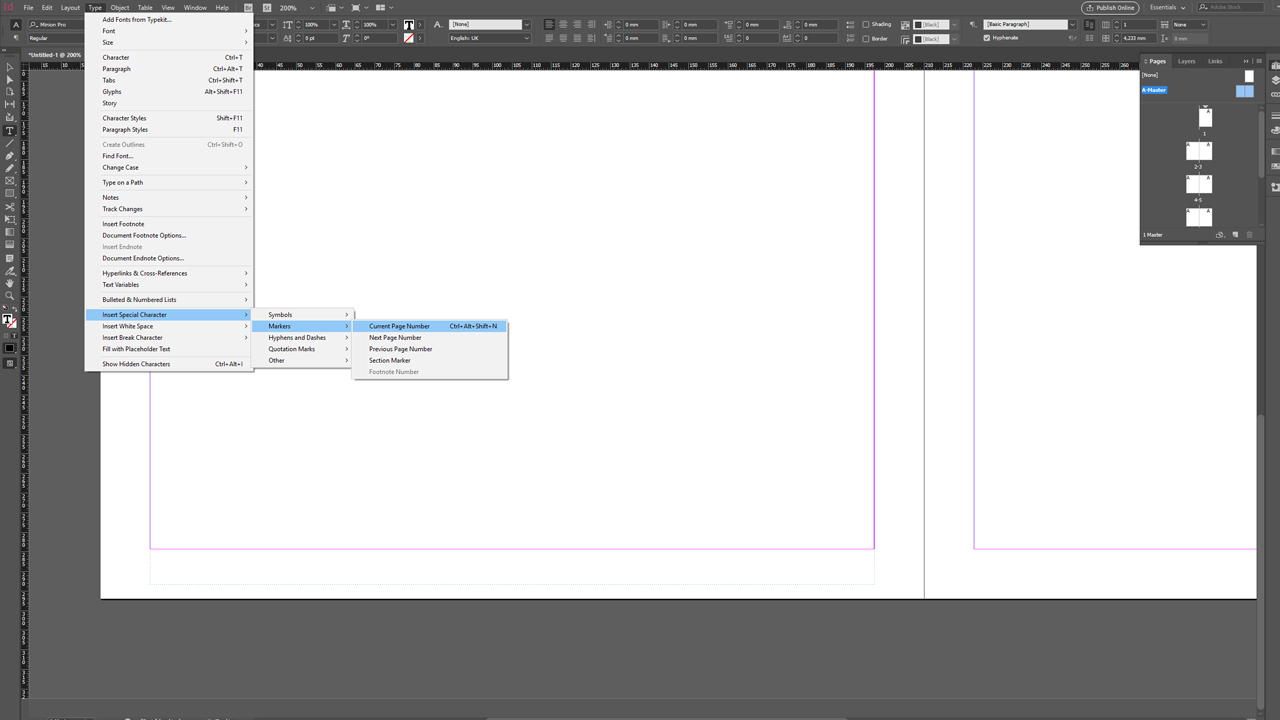
Now drag out a rectangular text frame across the entire page width of your canvas and in the top menu click Type > Insert Special Character > Markers > Current Page Number. If the automatic page number is on a master page, the text frame will display the master page prefix, “A” in this case. The “A” is a placeholder for the page number on a master page. On a document page, it displays the page number.
Step 4: Formatting page numbers
You can now format the “A” to your preferences. In the example, we choose the Nexa Light font with a point size of ten pt.
When formatting the page numbers, make sure that the master page prefix is not overwritten by another character or letter. Otherwise, the master page number will not be carried forward to the other project pages.
Step 5: Adding page numbers on the right pages
After you have adjusted and formatted the master page prefix, pick the Selection tool and hold the Alt key down. Now drag out a duplicate of the text frame with the left mouse button clicked and position the frame on the right. Then, select the master page prefix again and right-align it.
You have completed all steps to display page numbers on each page of your project document. Double-click a document page in the Pages window to return to the document view. You now see that each page has been assigned a page number in ascending order.
Start project with a left page
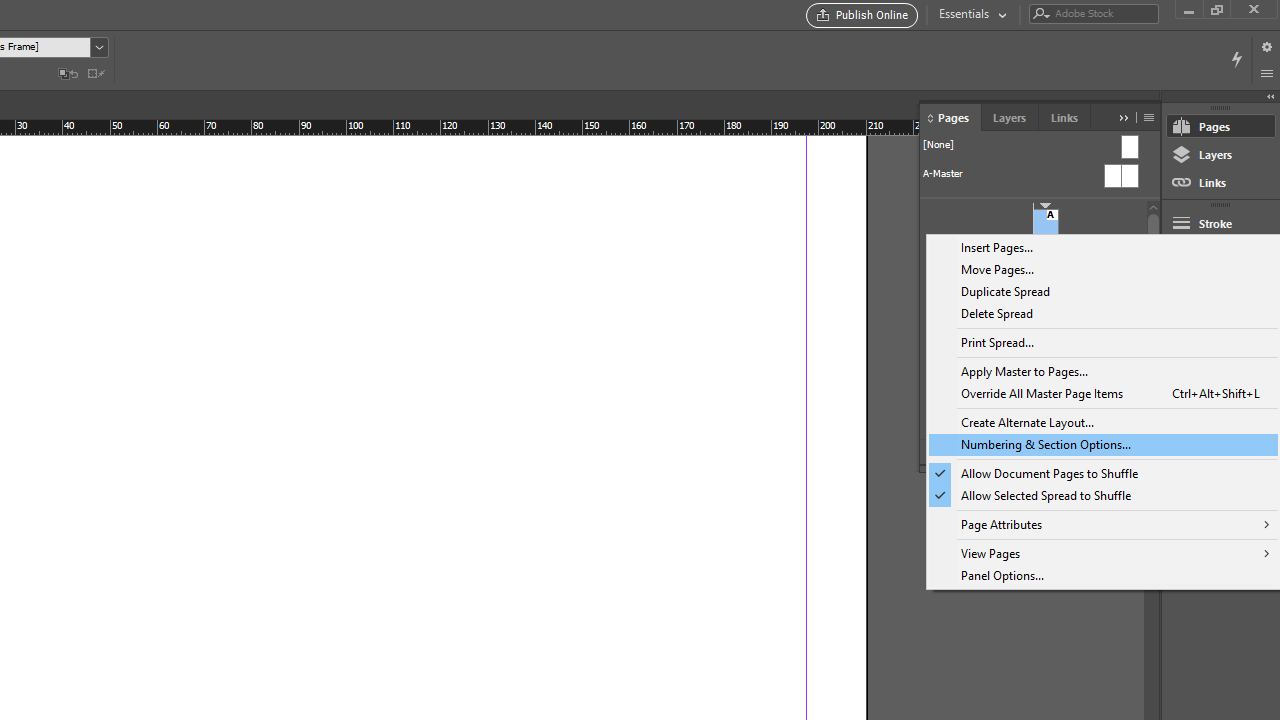
If you want to create a project or an individual article in a magazine or book, you can also start it on a left instead of a right page. To do this, open the Pages window again. Right-click on the first page of the project and select the Numbering & Section Options.
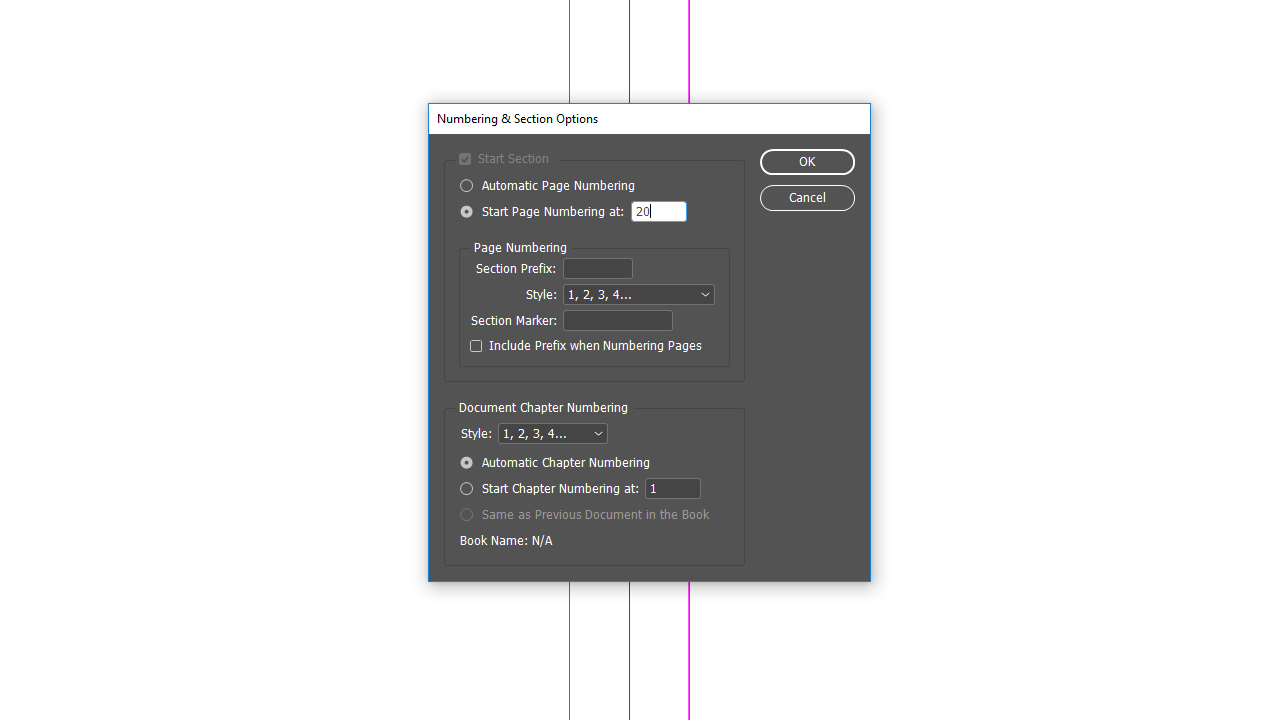
You can now enter an even number in the window under Start Page Numbering At and confirm with OK. Our demo project begins on page 20.
Note: InDesign automatically defines all pages with an even page number as left pages and all pages with an odd number as right pages.
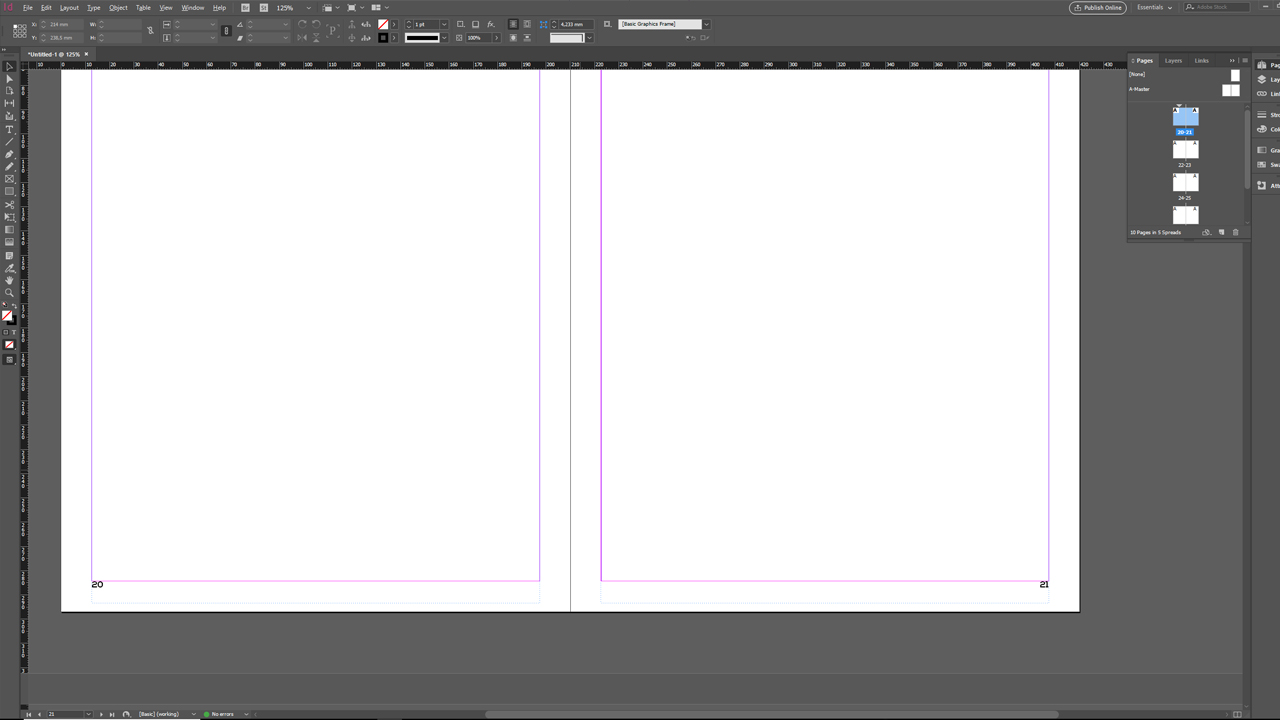
InDesign now recognizes that the number of the first page is even and accordingly aligns it as a left page. Existing page numbers on the other document pages are updated accordingly.
You can access the Numbering & Section Options on each page in your document. This allows you to end an article on a left page in the middle of a magazine and start again with a left page directly afterwards. This is especially useful if you want to include, e.g., an insert in your magazine.
The minimum number of pages is different and depends on the product selection and the associated stitching, glueing or other binding option. Therefore, it is important that you observe the exact specifications for your desired product made by the print shop.
Credits:
By media designer Christoph Ullrich.

