
Signs are everywhere: outside shops, on building roofs, in lobbies, etc. They come in all sizes but their shape is usually square. You can stand out from the signage monotony by creating a striking “contour cut” sign. Advertising signs cut to a specific shape provide a whole new level of design freedom. In this tutorial, you will learn how to create correct artwork files for a contour-cut lightweight foam board.
Contents of this article:
- What is contour cutting?
- How does contour cutting work?
- Which software to use?
- Design specifications
- A practical example: Tulip vase
What is contour cutting?
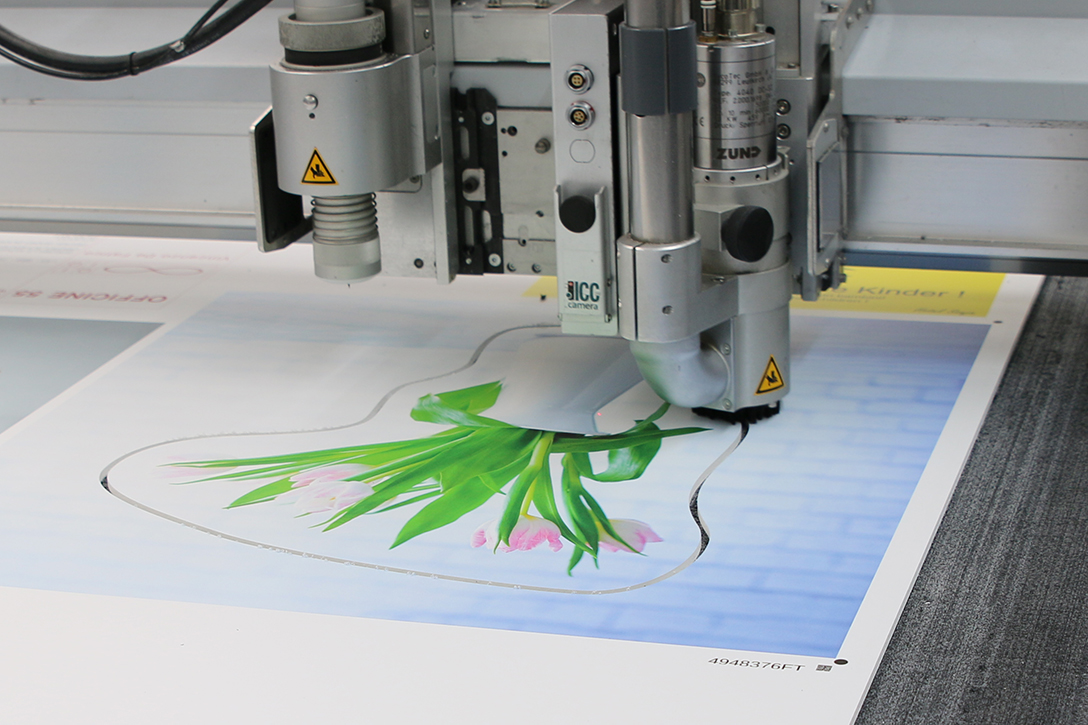
A special cutter trims the rectangular board to its custom shape. Whether it’s a simple circular logo or an entire slogan, almost anything is possible with contour cutting. The technique is ideal to create eye-catching signage for any occasion beyond square and rectangular shapes. Materials best suited to shaped designs include lightweight foam boards, rigid foam boards, DIBOND and corrugated sheets. All materials are suitable for indoor and outdoor use.
How does contour cutting work?
Any artwork to be shape cut must be supplied as a vector path that tells the cutter where to cut. This path is not printed. It merely provides the positional information for the cutter.
The right software
Adobe Illustrator or Adobe InDesign are the best choices to create vector-based paths that can be optimally processed by the cutter.
Design specifications
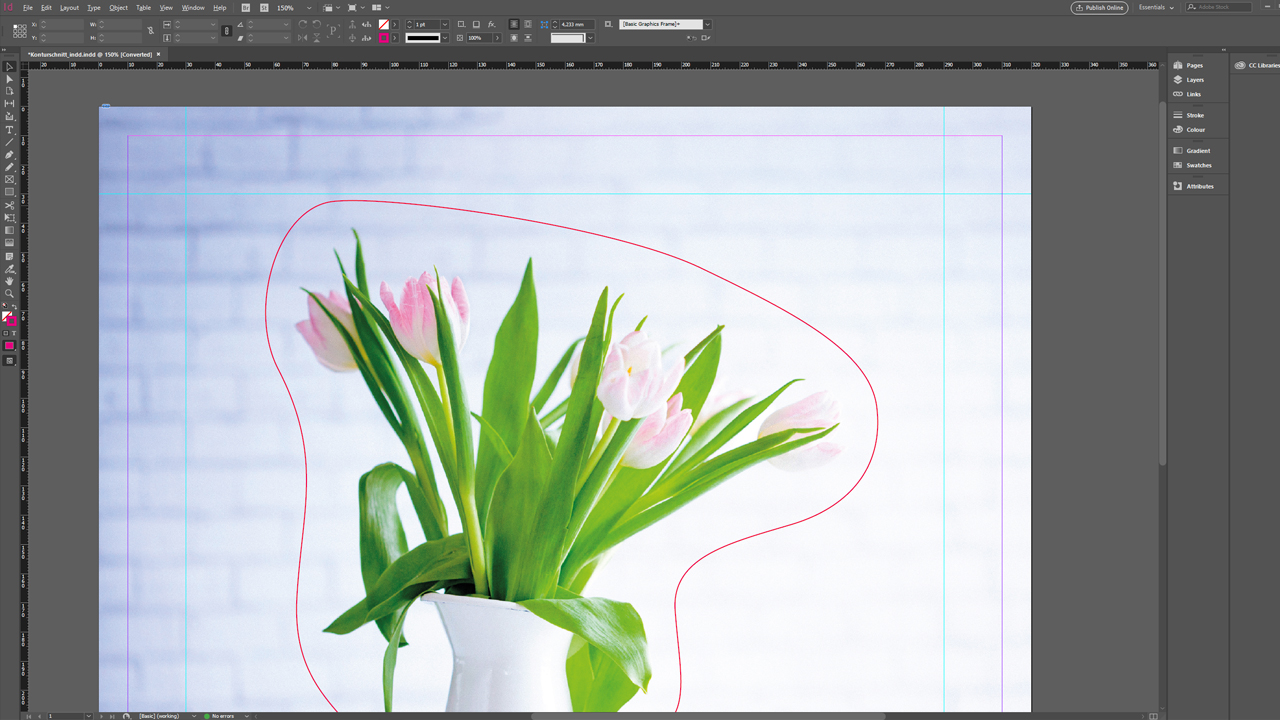
Like any print project, a shape cut also has specific requirements that must be met to obtain the desired result. We need a closed path which is continuous and where starting point and end point are the same. Moreover, the path must not have any sharp edges and the corner radius must not be less than 4 mm. Basically, trimming differences between 1 to 2 mm can occur. So there should be sufficient distance between the subject and the cutting path. We recommend a safety margin of at least 3 mm. To be on the safe side, a greater margin is better.
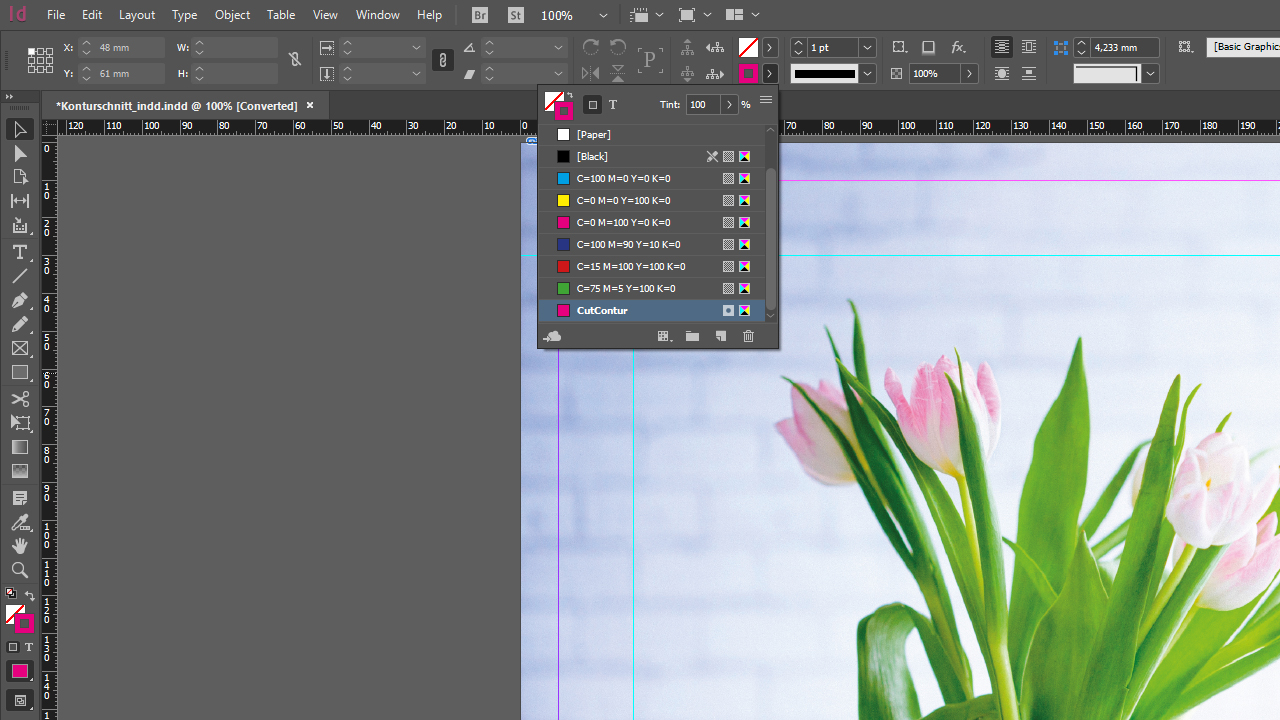
The path must have a 100% Magenta, 0.5 or 1 pt stroke spot colour named “CutContour”. The contour stroke weight is only relevant for viewing and irrelevant for cutting because the contour will not be printed and the cutter will process the basic path information and not the weight of the contour.
Important notice:
You must name the new spot colour “CutContour”. This enables the cutter to recognize that it is a cutting path.
The practical example: a tulip vase
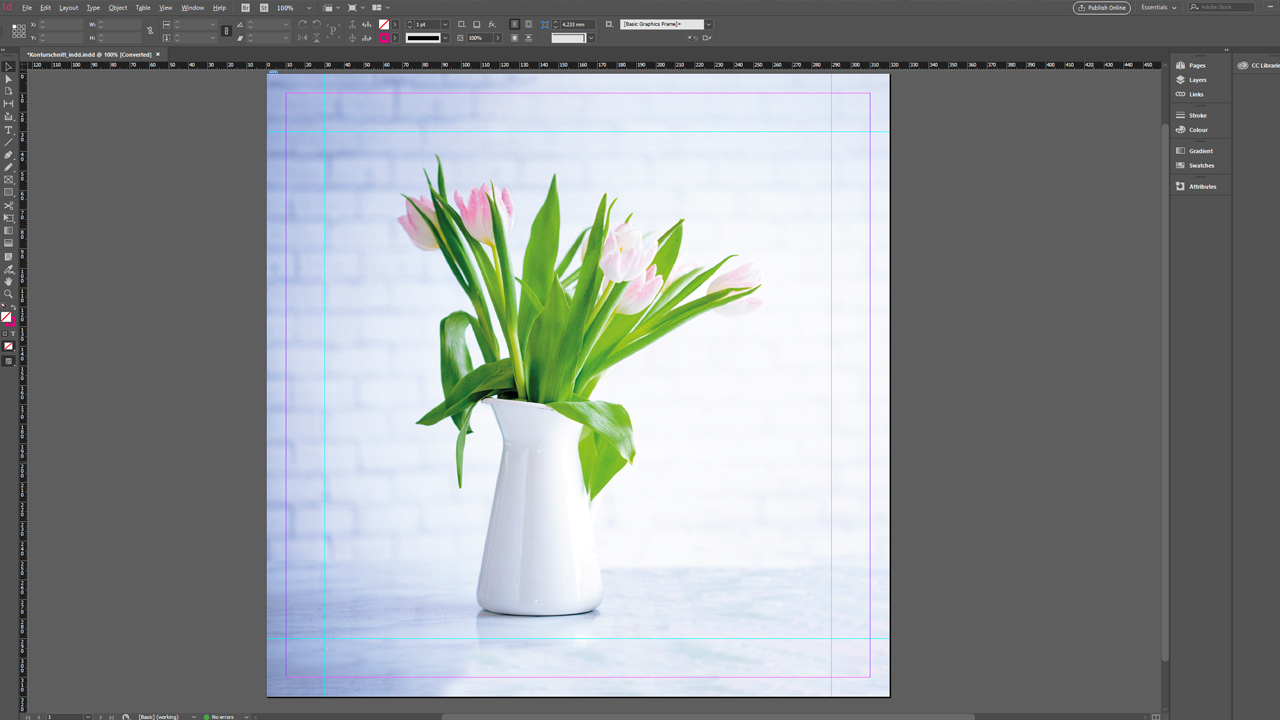
In our demo project, we want to cut this photo of a tulip vase to a custom shape. The photo has 300 dpi resolution which is an ideal value and suitable for a medium-sized project. The minimum resolution for advertising signs should be 120 dpi. We want to print a square 50 x 50 cm advertising sign on KAPA Plast (5 mm).
To create our artwork file, we use the InDesign template provided on the product page in the online shop. It comes preloaded with all settings for the correct PDF export. Only the path for the contour cut has to be created manually.
Open the downloaded template in InDesign, drag out an image frame and position the photo into the template using the shortcut Ctrl + D. We recommend positioning the photo on a separate layer and then locking it in the Layer panel to prevent moving it accidentally. For the contour cut, we will then create a separate new layer.

In the next step, the “CutContur” spot colour is created. To do so, open the Color Theme and click New Swatch. Name this swatch “CutContour”. This name is necessary because the cutting tool recognizes the path in this colour as the cutting path. Moreover, set the Color Type to Spot Color and define the colour composition as 100 % Magenta. Click OK to confirm the settings.
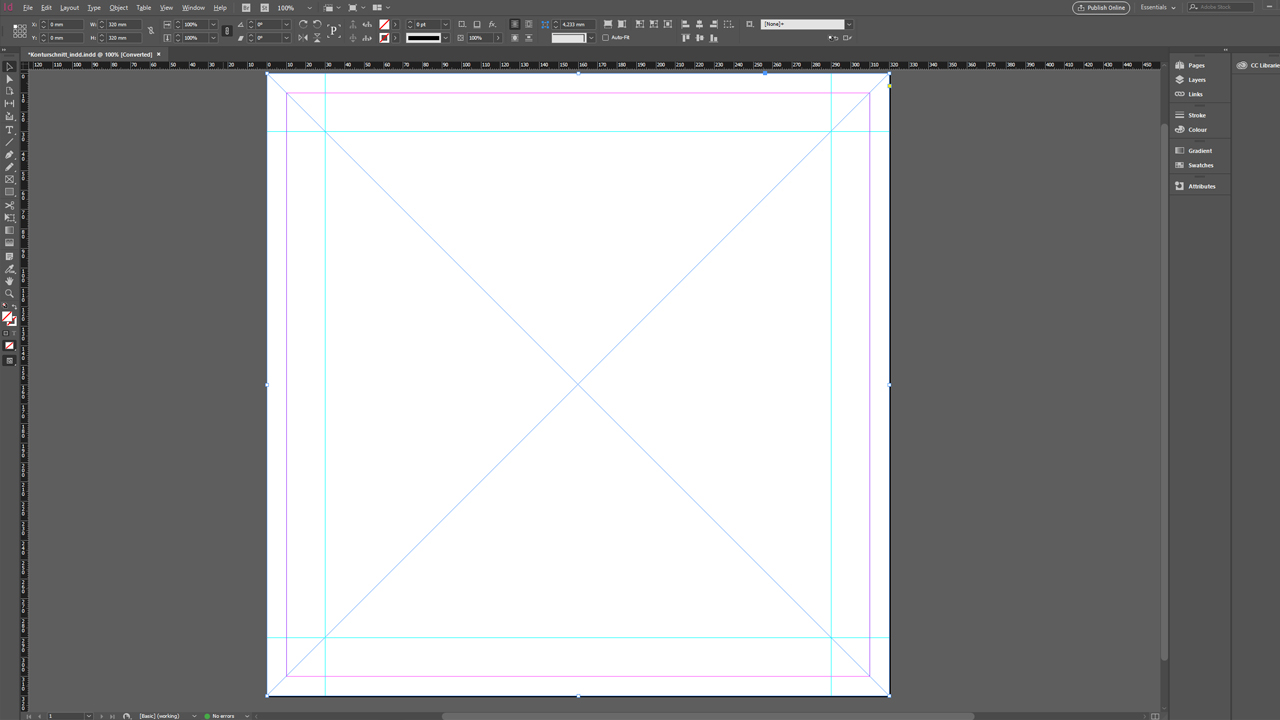
Now we create the path around the subject. From the toolbox, select the Pen Tooland choose a starting point at a sufficient distance to the subject. Click the desired position to add a new anchor point. Hold the mouse button down and continue to move the mouse; try moving it to the right and left to define the curvature of the segment, turning a linear path into a curve. Setting the anchor points and aligning the curve can be a bit tricky. Fortunately, you have the Ctrl + Z shortcut to undo any mistakes. Holding the Ctrl key, you can click the individual anchor points and correct the position and the angle if necessary.
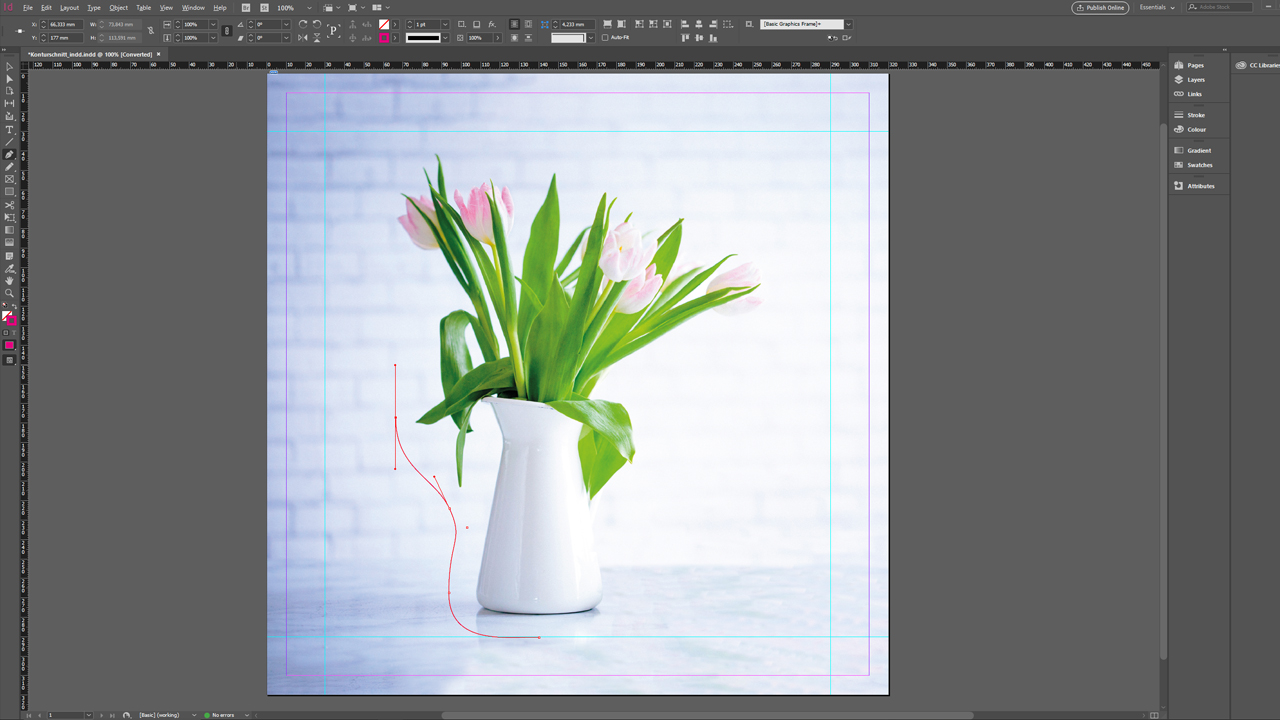
Make sure to keep an even distance to the design. Once you have set all anchor points, click the starting point to complete the path. There you are!
As the last step, check again that the path is really coloured in the “CutContour” colour.
Now click File > Export to save the project as a PDF file. Thanks to the template, you don’t have to make any further settings in the Export window.
Our tulip vase is a great decorative element for the office, cafeteria or lunch room. When you observe the shape cut specifications, there are no limits to your design freedom. Whether decorative visual, cursive slogan, mascot or logo, contour cutting makes all your shaped design dreams come true. Grab attention with custom shapes!
All information on contour cutting and many more subjects related to creating, saving and submitting artwork, can be found in the Support Centre of Onlineprinters.
Credits:
By media designer Christoph Ullrich.

