
Smart Objects open up a wealth of versatile Photoshop functions. Just converting an image to a Smart Object can simplify the entire image editing workflow. In this tutorial, we will show you three ways to use Photoshop Smart Objects to facilitate your work.
Contents
- Smart Objects in Photoshop
- Scaling images without information loss
- Adjusting effects subsequently
- Using Smart Objects as mock-ups
Using Smart Objects in Photoshop
Everyone who works with Adobe Photoshop has probably scaled down an image at some point only to find out that the original version looked better. Unfortunately, a great deal of image information was lost during the scale-down process which cannot easily be restored. This is where Photoshop Smart Objects come into play.
The general function
When importing an image in Photoshop, it will be imported directly as a Smart Object. This means that not just an image was imported but a new document which contains the complete image data in addition to the imported image. This yields a major advantage when editing the image: When scaling the image, the imported document is reduced but not the image itself. The original data are preserved, allowing the image to be scaled back to the original size without loss.
How can I tell if I am working with a Smart Object?
The small file icon in the lower right corner of the thumbnail indicates that you are dealing with a Smart Object. If there is no such file icon, the image data cannot be scaled without quality loss.

In Photoshop, you can convert your image or layer to be edited to a Smart Object at any time. Right-click on the desired layer and choose Convert to Smart Object.
All image information is saved and retained at the time of conversion. Scaling the image larger beyond its original dimensions will of course affect image quality and the image may appear to be very fuzzy or pixelated. Therefore, you should always use the automatic function where a newly imported image is created directly as a Smart Object. Do not convert it into a rasterised layer unless this is necessary for other image editing steps.
Further application options of Photoshop Smart Objects
You now know that a Smart Object retains all relevant image data. Moreover, a Smart Object can be used to create an applied effect in such a way that subsequent changes and adjustments are possible. This means you don’t have to undo the effect first via Ctrl+Z. Instead you can open the dialog of the corresponding effect directly in the Layers panel by double-clicking on the effect.
The Smart Object is also very popular to create mock-ups. For example, you want to create a mobile phone mock-up to show a sequence of images on the screen. Then you can use Smart Objects to insert a new image with just a few clicks. This saves you the time of having to adapt a new image to the screen each time.
Example 1: Scaling images without quality loss
In this first example, we want to illustrate the basic function of Smart Objects again. The image of the dog is located on the left side of the document as a rasterised layer. If you significantly scale down the size of this image using Ctrl+T, hit Enter and then scale back to the original size, you will see a clear difference to the image on the right (in the above image and in the video).

The scaling has resulted in a loss of image information and thus reduced the quality of the image. The image on the right was converted to a Smart Object first as indicated by the small file icon on the layer thumbnail.
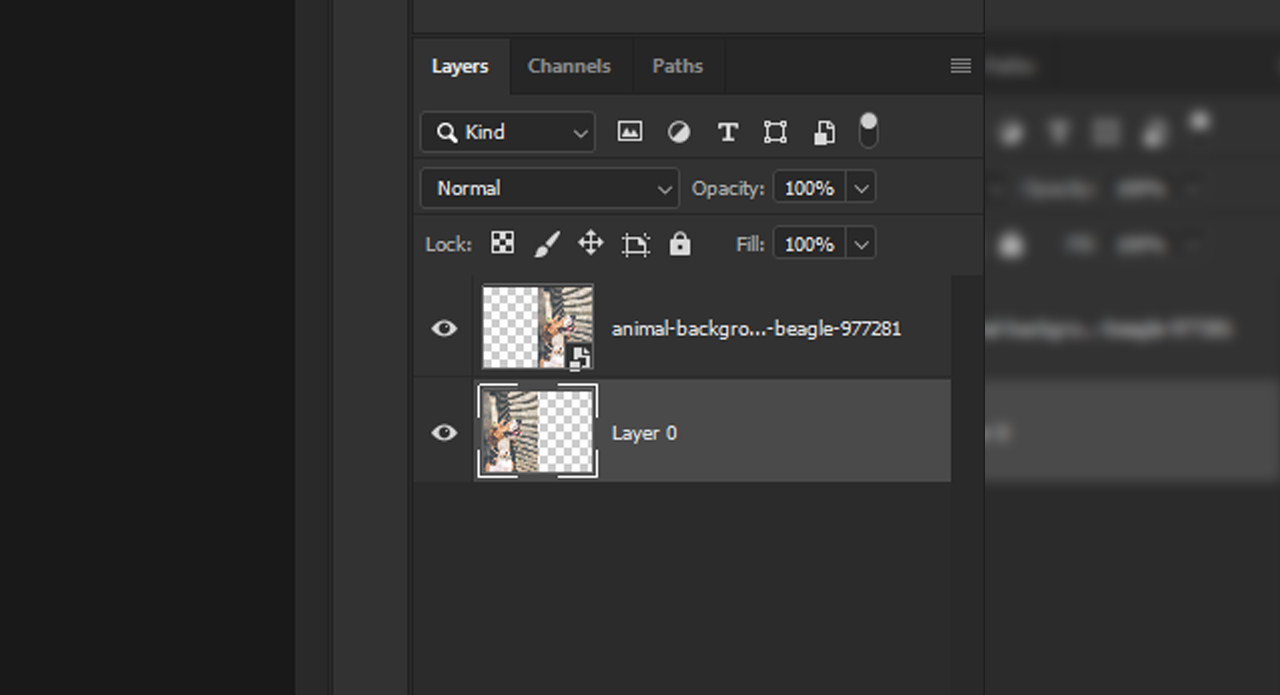
Now if you scale down this image, hit Enter and subsequently scale it back to the original size, you will see that the image stays razor sharp. By converting the image to a Smart Object, all the original image information prior to the conversion will be saved and preserved for the further workflow.
Example 2: Adjusting effects subsequently
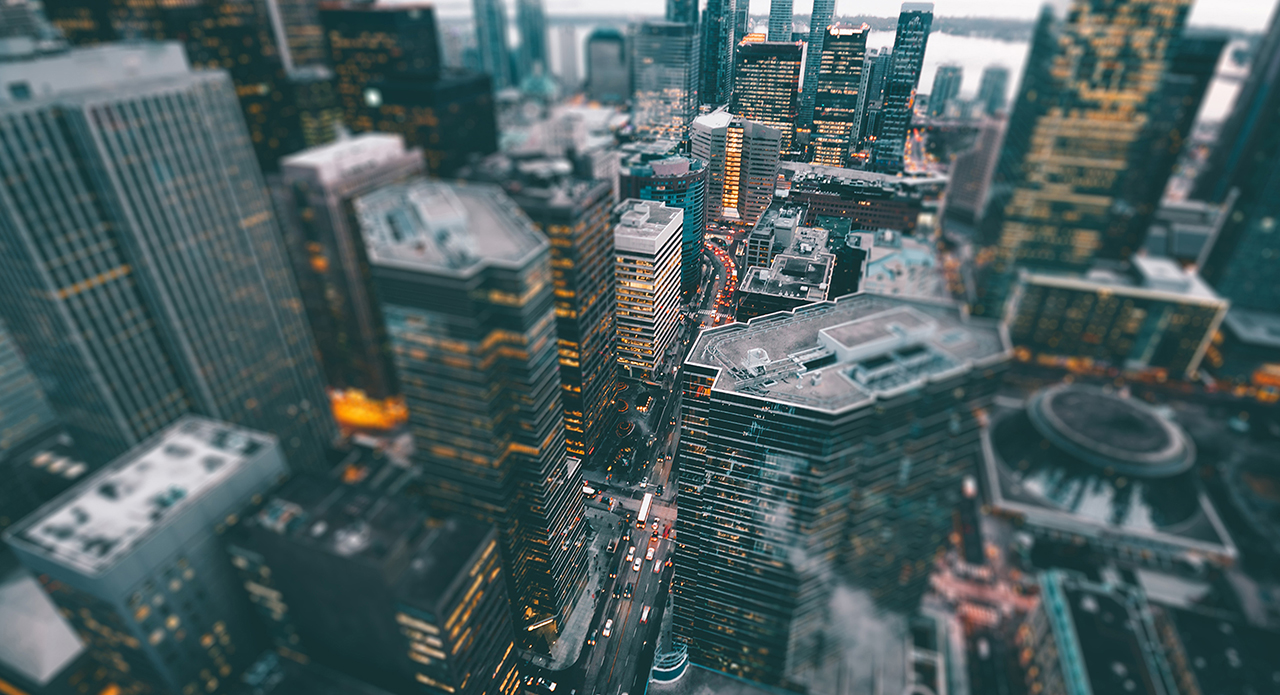
In this example, we want to apply a tilt-shift effect along the road, an effect which is currently very popular. This effect will blur all selected regions while maintaining focal points in others. First convert the image to a Smart Object: Right-click on the image layer and select Convert to Smart Object.
The tilt-shift method
Tilt-shift photography is the use of camera movements that change the orientation and/or position of the lens. This creates a miniature effect or diorama illusion. The effect can also be created artificially when post-processing images, e.g. in Photoshop.
Choose Filter → Blur Gallery → Tilt-Shift. A dialog box opens in which you can adjust the tilt-shift effect to follow the road. The small, circular controller lets you adjust the intensity of the blur effect.
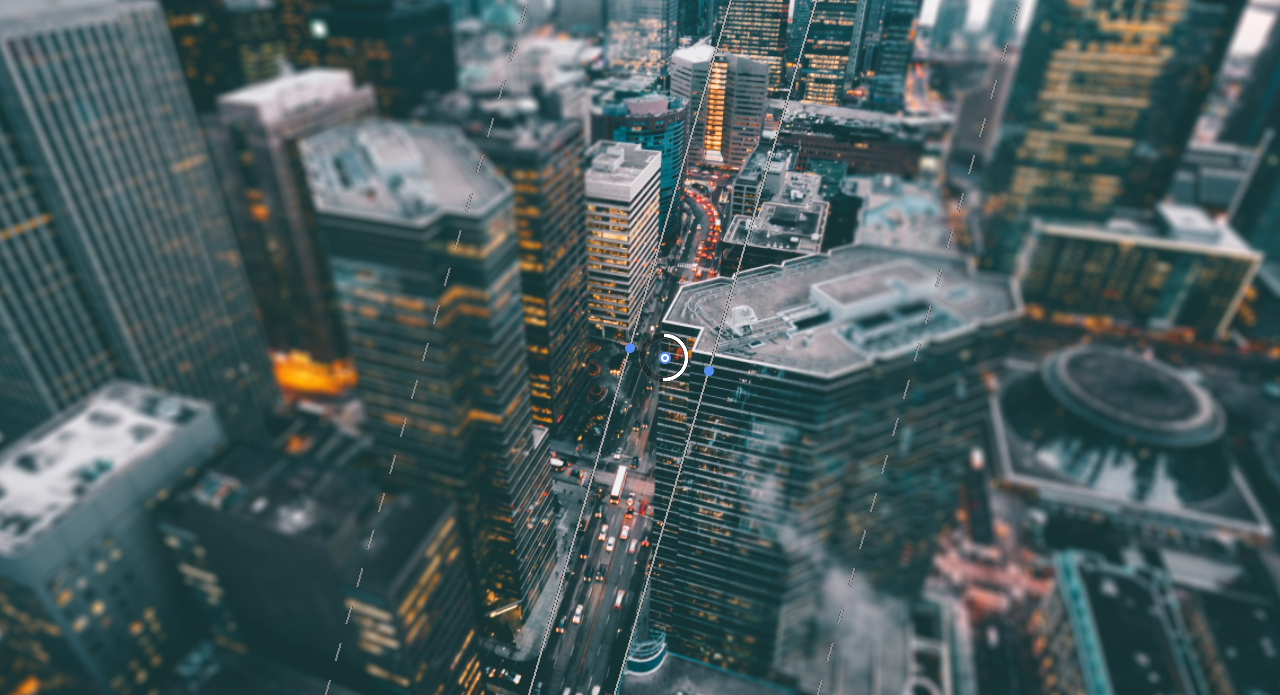
Then click OK in the upper part of the dialog to apply the effect. You now see the image layer and the underlying effect in the Layers panel. The effect was created as a so-called Smart Filter and now allows you to edit the effect settings with a double-click.
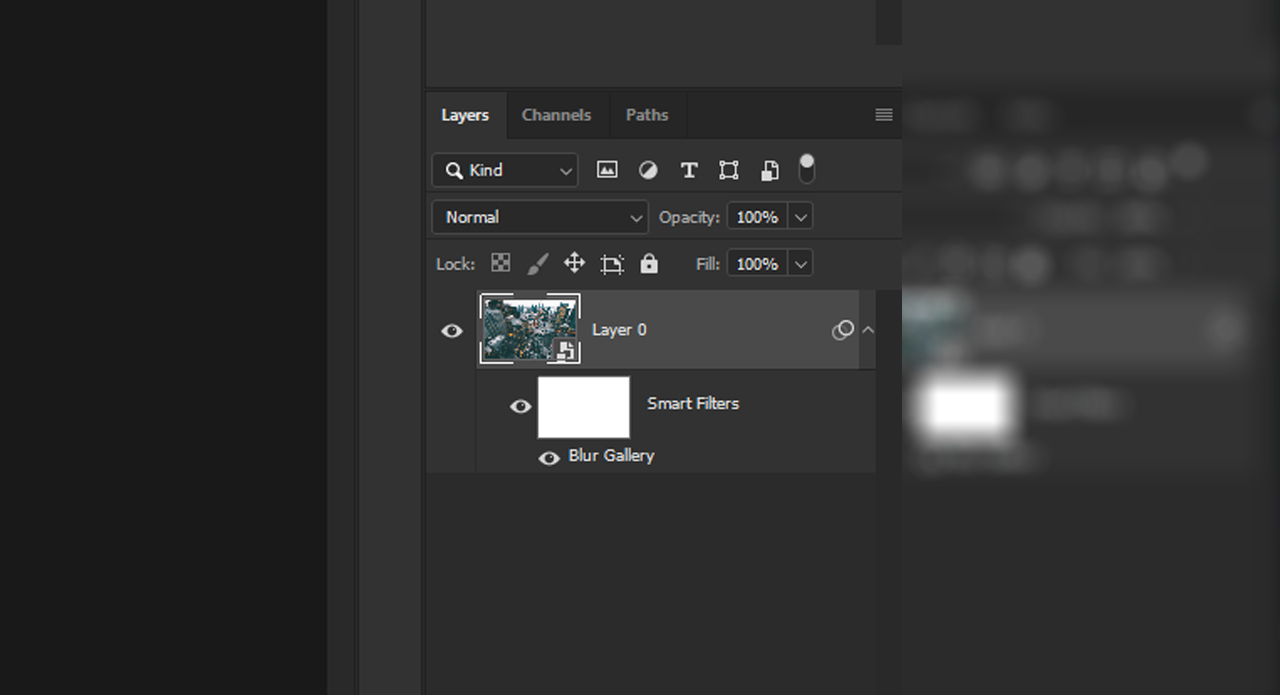
This takes you back to the panel of the tilt shift effect. In addition to the Smart Filter, you have a layer mask which you can use to exclude areas from the effect.
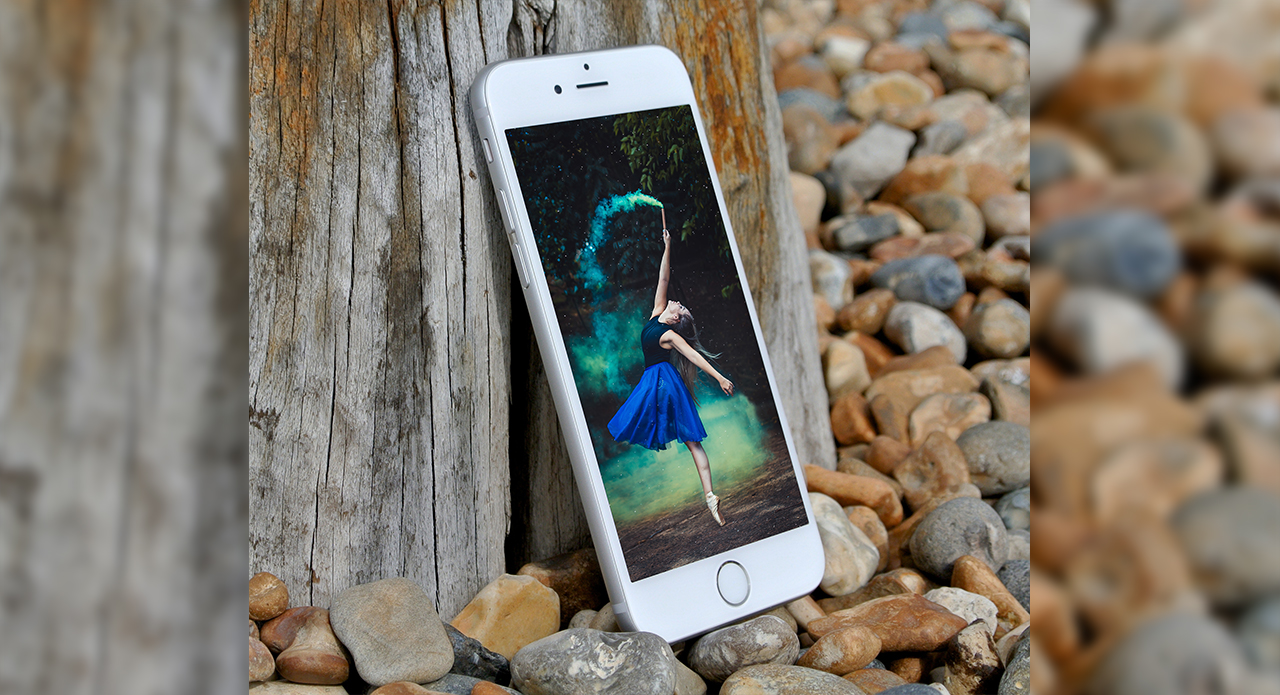
Example 3: Using Smart Objects as mock-ups in Photoshop
We want to insert an image on the display of the smartphone leaning against a tree which changes regularly and which is aligned in perspective. Of course, you can import an image and adjust it manually to the display each time. The use of Smart Objects makes this step redundant.
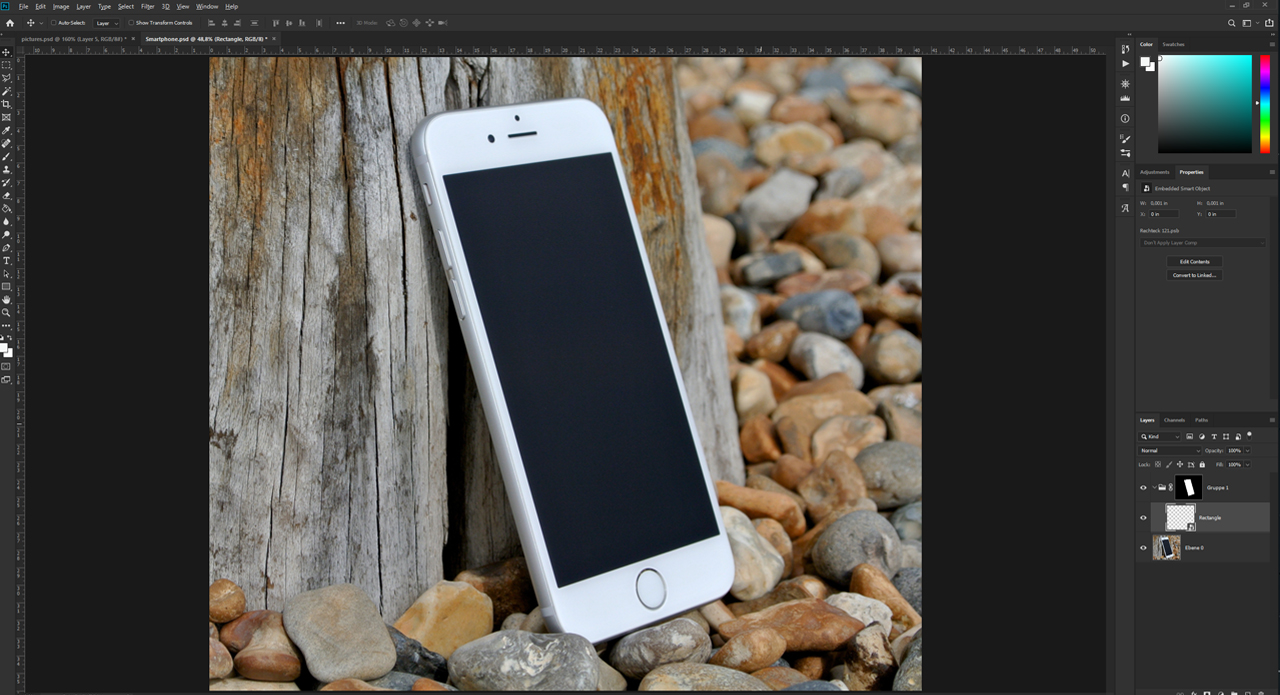
Converting the layer for the mock-up to a Smart Object
To facilitate the adjustment to the display, we already created a layer mask to a folder around the display. Next use the Rectangle Tool to drag out a frame about the size of the display. Then right-click on the rectangle layer in the Layers panel and select Convert to Smart Object.
Editing the area
All information, such as the dimensions or the current colour of the rectangle, is saved. If you haven’t done so yet, drag the rectangle into the folder with the layer mask and click Edit → Transform → Distort. Now you can click and drag each corner handle with the left mouse button to adapt it to the size of the smartphone display.

As soon as the rectangle covers the entire area of the display, hit Enter to confirm your settings.
Inserting the image
To insert an image into the rectangle, double-click the rectangle layer in the Layers panel to open your rectangle as a new linked document. You are now inside the Smart Object in the source file in a manner of speaking. Since the conversion to a Smart Object took place before the rectangle was adapted to the display, you will see the familiar top view of the rectangle here. You can now import an image into this area and adjust it as needed.
Saving the Smart Object and finishing the mock-up
After editing the image, the document or Smart Object must be saved. This is also indicated by a small asterisk in the upper document tab. Press Ctrl+S to save. You can then close the document by clicking the X in the document tab and return to your smartphone mock-up. You image is now displayed over the screen area and is thus correctly aligned in perspective.
In the last step, you can save the document as a PSD file to be able to change the image on the smartphone display at any time with a double-click on the rectangle layer in the Layers panel.
Credits:
Speaker and designer: media designer Christoph Ullrich.

