
Using filters to edit photos is an essential element of Adobe’s graphics editor. There are filters to change colour, add blur or create completely new image effects. Photoshop offers a virtually unlimited variety of filters for this purpose. In this video tutorial, we will introduce you to three different filters and explain how to apply them to your images with just a few clicks.
Photoshop filters – multi-tools for image editing
Adobe Photoshop provides filters for various image editing tasks. For example, you can give a photo a pin-up look with just a few clicks, change colours, sharpen edges or add a tilt-shift effect. Photoshop offers a wide selection of different filters that can greatly facilitate your work and workflow. The Filter menu contains filters for blurring, sharpening images or changing the noise.
Content
- Video tutorial
- Filter gallery
- No matching filter? No problem!
- Pin-up look
- Lens flare effect
- Motion blur
- Note: More filter tutorials
Filter gallery
The Filter menu also contains the Filter Gallery which comprises various other filters divided into different categories such as Artistic, Sketch or Texture. This allows artistic and other effects to be implemented with just a few clicks. The Filter Gallery panel shows a preview of the available filters. The settings can be edited directly in the window.
No matching filter? No problem!
Everyone who has some experience with using the graphics editor will at some point have faced the challenge of editing a photo without a suitable Photoshop filter. Equipped with a little know-how, you will be able to create your own filters and customise photos to your exact requirements. For this, it is important to know that filters are not only found in the Filter menu but are hidden in numerous other places, such as the Layers panel or the Adjustments panel.
Pin-up effect with Photoshop filter
Conversion to Smart Object
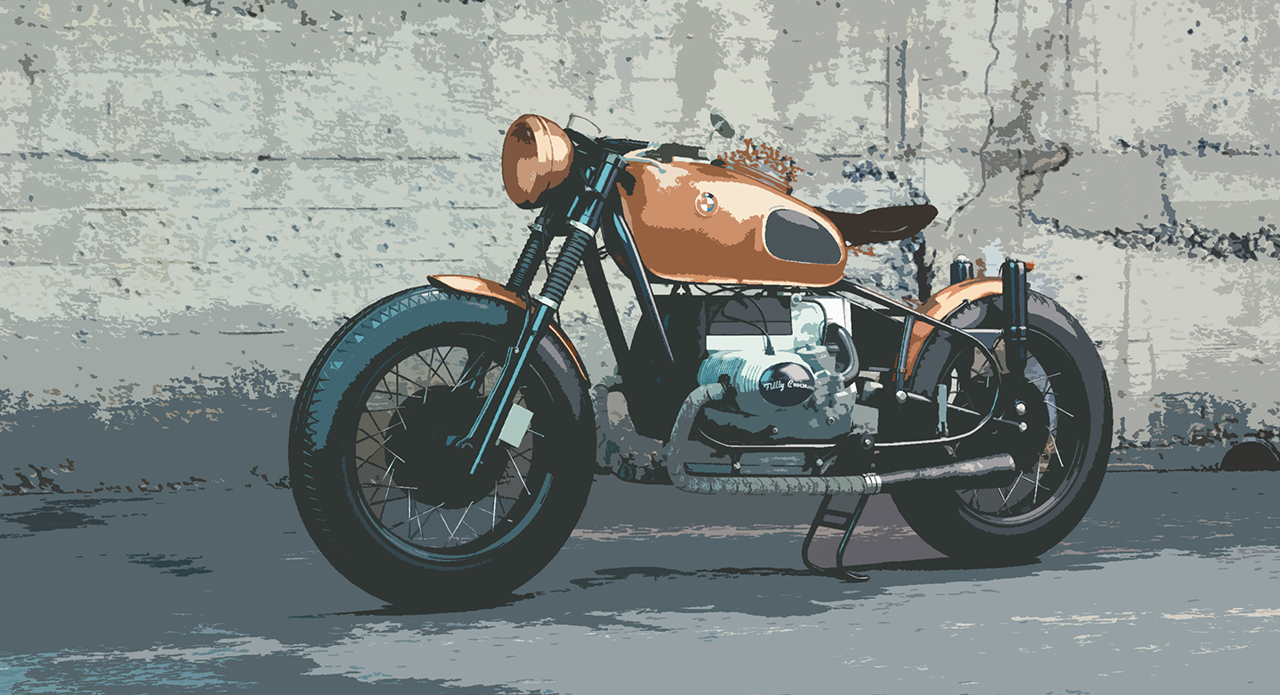
In the first example, we want to add a pin-up effect to the photo of a classic motorcycle. The beauty of Photoshop is that there is not one right way to do it but multiple ways to achieve what you are aiming for. Each method has its pros and cons. The easiest way to create a pin-up effect is via the Filter Gallery. Before you open it, right-click on your image layer in the Layers panel and choose Convert to Smart Object
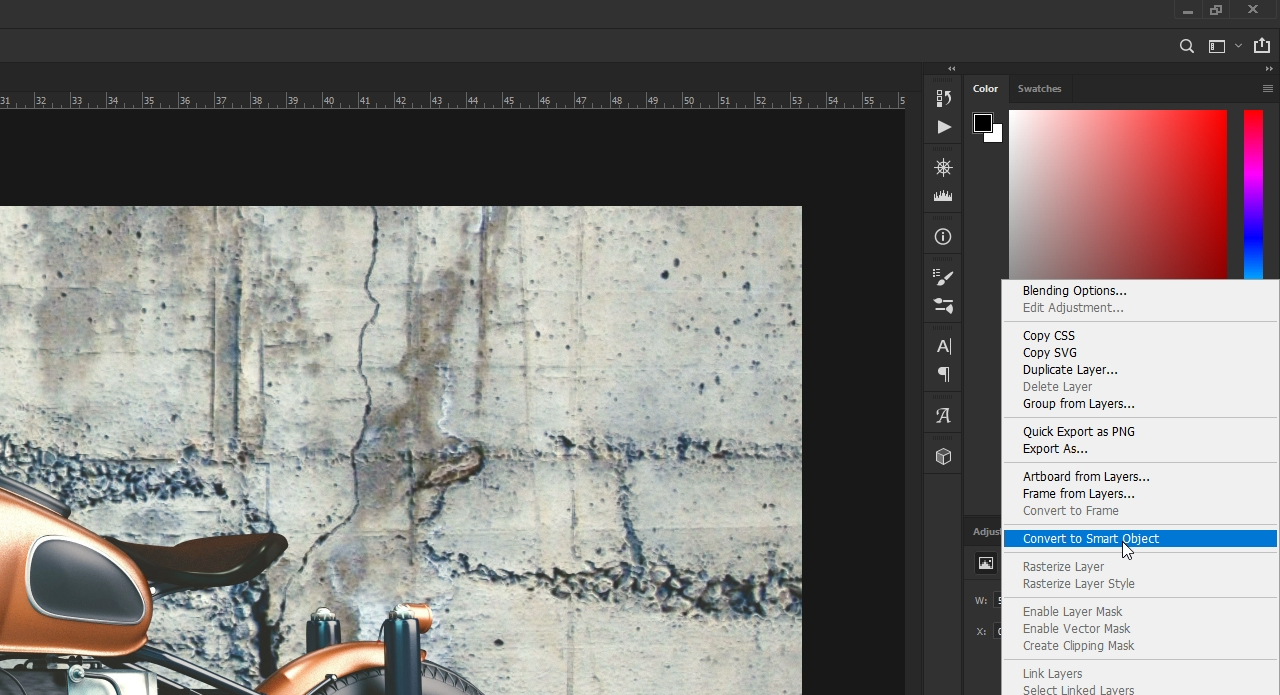
to make sure that you can still edit the settings after applying a Photoshop filter. For this reason, it is recommended that you always convert the image to a Smart Object before editing it.
Note: To learn more about this practical function, read our article “Photoshop: Smart Objects and their benefits“.
Effect from the Filter Gallery
Next click Filter → Filter Gallery. A panel opens showing a preview of the selected filter applied to your photo. To its right, you see the folder structure with numerous predefined filters and their setting parameters. To create the pin-up effect, click Artistic and choose Cutout.
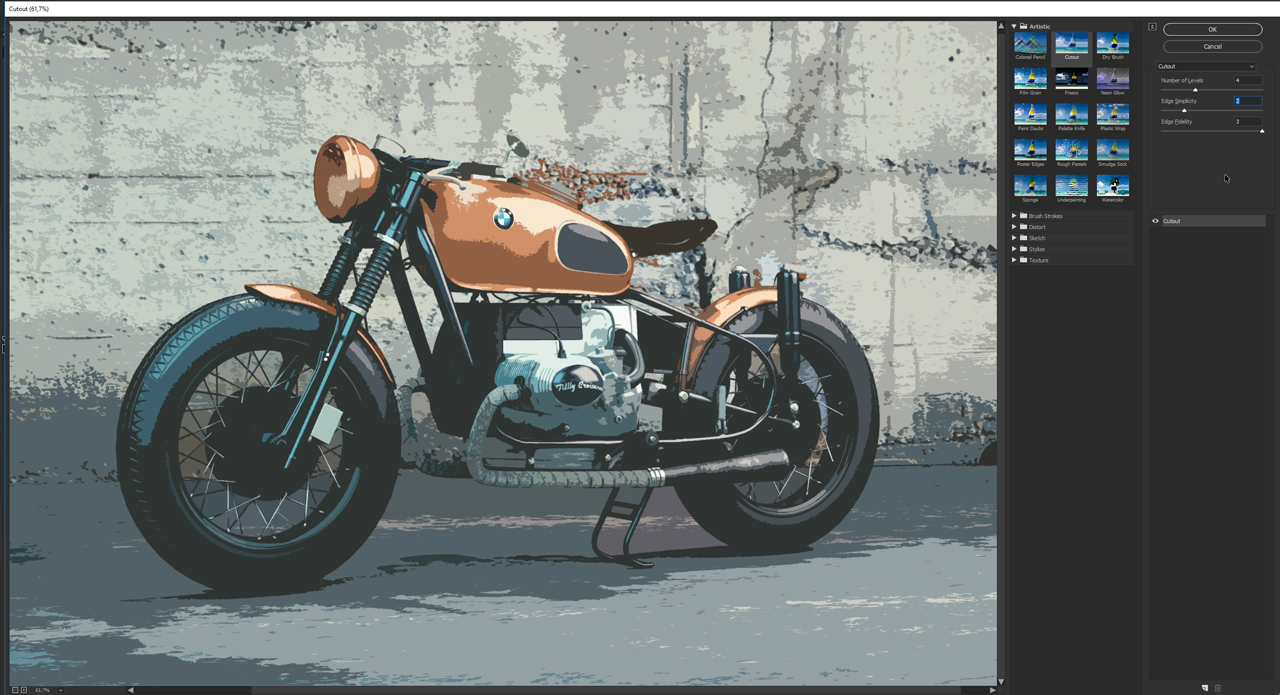
Adjusting the parameter settings
The result of your pin-up effect is displayed in the Preview window. You can use the setting parameters on the right to tailor the effect to your liking. In the example, we set the Number of Levels to 4, Edge Simplicity to 2 and Edge Fidelity to 3. Confirm the panel settings with OK to apply your filter to the photo.
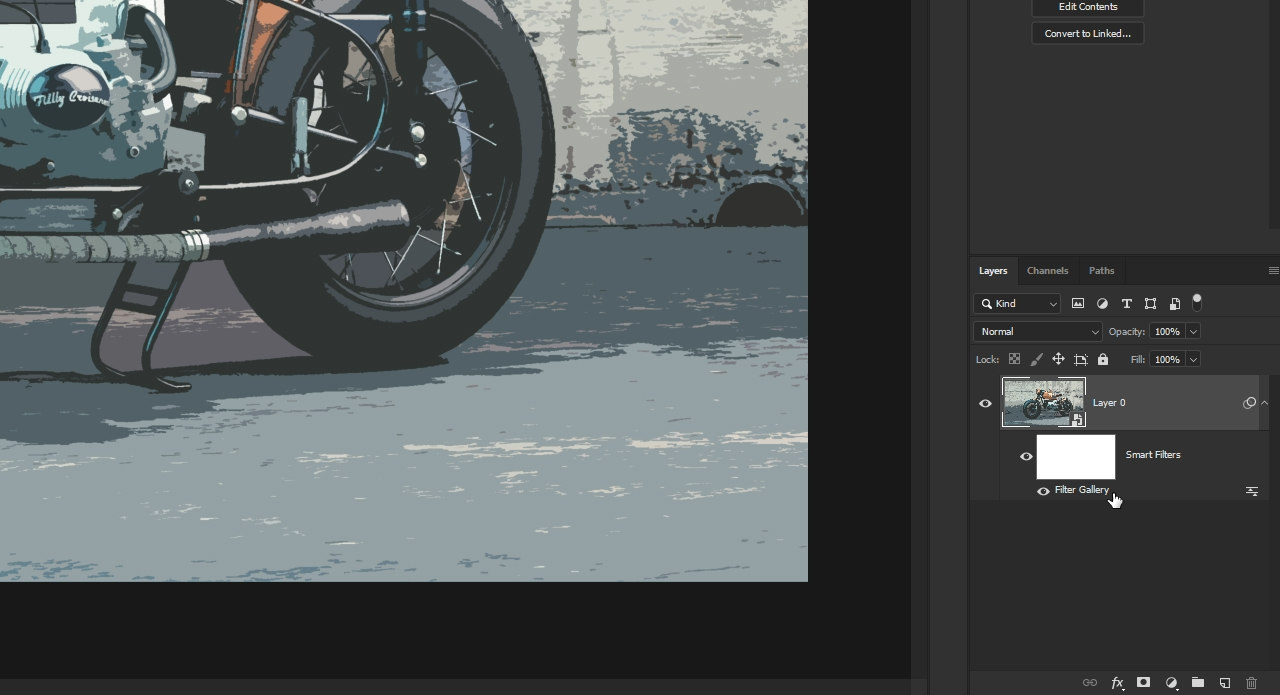
Smart Filter
In the Layers panel, you also see the so-called Smart Filter which contains your pin-up effect. Convert it to a Smart Object to access the effect settings again with a double click at any time.
Lens flare effect

Creating an additional layer
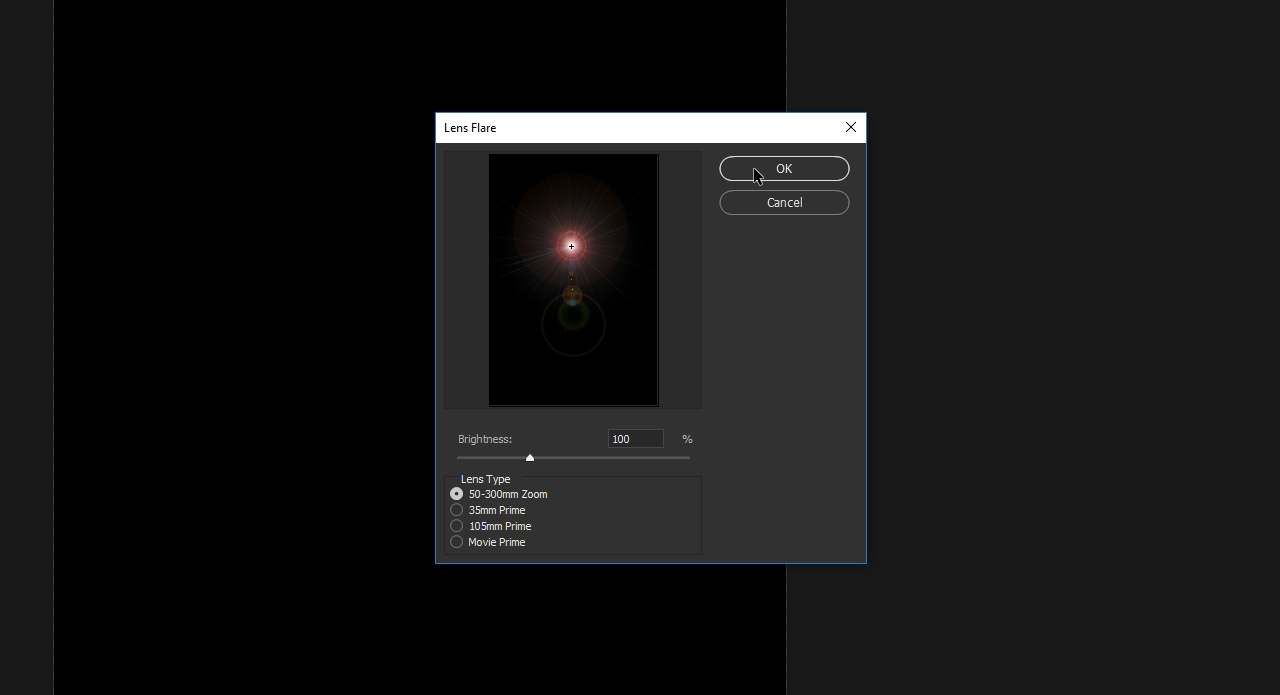
In this example, we want to increase the sunlight in the photo. The easiest way to achieve this is to use the Lens Flare filter in Photoshop. Since we want to combine two different components (light and image), we first create a new layer with black as the fill colour.
Lens Flare
Next click Filter → Render → Lens Flare. You then see a small panel showing a preview. The light effect is already visible in the preview and you can move it via the small cross hair at its centre. In the example, we set it a little above the center.
Blending mode
You can adjust the intensity and display of the filter using the setting parameters below. Then confirm the dialog with OK and change the blending mode to Color Dodge.
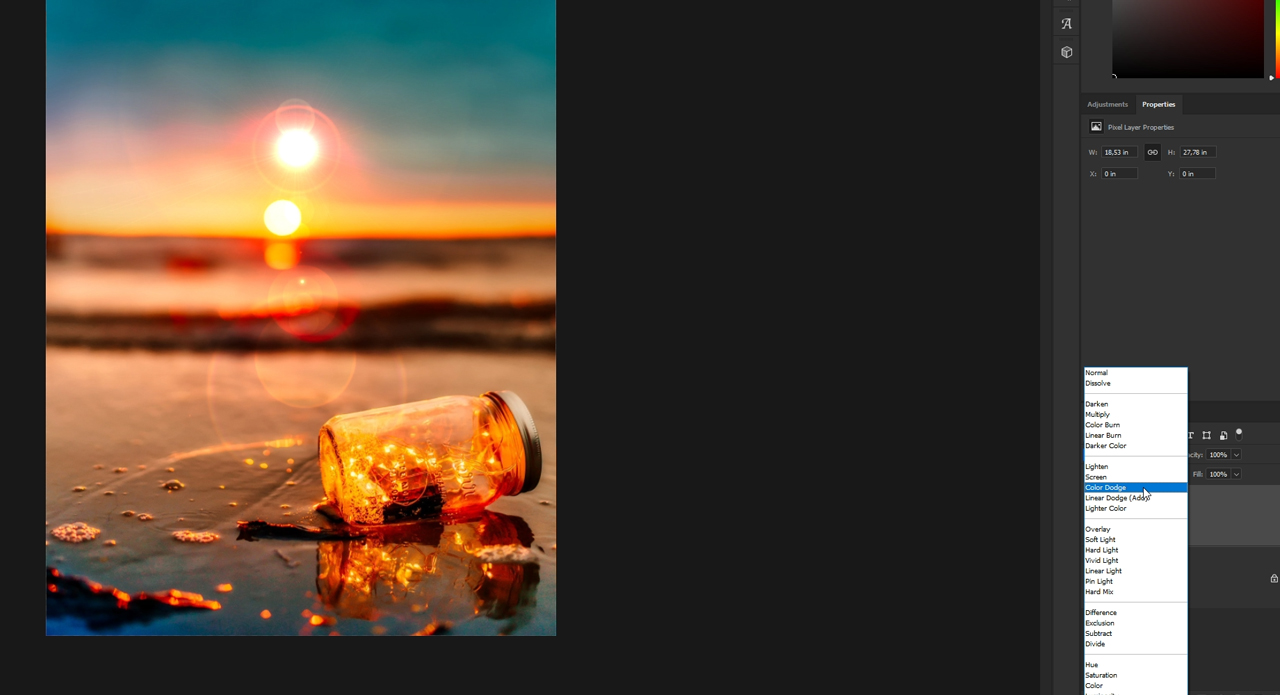
In some cases, you may achieve better results with other blending modes. Just try out different modes. The “Color Dodge” blending mode causes the layer with the light effect to be combined with the original photo. Press Ctrl+T to align the effect with the sun and rotate it slightly towards the bottle lying in the sand. To blend the two layers a little more, we additionally reduce the opacity to 80 %. This is a simple and fast method of intensifying the sunlight.
Photoshop filter for motion blur
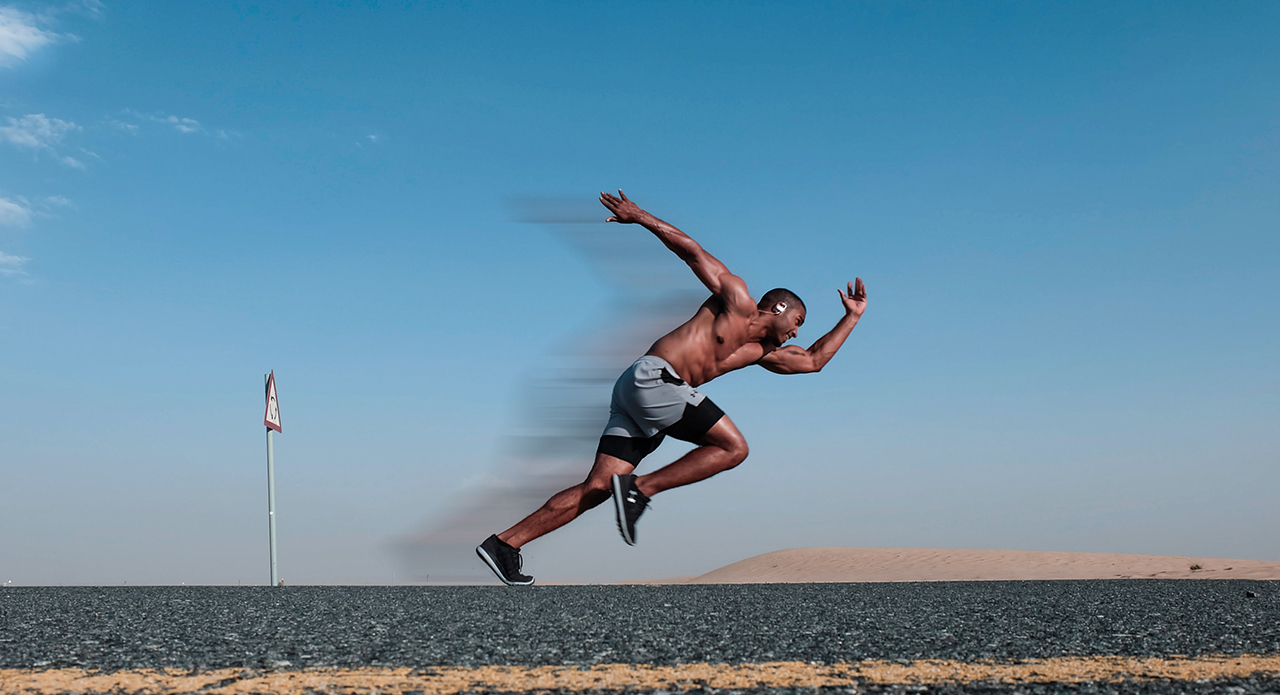
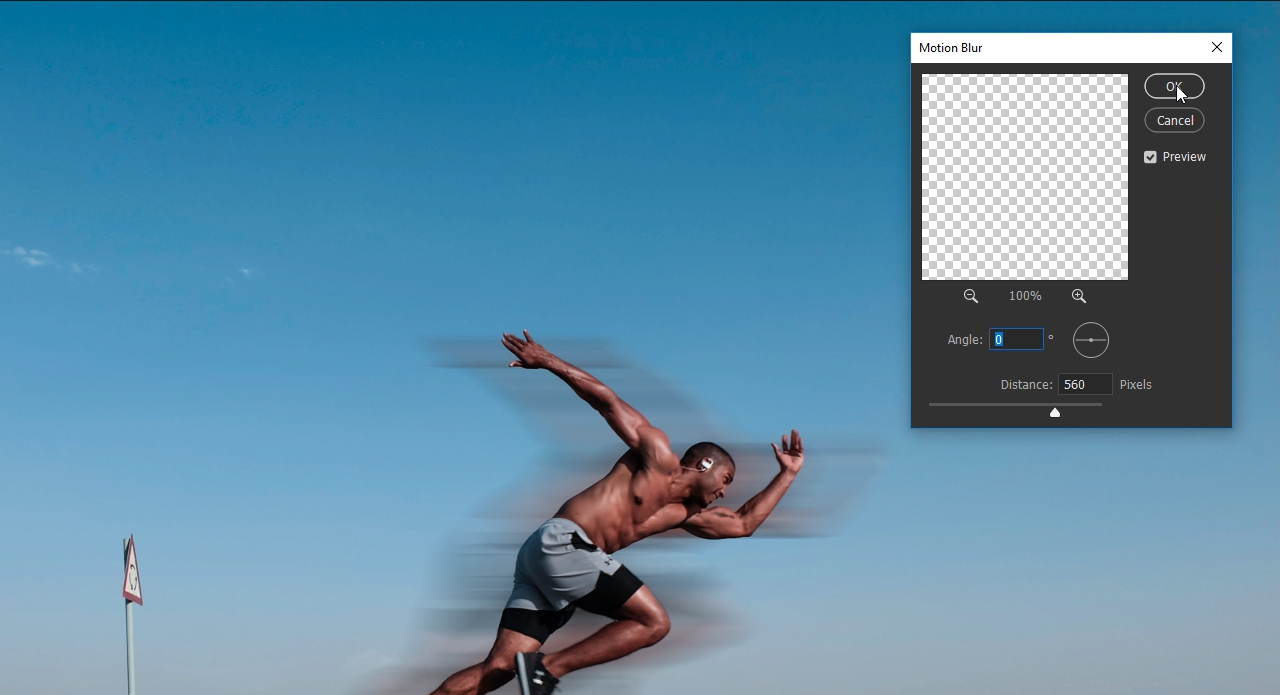
In our last example, we want to add motion to the photo using the Motion Blur filter with just a few mouse clicks. The runner was already cut out and set up as a separate layer.
First convert the layer with the extracted runner to a Smart Object and then click Filter → Blur → Motion Blur. A preview of the effect opens. If you enable the Preview checkbox, the result will also be applied directly to your original image.
Adjusting the intensity
Use the Distance slider to adjust the amount of motion blur. In our example, we use a value of 560.
Click OK to confirm your settings and move the layer with the effect slightly to the left. We want the motion blur to be visible behind the runner only.
Removing parts of the motion blur
To remove the excess areas, click on the small Smart Filter thumbnail in the Layers panel and paint along the areas you want to hide using a black brush.

Alternatively, you can rasterise the layer again with a click of the right mouse button and remove the excess areas using the Eraser tool. Please bear in mind that you cannot edit your blur settings afterwards.
More filter tutorials
As already mentioned, there are numerous Photoshop filters. In our article “Photoshop: Smart Objects and their benefits“, we take a closer look at The tilt-shift effect of the Blur Gallery. Read “Sharpening images using the high pass filter” to learn how to optimise the sharpness of your photos.
Credits:
Designer: media designer Christoph Ullrich.

