
Does this sound familiar: You want to enhance your photos visually and repeat the same editing steps over and over again? Fortunately, there is an easier way: Photoshop actions enable you to create, install and apply automated editing workflows. In this tutorial, we will introduce you to the functions of Photoshop actions and how to use them.
Contents of this article:
- Importing, loading and exporting actions
- Function of Photoshop actions
- Using an action to turn a summer photo into an autumn photo
- Photoshop action to download
Importing, loading and exporting Photoshop actions
To open the Actions panel, either select Window > Actions or click the small Play button in the shortcut menu. You will notice that Photoshop comes preloaded with a set of default actions. You can apply these actions directly to an open photo. New actions can also be downloaded from the internet which are either free or subject to costs such as vintage, Polaroid or HDR action filters and more. The actions you have to pay for are often more elaborate and detailed, but it is still worth trying out free alternatives which include some very helpful tools.
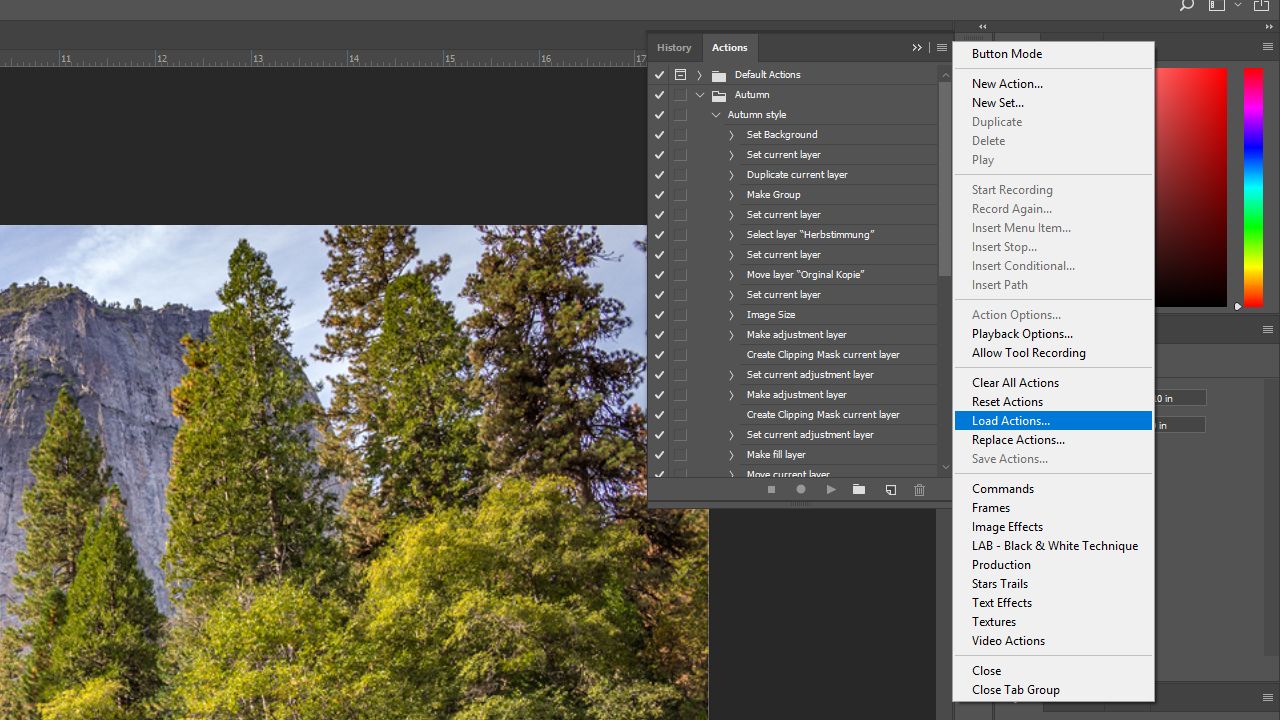
To import a new action, open the drop-down menu to the right of the Actions panel and click Load Actions. You can now search and load new actions in the next window. Photoshop actions have the extension .atn.
You can also export actions you have designed yourself to make them available to others. To do so, click your action, open the drop-down menu and select Save Actions. You can now name your .atn file and save it to the desired folder.
How to work with Photoshop actions
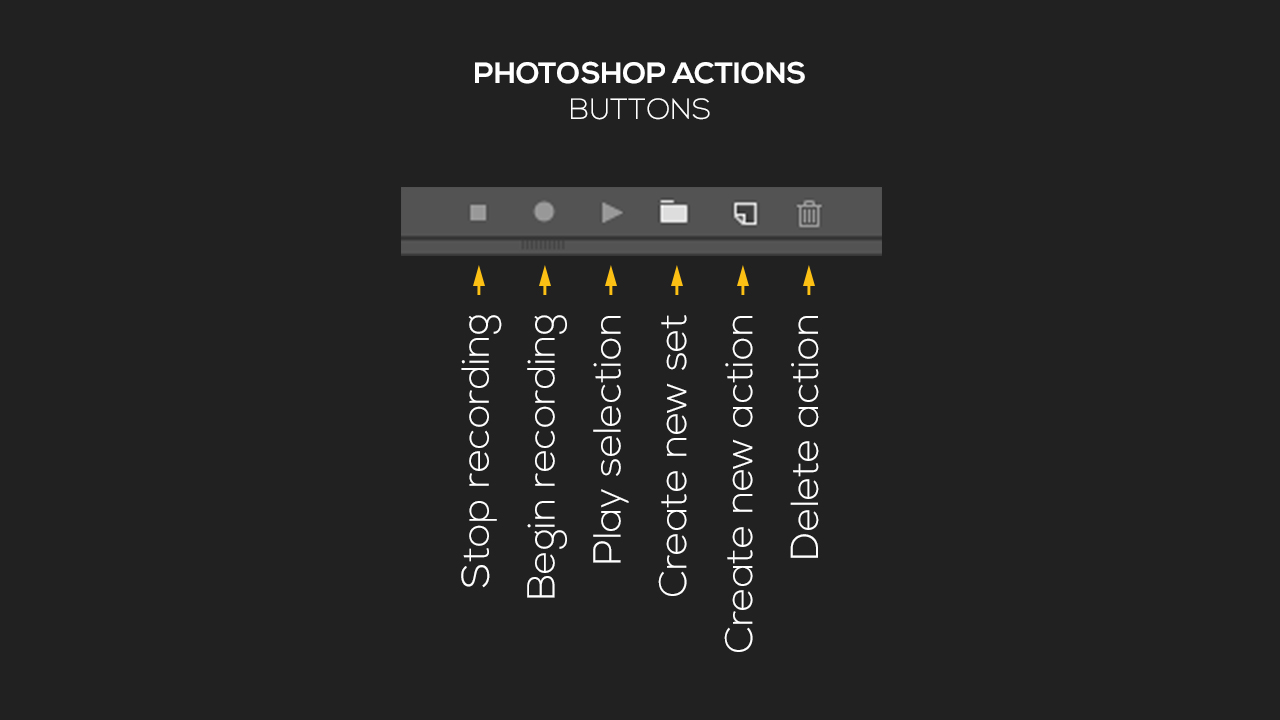
Basically, the Actions panel works as a recorder. Each editing step you perform will be added to the action during recording: changing the image size, adding a blur effect, colour correction and more. You can record, stop and replay an action using the familiar circular, square and rectangular button.
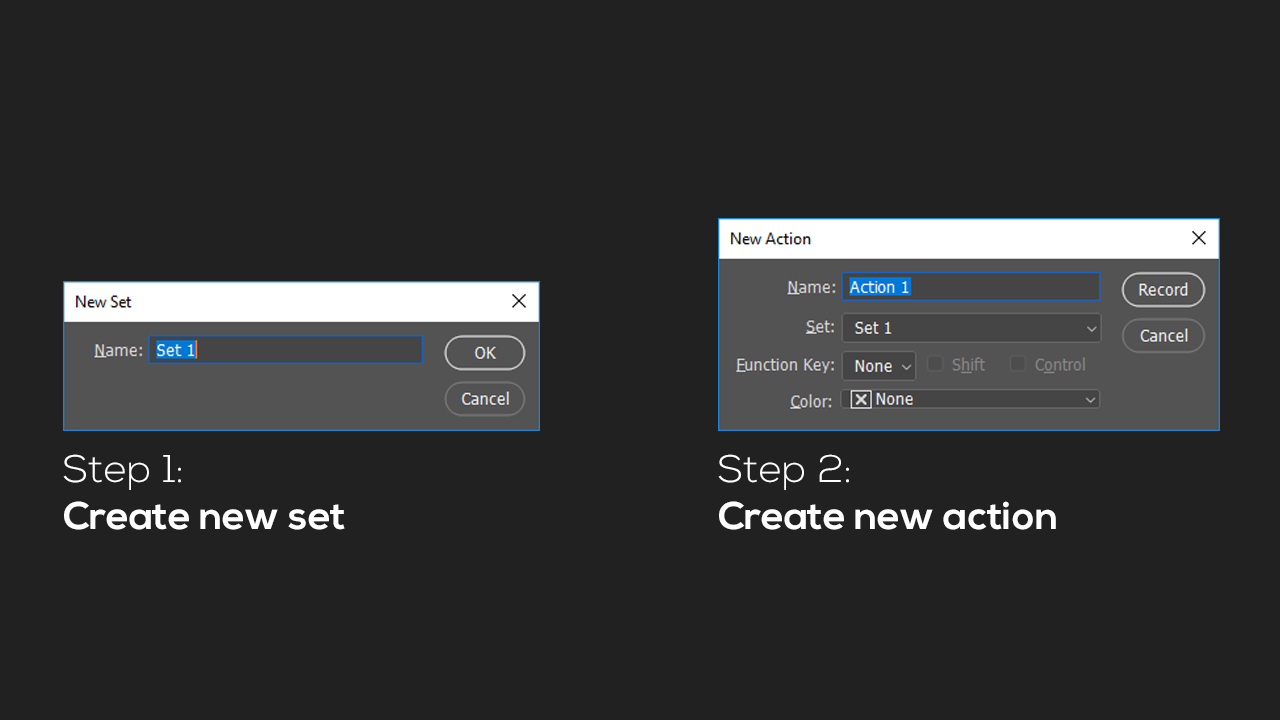
Before you get to work and start to create a new action, you should first create a new set. The action can be assigned to the action set to keep you organized and facilitate finding the action later on. Create the set folder in the Actions panel using the small folder icon (see figure above). Click the icon to open a new window in which you can custom name the set. Next, click the button directly adjacent to the set folder icon to start creating the action. In the window, you can define the name of the action, select the set in which to save the action, define a shortcut key to start recording and additionally assign a colour to the action.
Once you click the record button, recording is started (the record button turns red) and each editing step is recorded. This also applies to undo commands via the shortcut Ctrl + Z.
Tip:
It always makes sense to retain a copy of the original photo until you have finished editing. Start the action recording for this purpose and duplicate the original image. Move the duplicated layer to a new folder named after the action. Now make all modifications to the image at the duplicated layer. This way you keep a backup copy and are able to undo all steps with a simple mouse click if necessary.
Turning a summer photo into an autumn photo using a Photoshop action
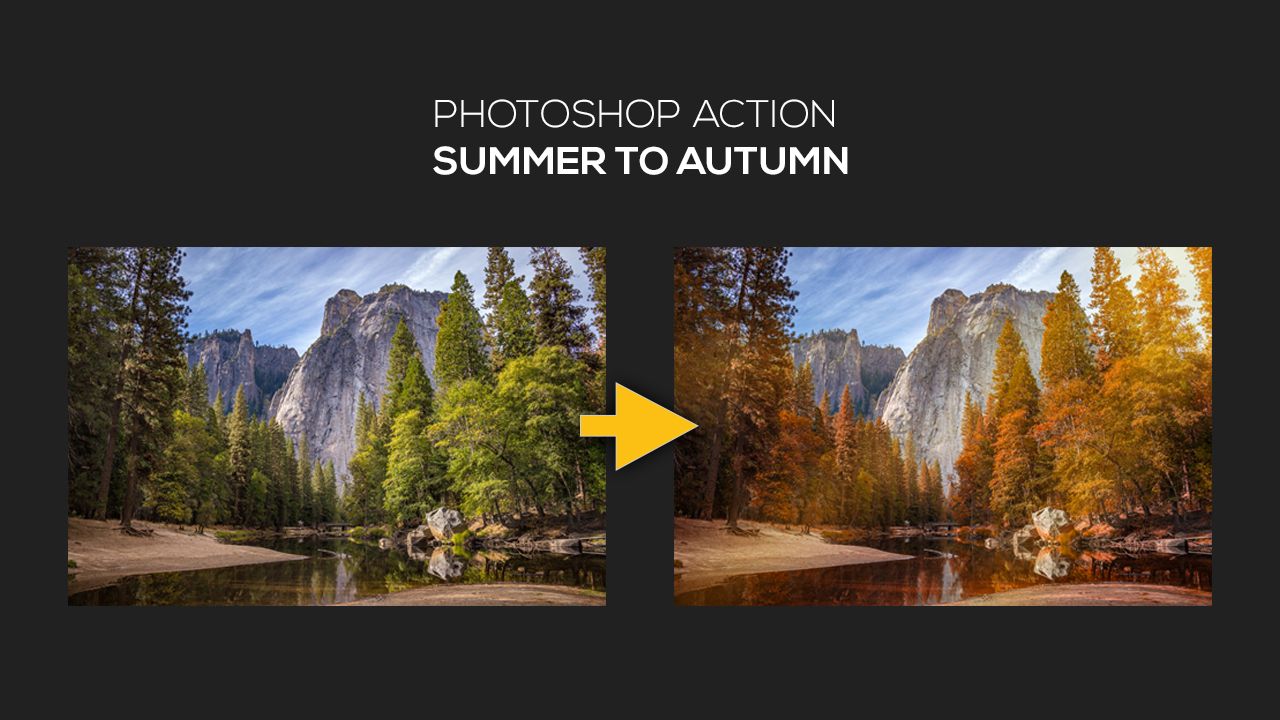
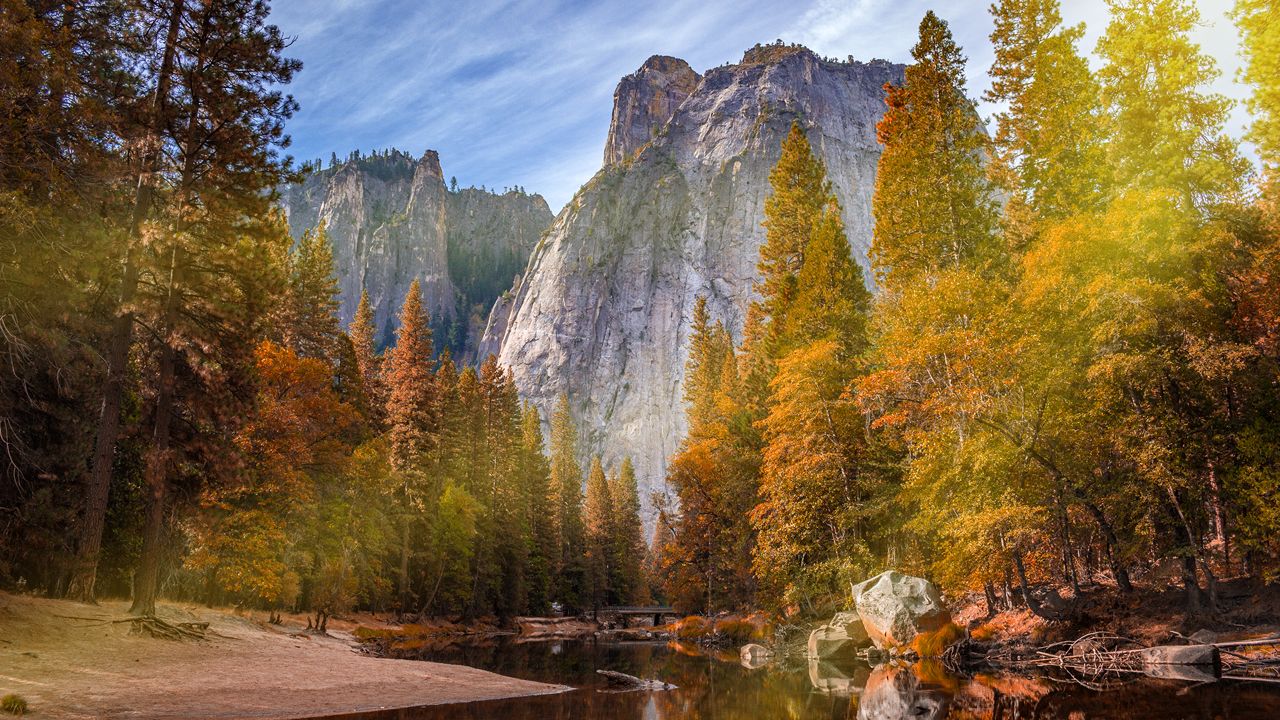
In our example, we want to use an action to turn the above picture of a summer landscape into an autumn mood photo. Using a Photoshop action for this purpose has the advantage that you can add the autumn mood to photos of the same subject taken from a slightly different perspective with a simple mouse click.
First create a new set named ‘autumn’. Next create a new action named ‘autumn mood’ and start the record. Also follow our tip and duplicate the original image. Now apply the Hue/Saturation command to your photo. Choose ‘Yellow’ to be edited and move the first colour slider to the left by 26 % and the saturation slider by 22 % to the right.
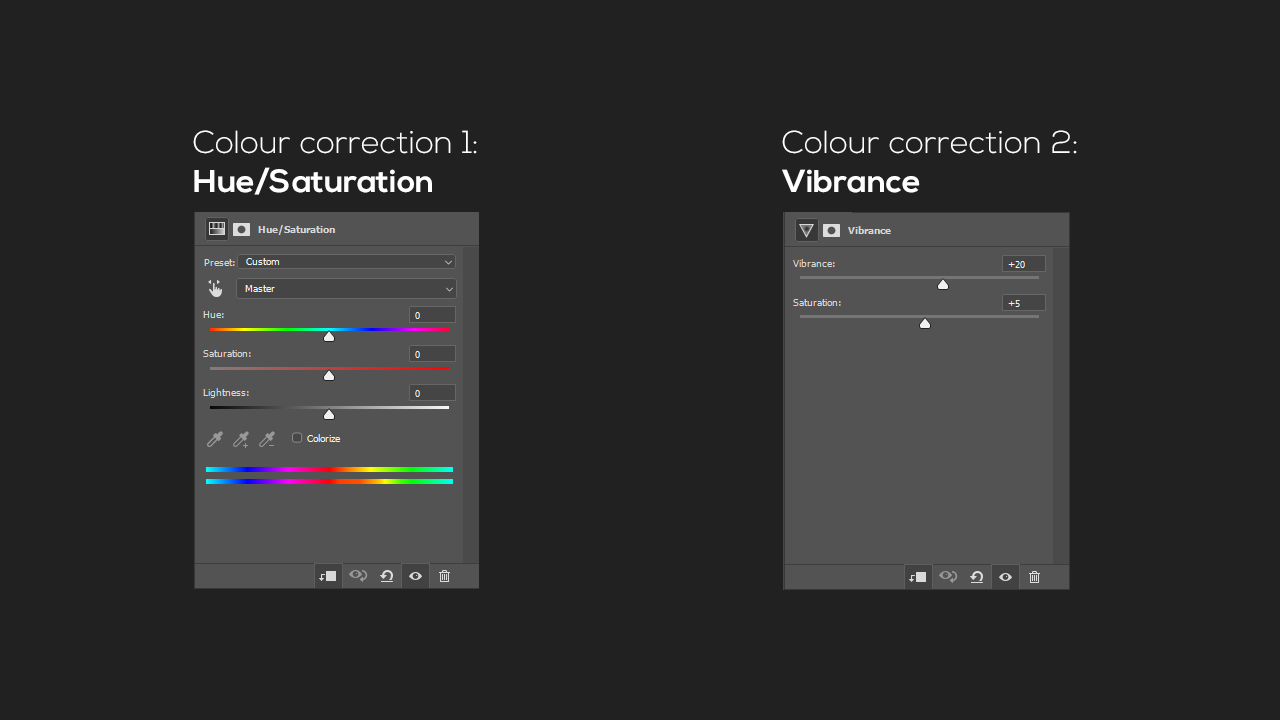
The difference between Before and After is already clearly visible. Additionally, you can add the ‘Vibrance’ colour correction option to define the individual colours of the whole picture a bit more accurately. Move the Vibrance slider to the right by 20 % and the Saturation slider to the right by 5 %. The resulting image should be a nice autumn mood photo.
The actions not only allow colour corrections, they also enable you to add new effects and elements. In our example, we will now add an artificial light source to our autumn photo.
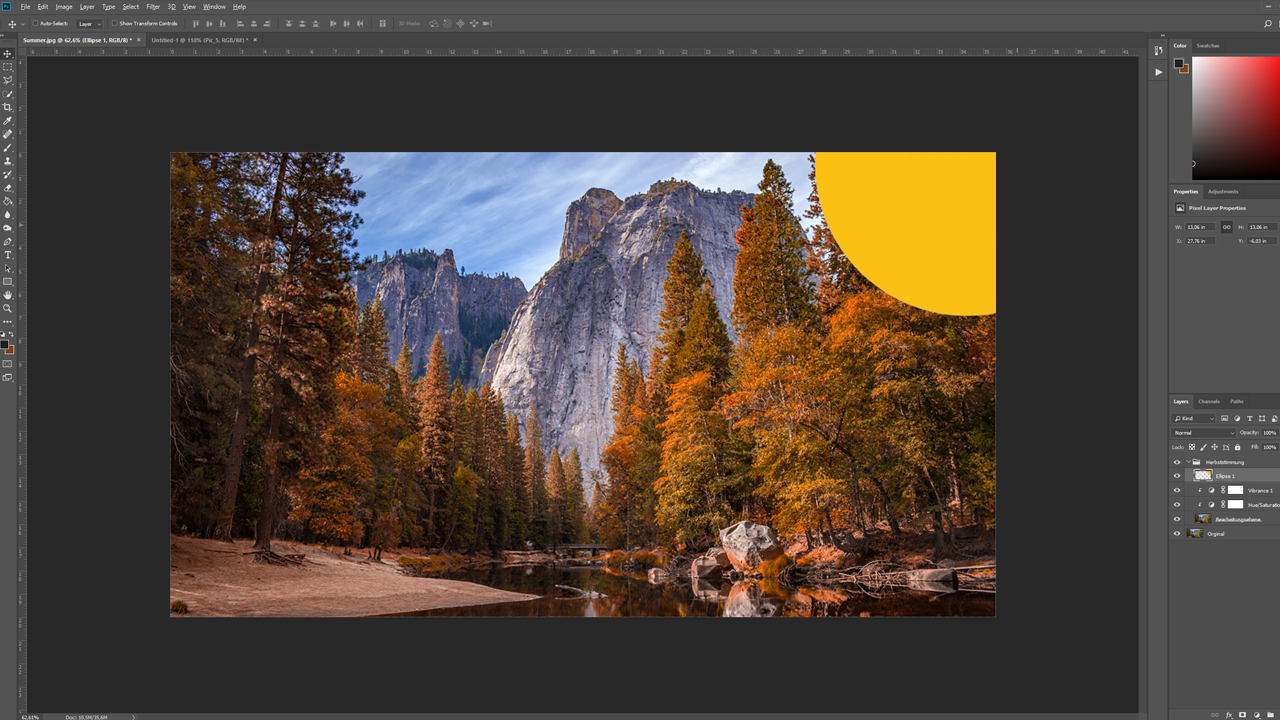
Drag out a new oval in the upper right part of the photo. Rasterize the new layer and apply the Gaussian Blur to the oval. Subsequently set the blending mode to Linear dodge (Add). If you find the effect too strong, reduce the opacity to 70 %. You can add further sun rays using the same method. To do so, drag out a few long and narrow rectangles and repeat the same steps as for the oval. Your autumn picture is finished and you can stop action recording by clicking the stop button.
Your action can be automatically applied to one or more files. To test this, open a new photo or reset the photo to its original state. Click the action and then the replay button to have all steps applied to the photo in an automated workflow.
Credits:
By media designer Christoph Ullrich.
The pictures in the example are from the free pexels image database.

