
Cutting out hair in Photoshop can be very tiresome and time-consuming and which method to choose depends on the subject, the resolution and colour contrasts. In this tutorial, we will show you a clean and efficient method of masking out hair in Photoshop using the colour channel. We will also illustrate which criteria a photo should meet to prevent you from investing a great deal of time and effort into editing it only to find that cutting out is not worth it.
If you want to cut out hair, there are some methods that deliver a clean and natural result. Basically, any image and hence any type of hair can be cut out. When weighing the different cut-out options, you should consider how much time and effort each requires and which method is the best for the given photo. We will analyse the following example to illustrate which prerequisites an image should met to cut out hair efficiently from the background.
Image criteria that support efficient cutting out

Photo characteristics:
- Dimensions of the original photo: 2000 x 2100 px
- Resolution: 300 dpi
- Relatively dark background
- Strong focus on the model and hence very blurred background
Assessment:
The strong focus on the model and the high resolution suggest that a proper cut-out result can be achieved for this photo. But the person has relatively dark hair and the wooden gate in the background is also very dark. Therefore, creating sufficient contrast between the hair and the background to properly cut out the hair is a complex and time-consuming task with this subject.
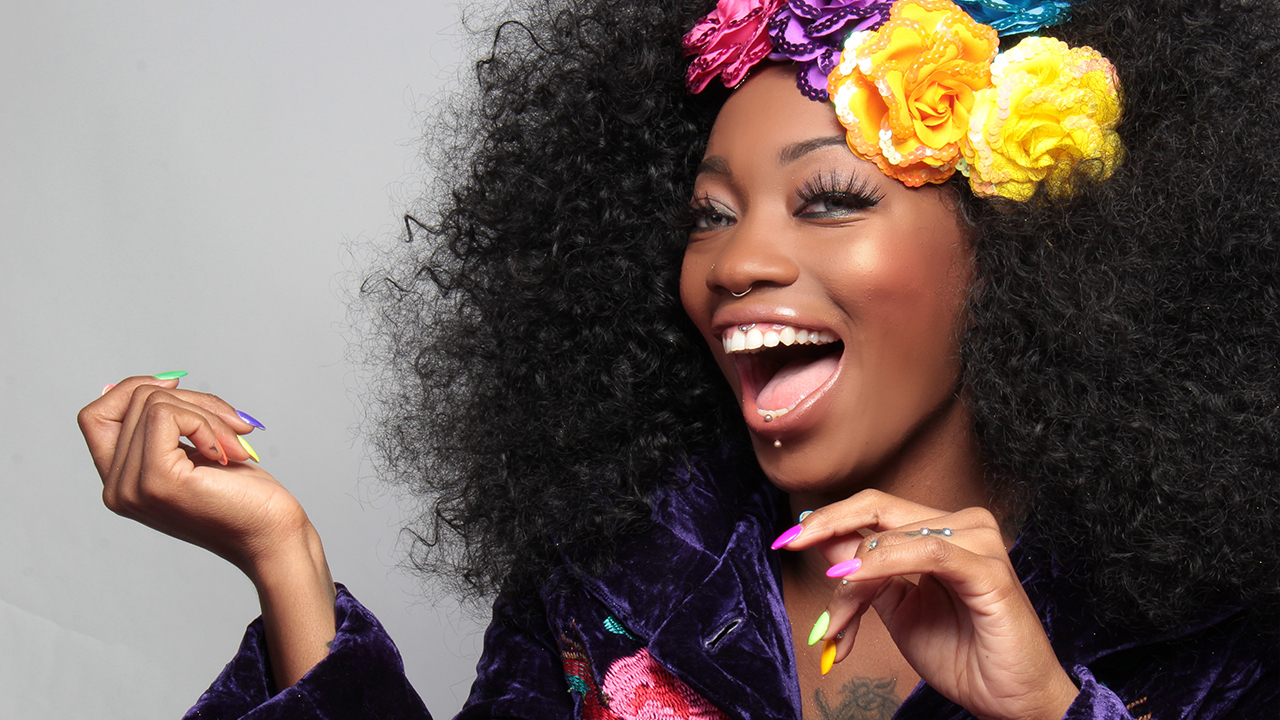
Photo characteristics:
- Dimensions of the original photo: 4600 x 3400 px
- Resolution: 300 dpi
- High contrast between foreground and background
- A lot of single hairs are visible
Assessment:
You immediately see that there is a good contrast between the person and the background in this photo. The resolution would also be ideal for cutting out the hair. The problem with this subject is that a lot of single hairs are visible and Photoshop is not able to recognize and cut out each one of them. Therefore, masking would be feasible within a reasonable time frame at the cost of losing a lot of individual hairs.

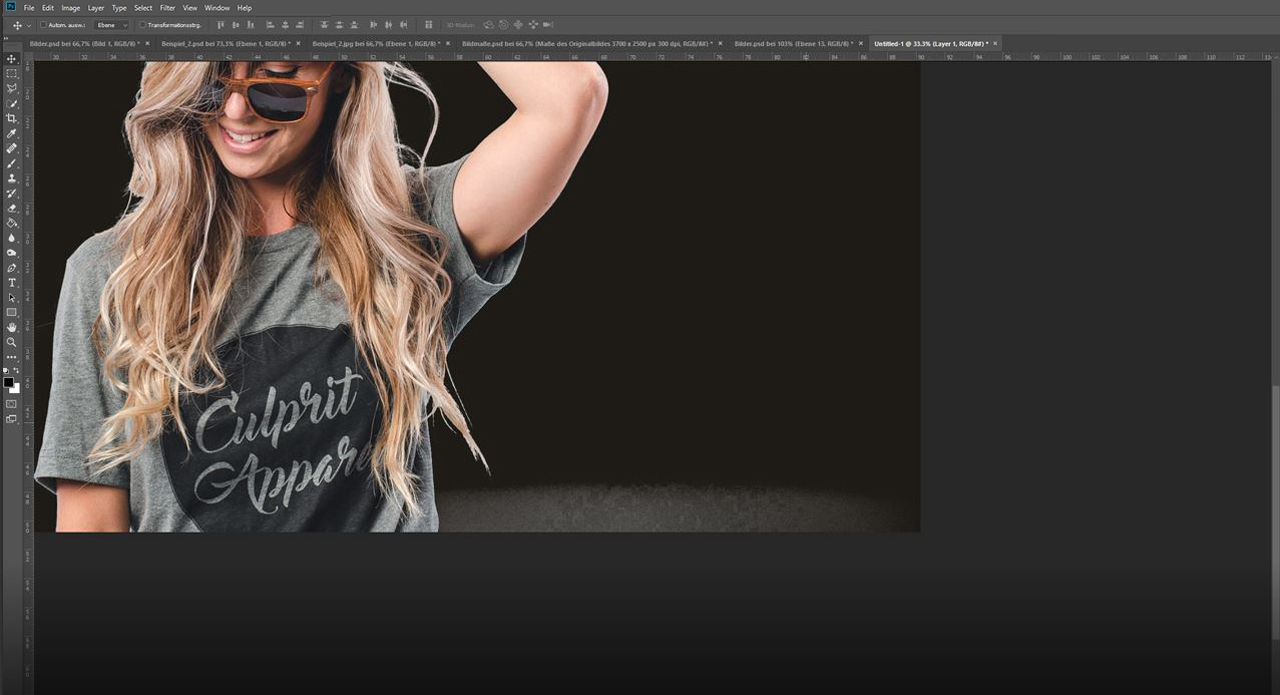
Characteristics:
- Dimensions of the original photo: 3700 x 2500 px
- Resolution: 300 dpi
- Calm simple background
- High contrast between foreground and background
Assessment:
The contrast between the person and the background is sufficient for a successful cut out result. The resolution is also adequate and neither foreground nor background are blurred in any way. Moreover, there aren’t a lot of single hairs which makes the subject ideal for masking the hair.
A photo should meet the following criteria to cut out hair as cleanly and efficiently as possible:
- High resolution
- Sharp contrast between subject to be cut out and background
- The element to be masked has good colour contrast to the background
- Not too many single hairs are visible
Remember: It is impossible to preserve every single hair in the cut out process.
Cutting out hair using the colour channel in Photoshop
Step 1: Choose the colour channel with the highest contrast

This subject already comes with sufficient contrast and therefore provides the best preconditions for cutting out the hair. To enable Photoshop to recognize single hairs, you have to increase the contrast as much as possible. A black and white photo has optimal contrast. So everything that should be visible as a selection edge in Photoshop must be coloured black and everything you want to cut out white.
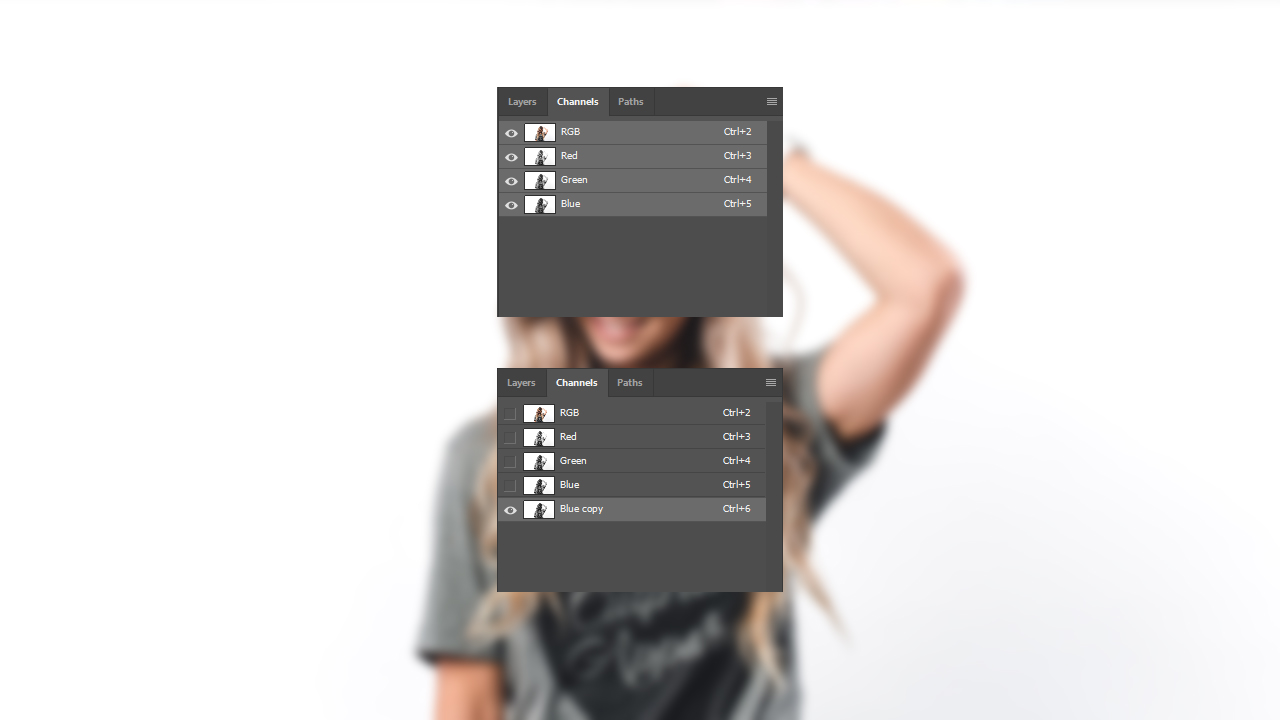
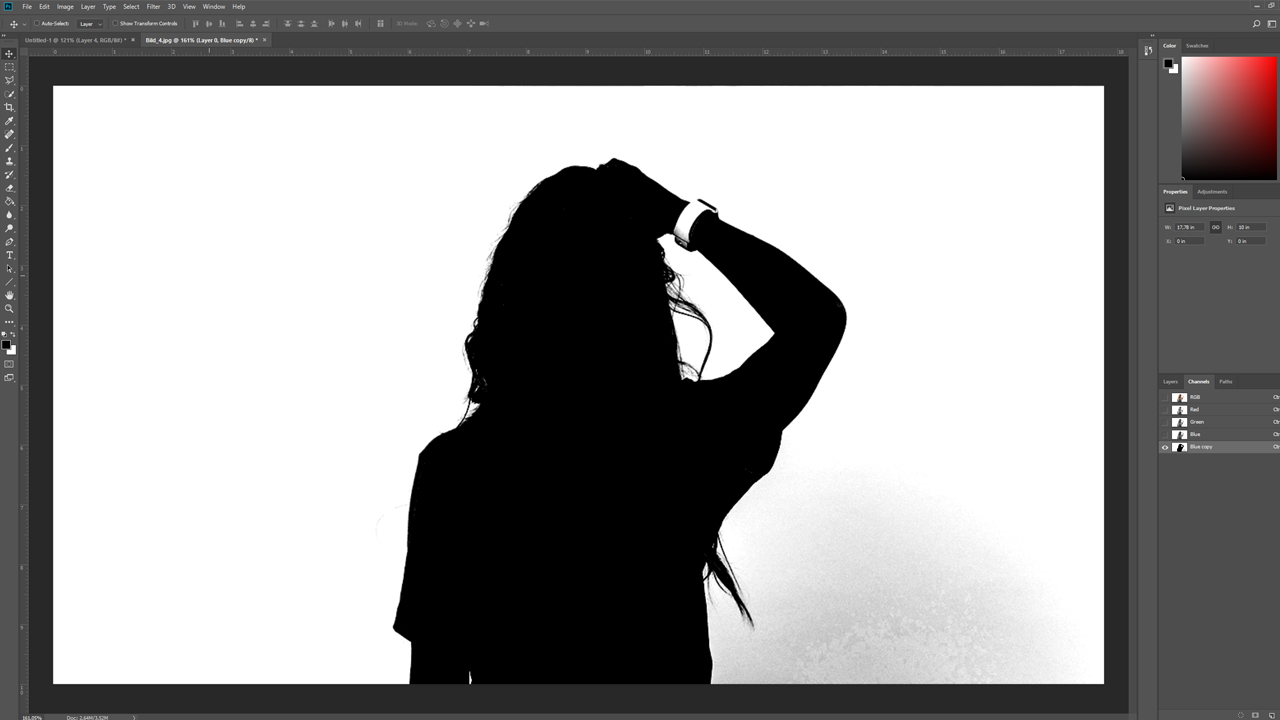
To obtain this result, first go to the Channels panel next to Layers. Depending on the colour mode of your photo, this panel shows the individual colours your photo is composed of. In the example, the image is in RGB mode and you see a red, a green and a blue colour channel. Click through the individual colour channels and pick the channel with the best contrast between subject and background. This is usually the Blue channel. Click this channel, hold the left mouse button down and drag it on the Duplicate Layers icon in the lower right corner to create a copy of the colour channel.
A copy of the channel is necessary because you don’t want to work directly in the blue colour channel and change the original photo. This is impossible with a copied colour channel since the original photo is still composed of the other colour channels red, green and blue.
Step 2: Use the Levels adjustment to correct the tonal range and the contrast
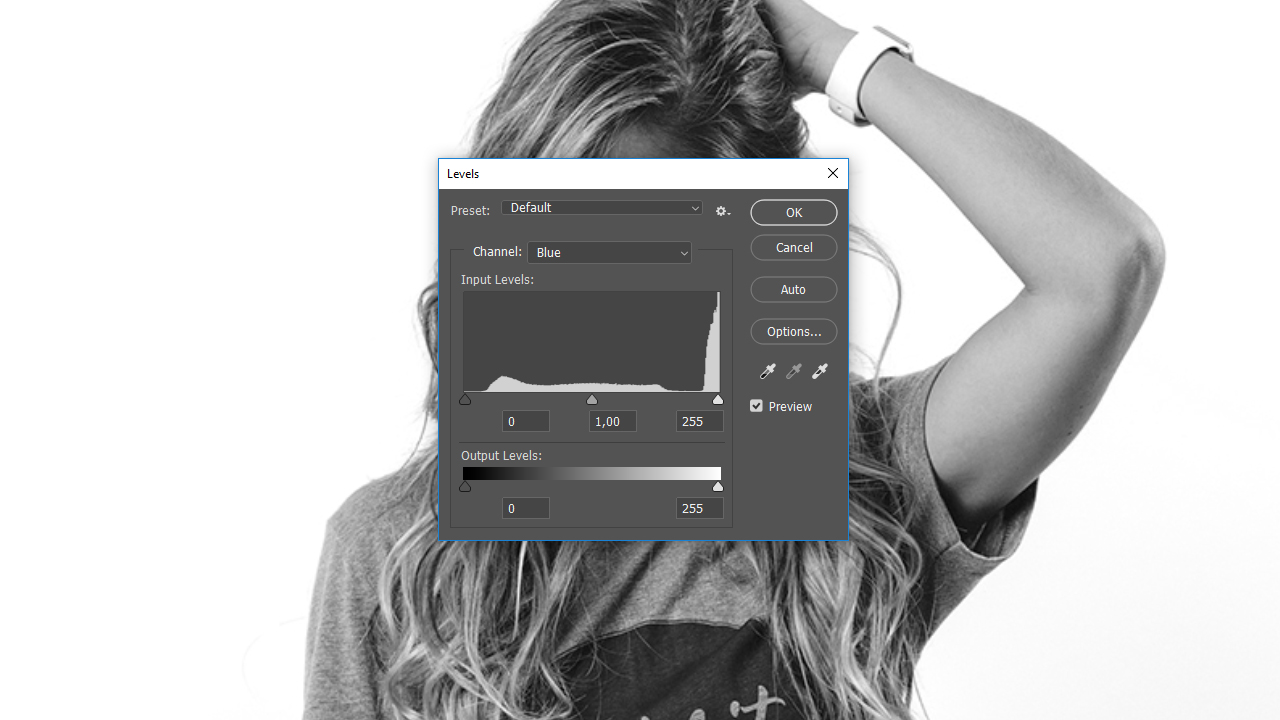
To further increase the contrast, click Image > Adjustments > Levels. A window opens in which you can set the triangular black and white sliders to adjust the shadows (dark image areas) and the highlights (light image areas). Move the left slider to the right until the element you want to cut out is as black as possible. Take for example a curl as orientation in your subject and drag the slider so far to the right that the curl is completely black but the gaps between the hairs are not blurred.
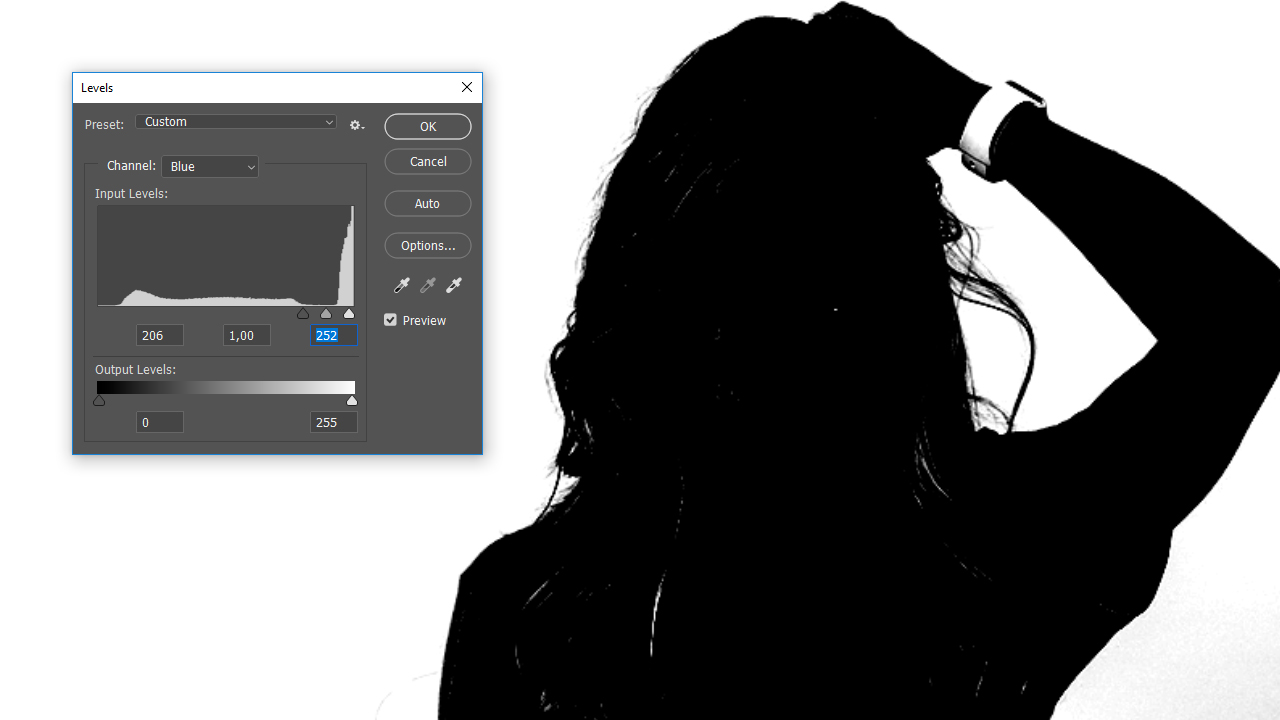
Use the Levels window to brighten up the background until it is completely white using the right slider. Make sure that your orientation point is preserved as best as possible.
Step 3: Correcting white areas and creating the selection
Next choose the Brush Tool. Set the foreground colour to black and paint over all remaining white areas of your subject with the mouse. Now the subject should be completely black and the background you want to clip as white as possible. Now click on the copied colour channel you are working in to create a selection holding the Ctrl key pressed. This is the moment when Photoshop recognizes the edges and outlines of the subject.
Step 4: Create a layer mask
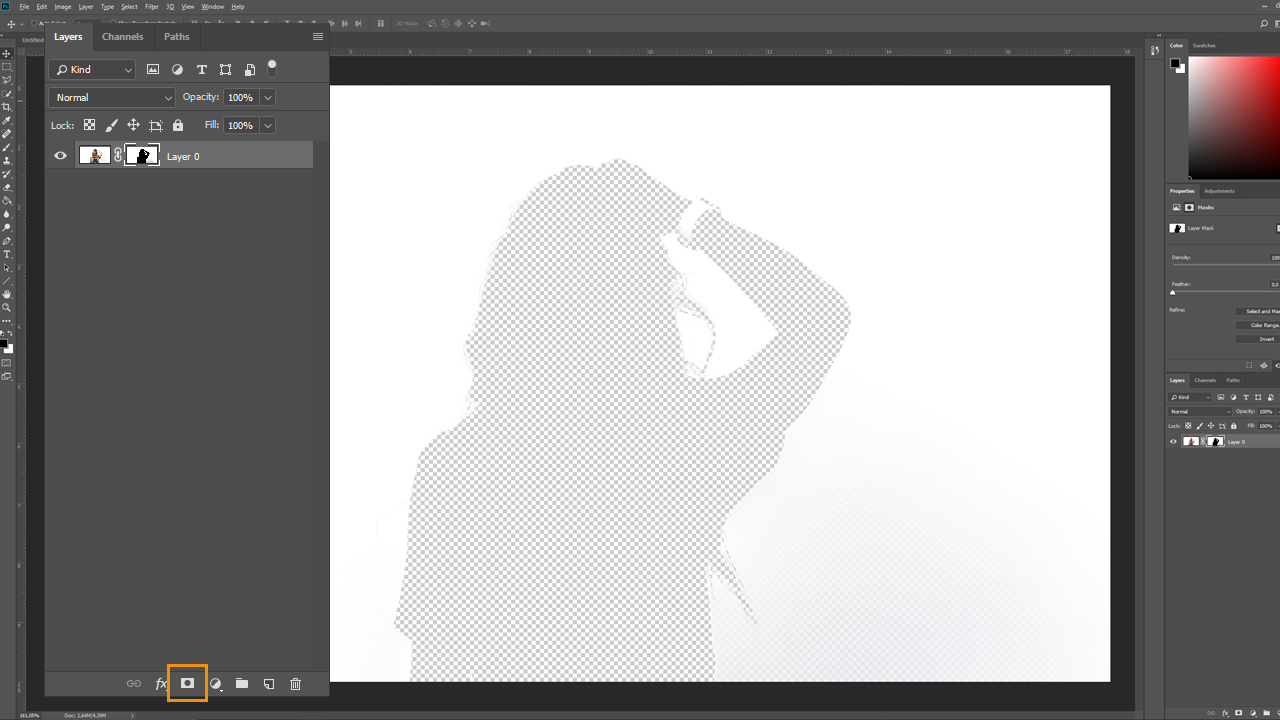
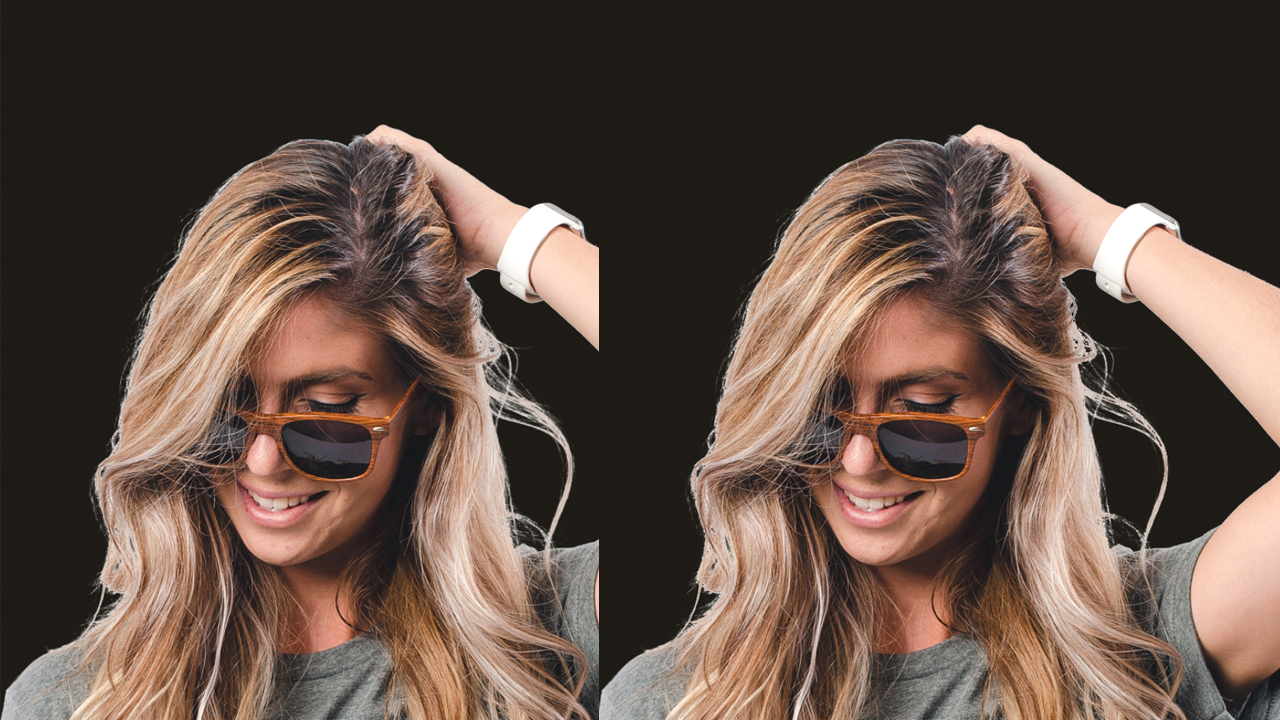
Now from the Channels panel return to the Layers panel and click on the lower right Create layer mask icon. You now see the exact opposite of the desired result. This is because Photoshop hides all black areas and shows all white areas once the layer mask is applied. You can revert this layer mask using the shortcut Ctrl + I. You now see your subject without or against a transparent background.
Step 5: Add a new layer and fill with colour
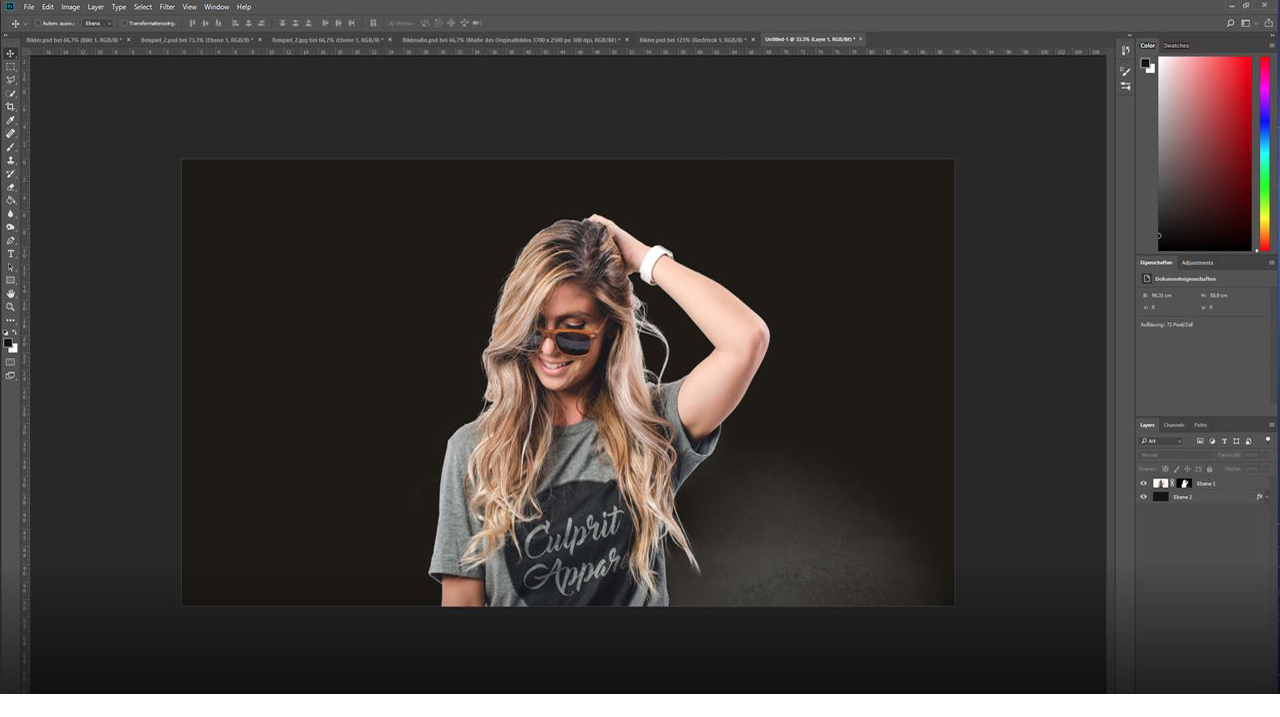
To check the cut out result, create a new layer and fill it in any colour using the Fill Tool. In this example, we recommend a dark colour such as a dark brown. Make sure that the new layer is below the layer with the cut out subject in the layer view so that it is not superimposed by the new layer.
Step 6: Correct cut out areas
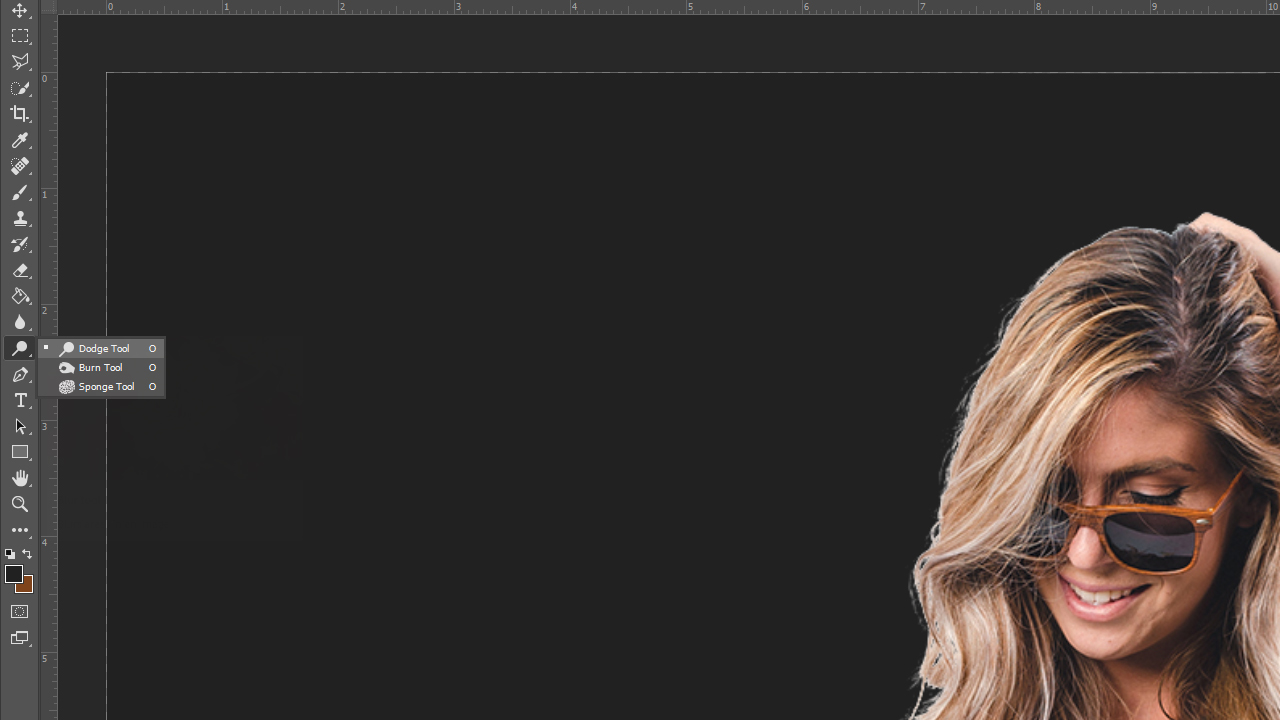
In the example, you can see that there are still white areas of the former background visible. Two other Photoshop tools enable you to adjust these areas in your image, the Dodge tool and the Burn tool in the left toolbar. The Burn tool enables you to further darken areas which are already dark and the Dodge tool to brighten up existing light areas. Both tools additionally allow changing the shadows, midtones or highlights of an image area. This selection is available in the top menu at Range for both tools.
In the example, we are going to remove only the light area in the lower right part of the image. To do so, the area must be darkened using the Burn tool. The right area is darker than the cut out person. Therefore, you have to set the Burn tool to Shadows in the top menu. Now hold the left mouse button down and paint over this area to remove the remaining background.
Finally, you can make further adjustments to the hair you have cut out. In the example, we see a slight grey haze that needs to be darkened as well. Again, we use the Burn tool for this purpose. Set the area to be edited to Midtones. Move the mouse over the clipped hair until the haze has disappeared. Make sure to work carefully. If you move repeatedly over the same area, it can become grainy and you may inadvertently remove hair as well.
Bear in mind that each image needs custom settings and adjustments to cut out the hair. The steps shown above have to be fine-tuned to the respective image until you obtain a satisfactory result.
Credits:
By media designer Christoph Ullrich.

